Watch it draw itself · tap to replay
How to Draw an Accordion
Draw an accordion in 13 easy steps, about 10 minutes. Free, with a printable worksheet.
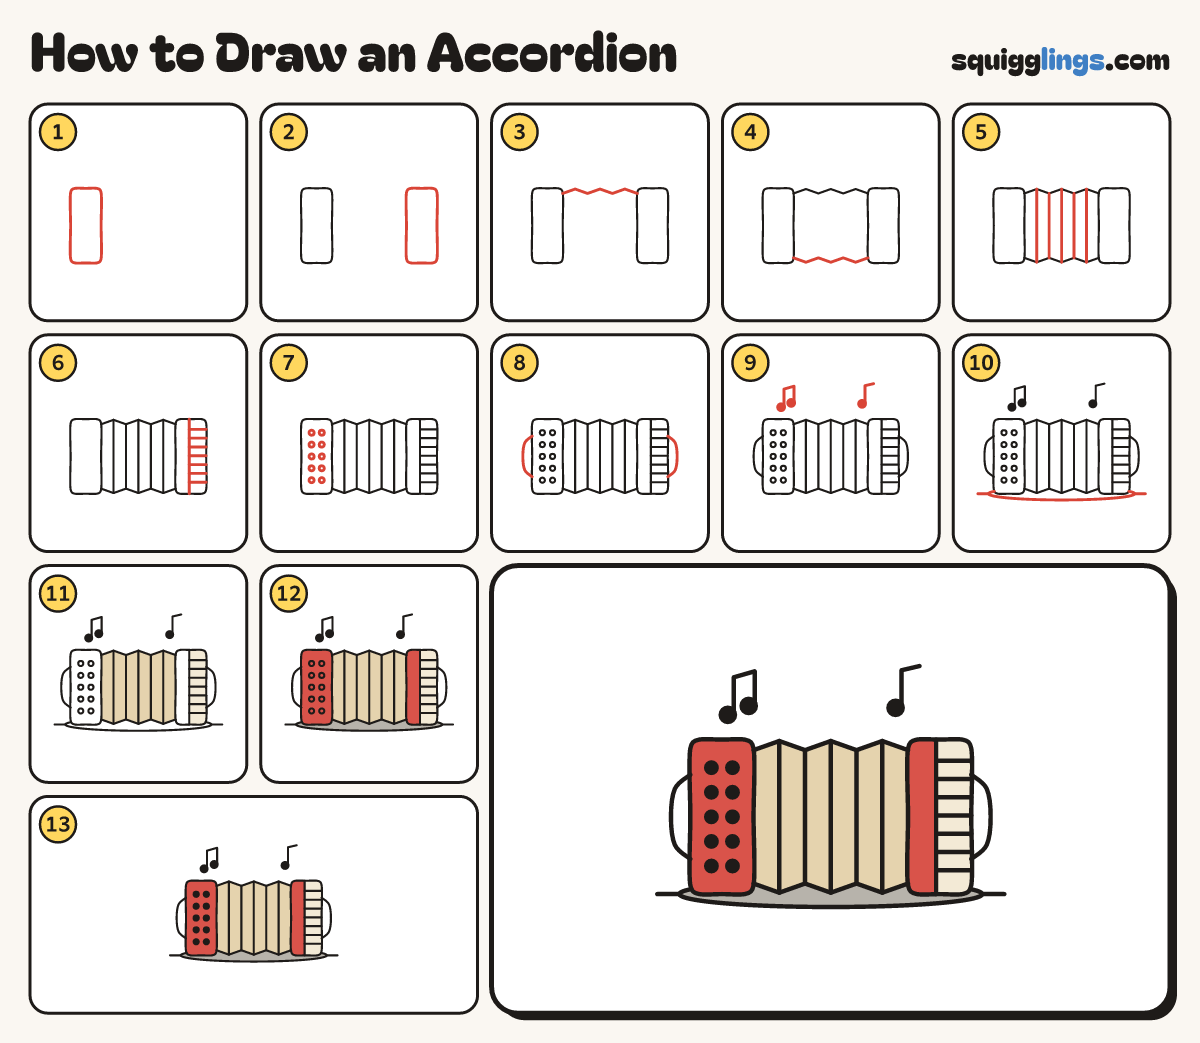
Each picture adds one red line. Draw that line, then scroll to the next picture. Rub out any dashed helper lines at the end. First up: the left box.
Step 1: The left box
On the left of your paper draw a tall rectangle with rounded corners, twice as tall as it is wide.
Step 2: The right box
On the right draw another tall rounded rectangle the same height, leaving a wide gap between the 2.
Step 3: Bellows top
Start on the left box's top corner. Zigzag 6 folds across the gap, stop on the right box's top corner.
Step 4: Bellows bottom
Same along the bottom: start on the left box, zigzag 6 folds pointing down, stop on the right box.
Step 5: Fold lines
Start at each top point. Draw a straight line down to the bottom point below it, 5 lines in all.
Step 6: Piano keys
On the right box draw a line down near its left edge, then 7 lines across to the right edge.
Step 7: Buttons
On the left box draw 2 columns of 5 small round buttons.
Step 8: The straps
Outside each box draw a C strap, starting and stopping on the box.
Step 9: Music notes
Above the accordion draw a double note on the left, a single one on the right. Fill in the heads.
Step 10: Table and shadow
Draw a flat oval shadow round the bottom of the accordion. Add a table line out from each side.
Step 11: Cream keys, sand bellows
Go over your lines, then colour the key strip cream and the bellows sand.
Step 12: Grey shadow, red boxes
Colour the shadow grey. Colour both boxes red, around the buttons and the keys.
Step 13: Black buttons
Colour the buttons black. Your accordion is done!
Your finished drawing
Follow the steps above and this is where you end up: an accordion, drawn by you.
Every step in one picture