Watch it draw itself · tap to replay
How to Draw a Winch
Draw a winch in 12 easy steps, about 9 minutes. Free, with a printable worksheet.
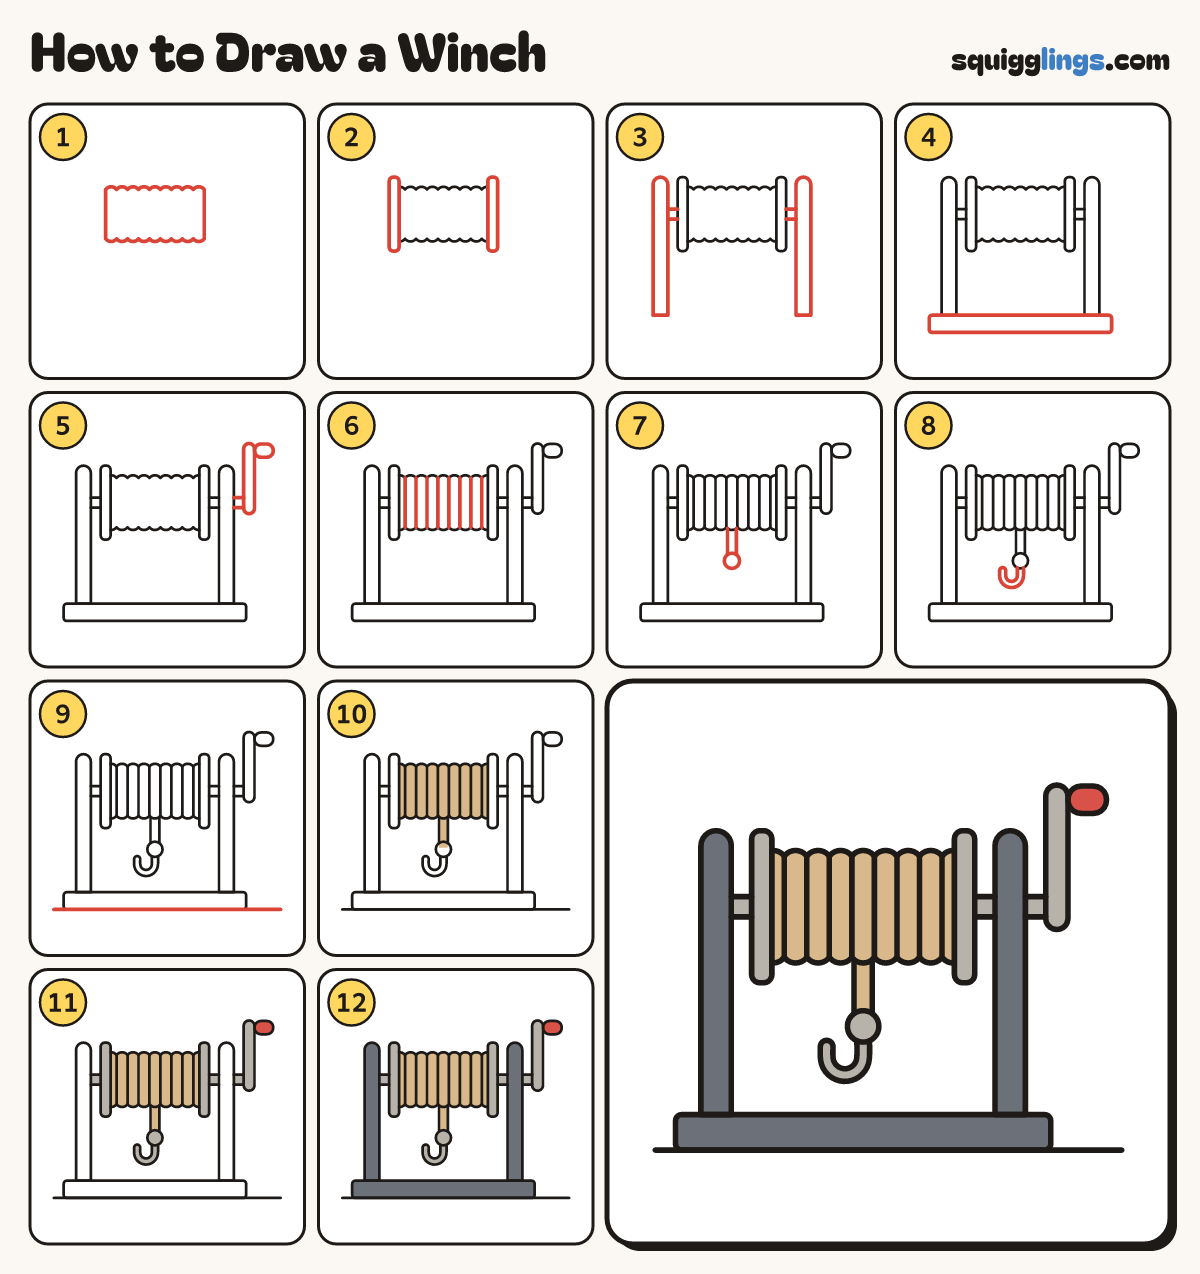
Each picture adds one red line. Draw that line, then scroll to the next picture. Rub out any dashed helper lines at the end. First up: the rope drum.
Step 1: The rope drum
In the upper middle draw a long box on its side, with 9 small bumps along the top and bottom.
Tip A winch winds a rope round a drum to pull or lift heavy things.
Step 2: Two end plates
Over each end of the drum draw a tall thin plate with round corners, taller than the drum.
Step 3: Two posts
Draw a short axle out from each plate. Stand a tall round-topped post at the end of each axle.
Tip Make both posts the same height.
Step 4: The base
Under the 2 posts draw a long flat base that sticks out a little past each post.
Step 5: The crank
Start at the right post and draw a short axle. Stop at a tall arm with a handle on top.
Tip Turn the handle and the drum winds the rope in.
Step 6: Rope coils
Draw 8 straight lines down the drum, from the dips along the top to the dips along the bottom.
Step 7: The hanging rope
From under the middle of the drum draw 2 lines straight down. Add a round ball at the end.
Step 8: The hook
Under the ball draw a thick hook shaped like a J, curling round to the left and up.
Step 9: The ground
Draw a long ground line along the bottom of the base, from left to right.
Step 10: Light brown rope
Colour the rope on the drum and the hanging rope light brown.
Step 11: Grey metal, red handle
Colour the plates, axles, crank arm, ball and hook grey. Colour the handle red.
Step 12: Dark posts and base
Go over your lines, then colour the 2 posts and the base dark grey. Your winch is ready!
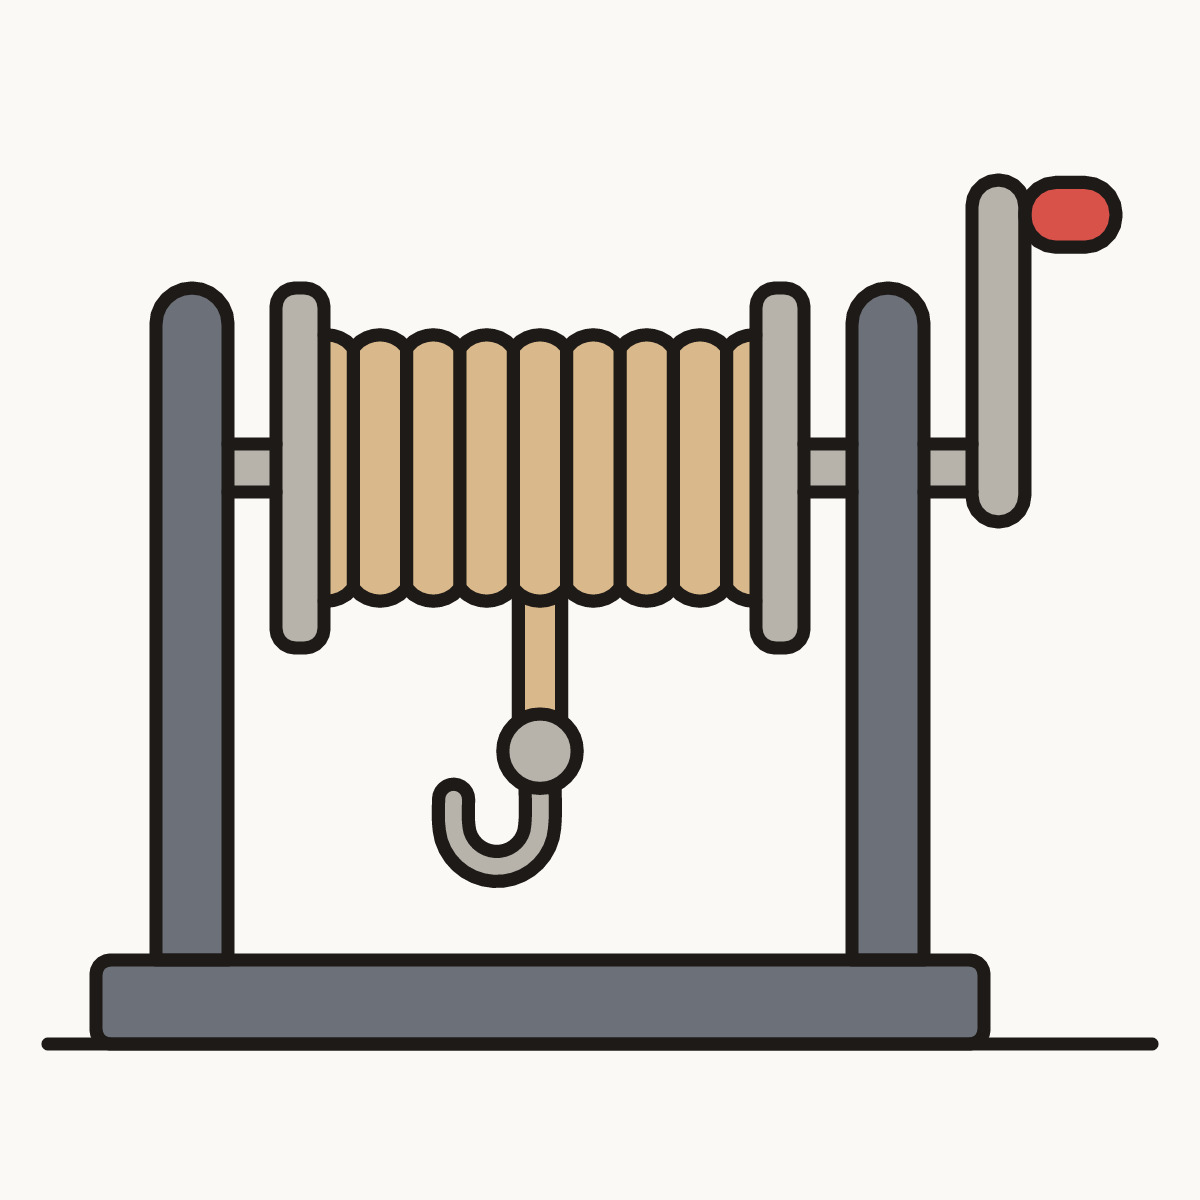
Your finished drawing
Follow the steps above and this is where you end up: a winch, drawn by you.
Every step in one picture