Watch it draw itself · tap to replay
How to Draw a Will-o’-the-Wisp
Draw a will-o’-the-wisp in 12 easy steps, about 9 minutes. Free, with a printable worksheet.
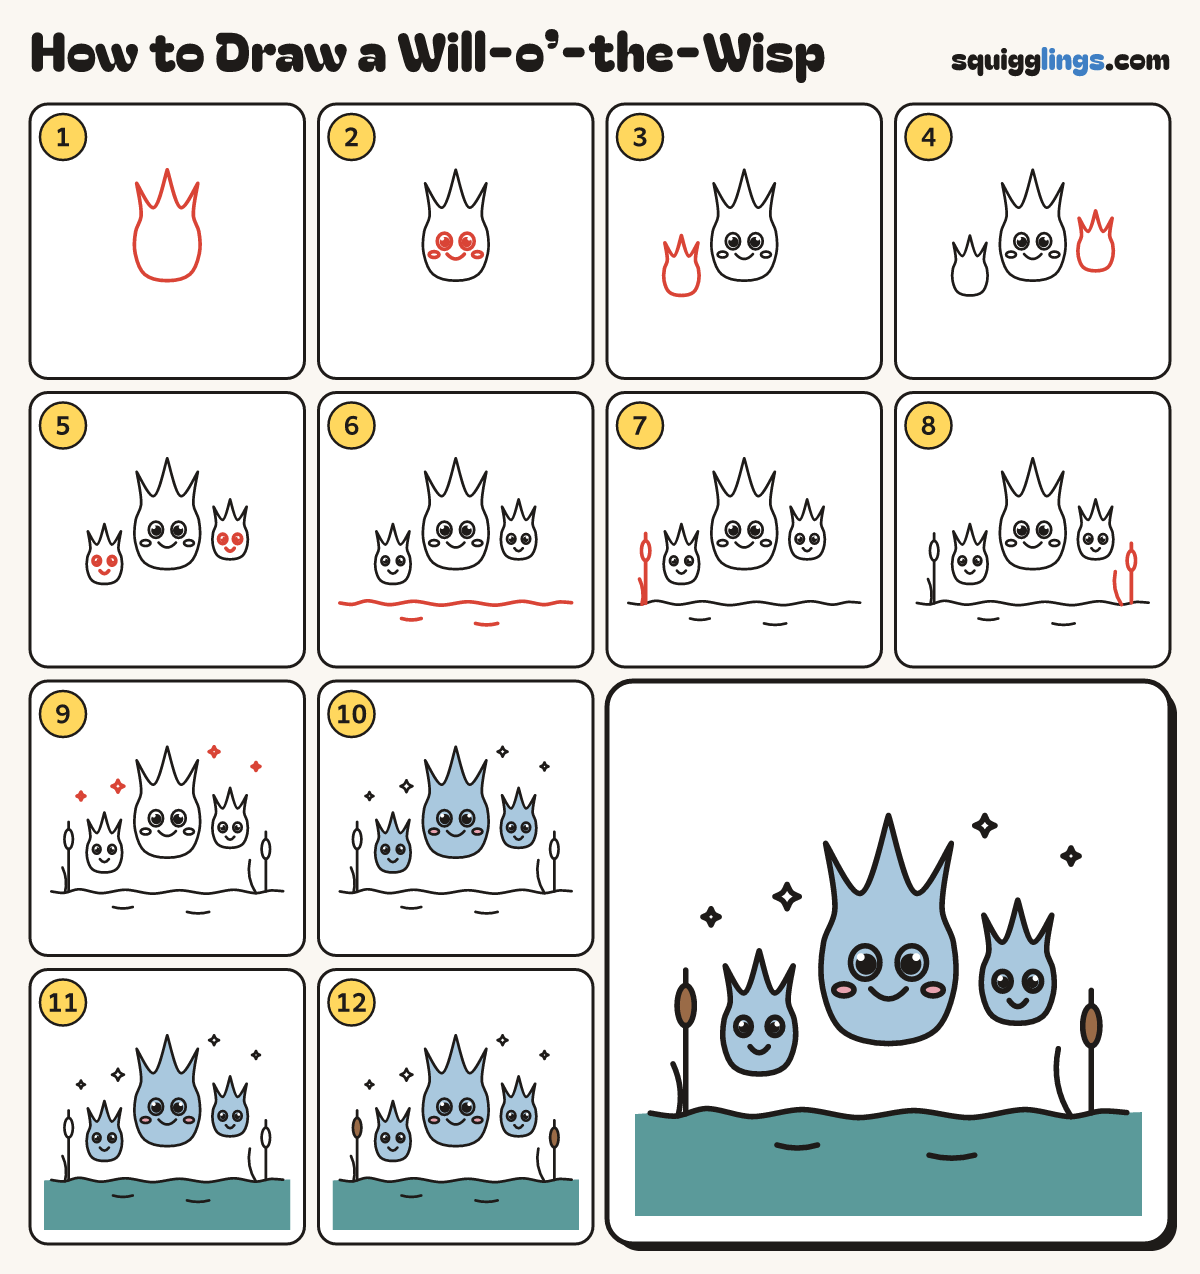
Each picture adds one red line. Draw that line, then scroll to the next picture. Rub out any dashed helper lines at the end. First up: the big wisp.
Step 1: The big wisp
In the middle draw a tall flame: a round bottom, wavy sides and 3 tongues, the middle one tallest.
Tip A will-o-wisp is a friendly floating flame. Leave space below for the swamp.
Step 2: Its face
In the lower half draw 2 tall eyes with dots and shines, a small U smile and 2 oval cheeks.
Step 3: Small wisp, left
Lower down on the left draw a smaller flame the same way, standing straight up.
Tip Its bottom sits a touch lower than the big one's.
Step 4: Small wisp, right
On the right, a little higher, draw another small flame the same way, standing straight up.
Step 5: Two more faces
Give each small flame a face: 2 oval eyes with dots and shines, and a little smile under them.
Step 6: The swamp water
Draw a wavy water line from the paper's left edge across to the right edge. Add 2 small ripples.
Tip The wisps float above the water, never touching it.
Step 7: Left cattail
On the left draw a stalk from the water up to a sausage top and spike. Add a bendy reed.
Step 8: Right cattail
On the right draw another cattail from the water up to its sausage top. Add a bendy reed.
Step 9: Sparkles
Draw 4 tiny 4-point sparkles in the air around the flames.
Step 10: Pink cheeks, blue flames
Colour the cheeks pink, then all 3 flames sky blue around the cheeks. Leave the eyes white.
Step 11: Teal water
Colour the water teal.
Step 12: Brown cattails
Colour the cattail tops brown. Go over your lines, and your will-o-wisps are done!
Your finished drawing
Follow the steps above and this is where you end up: a will-o’-the-wisp, drawn by you.
Every step in one picture