Watch it draw itself · tap to replay
How to Draw a Trampoline
Draw a trampoline in 12 easy steps, about 9 minutes. Free, with a printable worksheet.
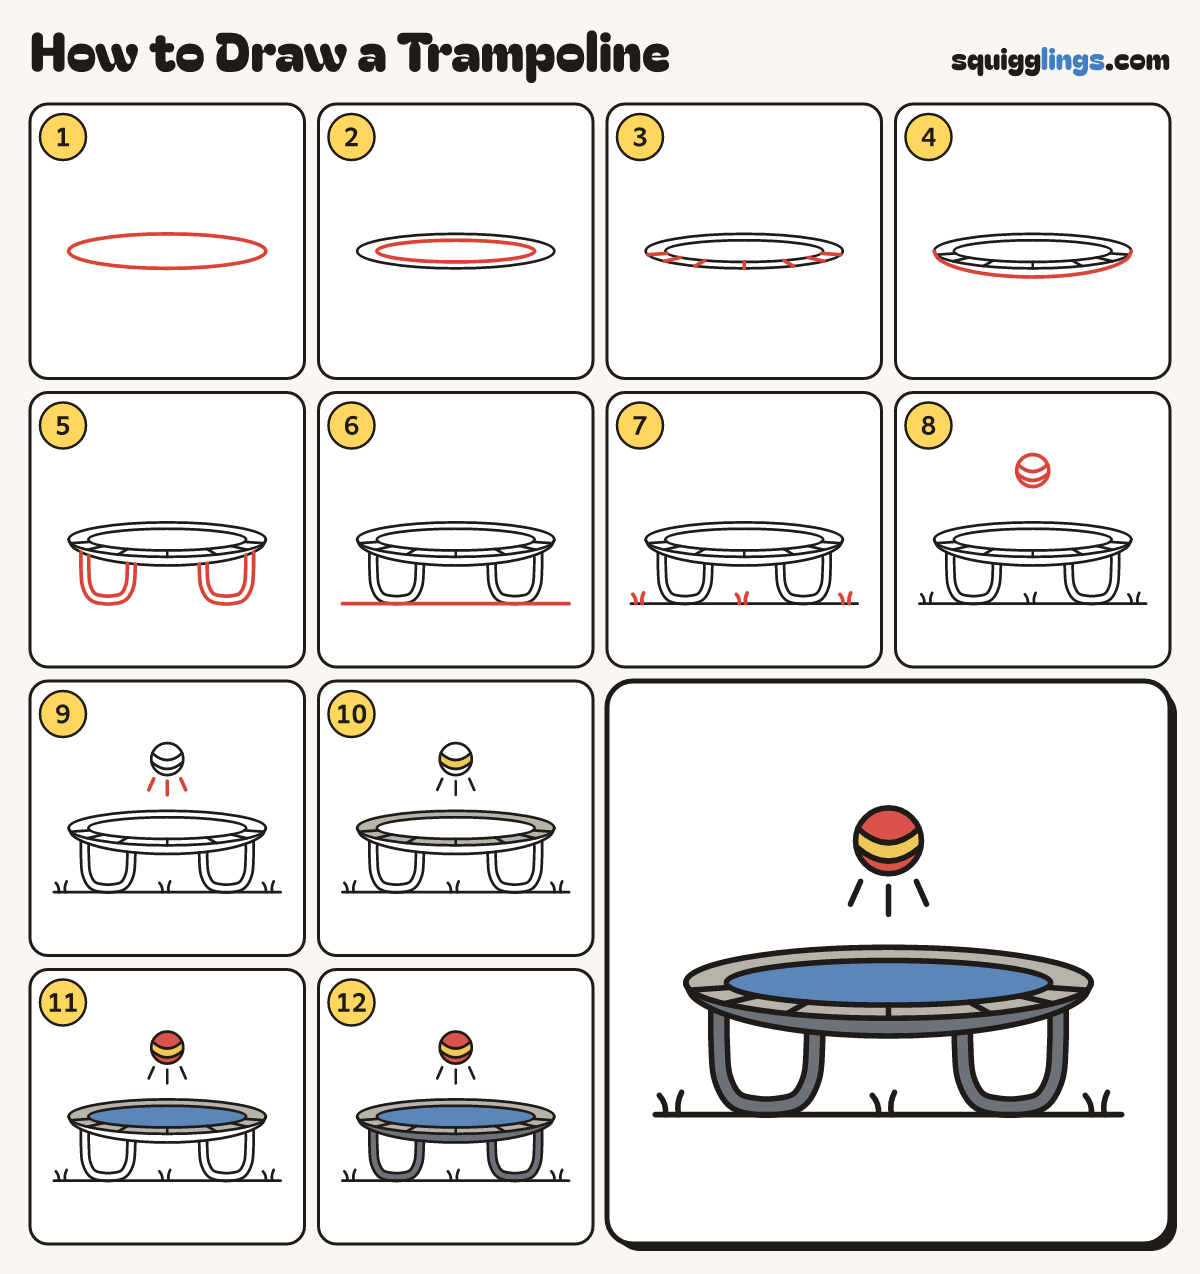
Each picture adds one red line. Draw that line, then scroll to the next picture. Rub out any dashed helper lines at the end. First up: the frame.
Step 1: The frame
Across the middle draw a wide flat oval frame, nearly as wide as the paper and a thumb tall.
Step 2: The mat
Inside the frame draw a second flat oval, a finger in from the edge all round: the jumping mat.
Step 3: The springs
Across the front half, between the 2 ovals, draw 7 short spring lines from the mat out to the frame.
Step 4: The padded edge
Start at the left end of the frame. Draw a smile curve underneath, across to the right end.
Step 5: Hoop legs
Under each end draw a big U hanging from the padded edge, with a smaller U inside: a hoop leg.
Step 6: The ground
Draw a long ground line under the hoop legs, from the left edge of the paper to the right.
Step 7: Grass
Along the ground draw 3 tufts of grass: 2 short curved blades leaning apart, starting on the ground line.
Step 8: A bouncing ball
Above the trampoline draw a ball in the air, as big as 2 fingers, with 2 smile curves across.
Step 9: Boing!
Under the ball draw 3 short bounce lines fanning down toward the mat: one straight, one left, one right.
Step 10: Yellow band, grey frame
Colour the band across the ball yellow, and the ring between the frame and the mat grey.
Step 11: Blue mat, red ball
Colour the mat blue, and the ball red around the yellow band.
Step 12: Slate edge and legs
Colour the padded edge and both hoop legs slate grey. Your trampoline is ready to bounce!
Your finished drawing
Follow the steps above and this is where you end up: a trampoline, drawn by you.
Every step in one picture