Watch it draw itself · tap to replay
How to Draw a Tiny Yellow Helper
Draw a tiny yellow helper in 10 easy steps, about 8 minutes. Free, with a printable worksheet.
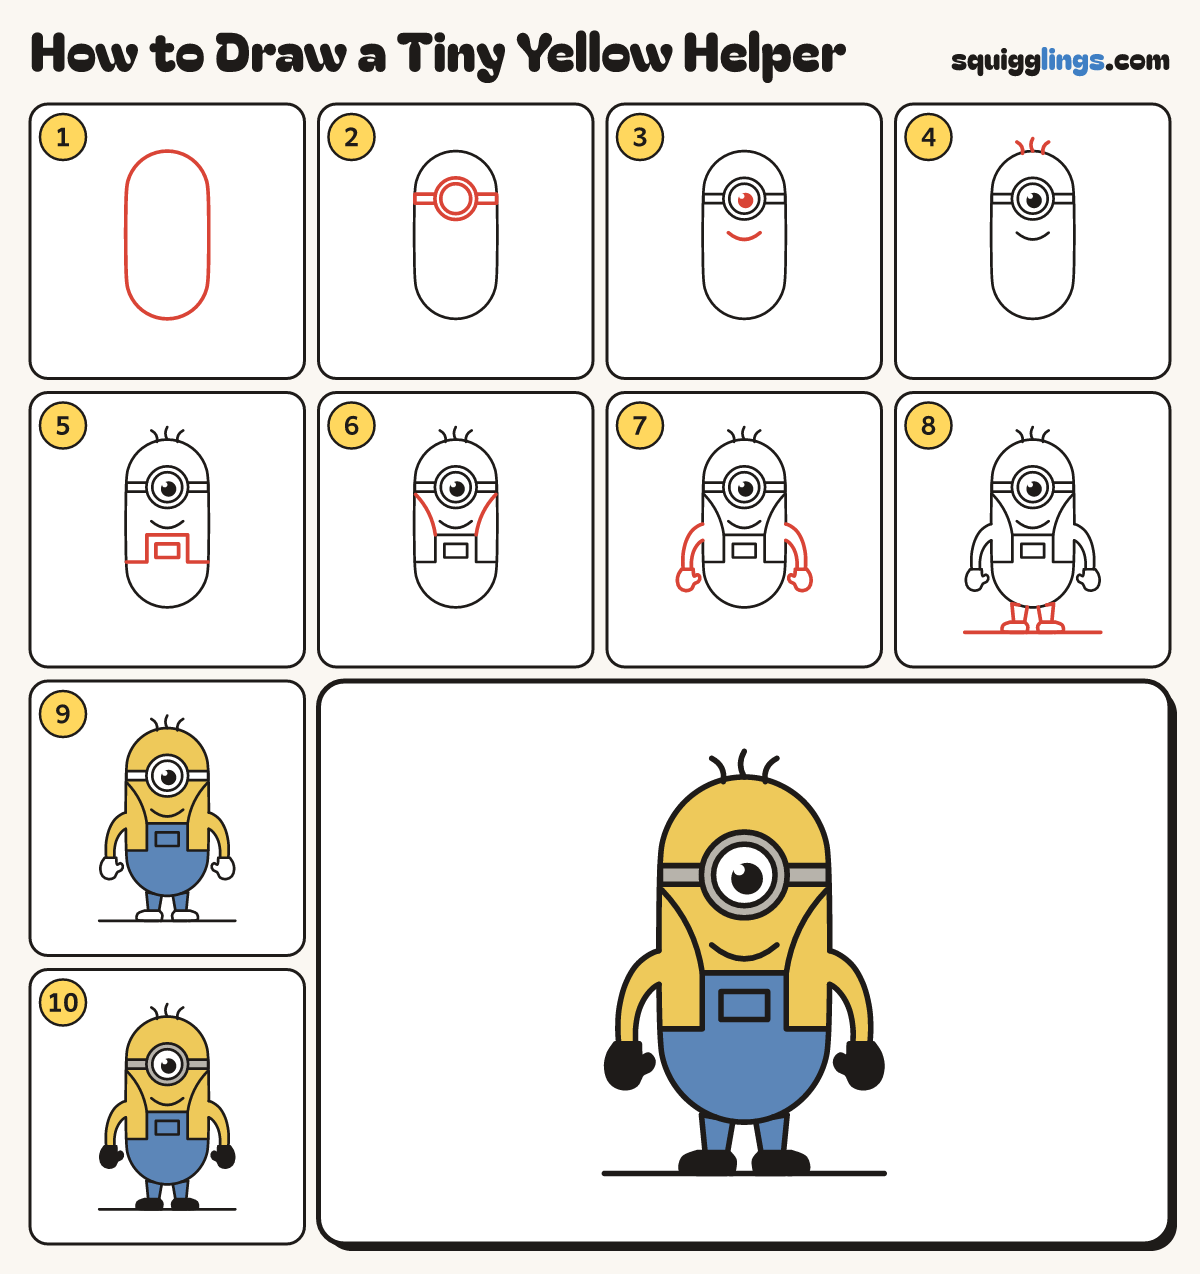
Each picture adds one red line. Draw that line, then scroll to the next picture. Rub out any dashed helper lines at the end. First up: a tall capsule.
Step 1: A tall capsule
Near the top draw a tall capsule like a pill standing up: round top, straight sides, round bottom.
Step 2: One big goggle
Across the upper capsule draw a 2-line strap. In the middle draw a big circle with a smaller one inside.
Step 3: Eye and smile
Inside the glass draw a big black dot with a white speck. Under the goggle draw a wide smile.
Step 4: Three hairs
On top of the dome draw 3 short hairs sticking up. Start on the capsule and end in the air.
Step 5: Overalls
Start low on the left edge. Go up round a square bib, out to the right edge. Add a pocket.
Step 6: Straps
From each top corner of the bib draw a strap curving up and out to the edge, below the goggle.
Step 7: Arms and gloves
Start on each side of the capsule. Draw an arm hanging down, getting thinner. Add a glove with a thumb.
Step 8: Legs, shoes and ground
Under the capsule draw 2 short legs with a rounded shoe on each. Draw a ground line under the shoes.
Step 9: Yellow and blue
Colour the capsule and arms yellow, but not the goggle or strap. Colour the overalls and legs blue.
Step 10: Grey and black
Colour the goggle ring and strap grey, leaving the glass white. Colour the gloves and shoes black.
Your finished drawing
Follow the steps above and this is where you end up: a tiny yellow helper, drawn by you.
Every step in one picture