Watch it draw itself · tap to replay
How to Draw a Temaki
Draw a temaki in 11 easy steps, about 8 minutes. Free, with a printable worksheet.
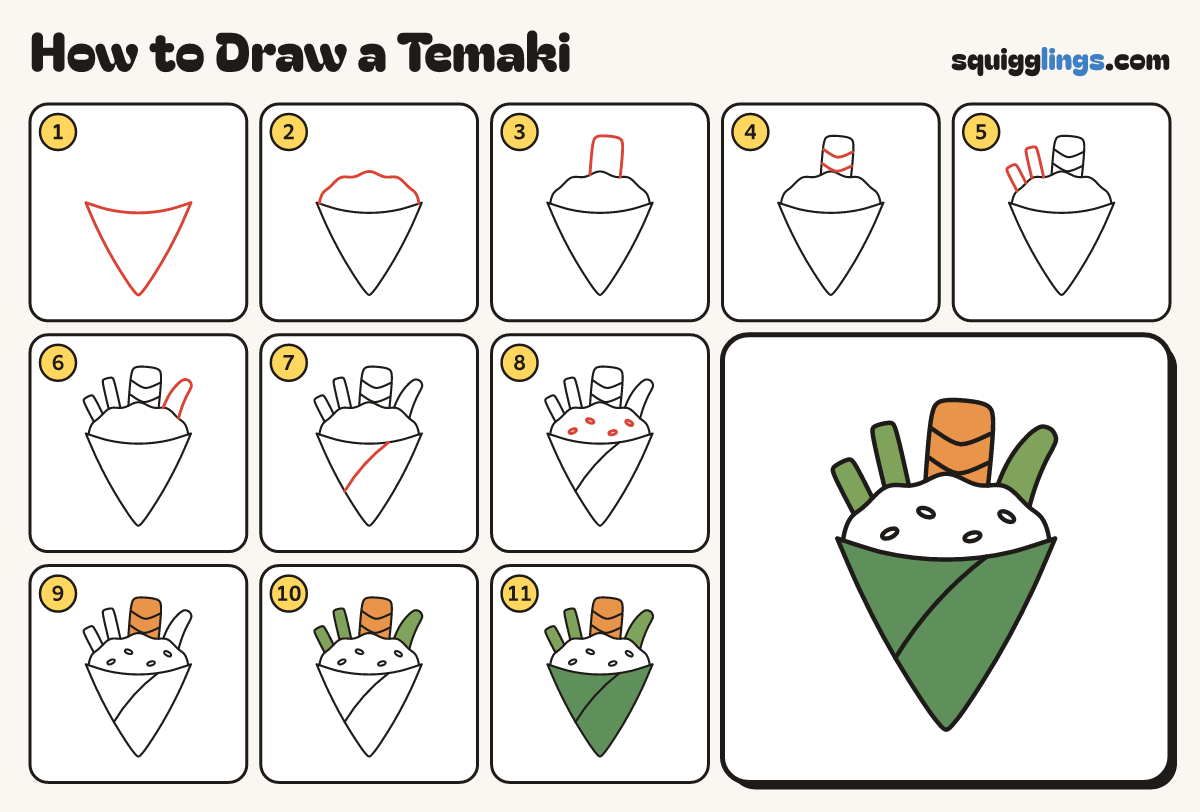
Each picture adds one red line. Draw that line, then scroll to the next picture. Rub out any dashed helper lines at the end. First up: seaweed cone.
Step 1: Seaweed cone
Draw a big V with a round tip. Join the two top corners with a line that dips like a smile.
Tip Temaki is a hand roll: seaweed rolled into a cone.
Step 2: Rice
From one top corner to the other, draw a big bumpy hill of rice over the cone.
Step 3: Salmon
From the middle of the rice, draw a tall wide slab of salmon with a rounded top, leaning a little.
Step 4: Salmon stripes
Across the salmon draw 2 bent lines, each from the left edge to the right edge.
Step 5: Cucumber sticks
Left of the salmon, draw 2 thin cucumber sticks standing up out of the rice, one tall and one short.
Step 6: Avocado slice
Right of the salmon, draw a fat curved slice of avocado, bending away to a rounded tip.
Step 7: The seam
Draw one slanted line across the cone, from the top edge down to the left side.
Tip This is where the seaweed wraps over itself.
Step 8: Rice grains
Dot 4 tiny ovals on the rice for grains, each one tilted a different way.
Step 9: Orange salmon
Go over your lines, then colour the salmon orange. Leave the rice white.
Step 10: Green cucumber, avocado
Colour the cucumber sticks and the avocado slice leaf green.
Step 11: Dark green seaweed
Colour the whole seaweed cone dark green, and your temaki is done!
Your finished drawing
Follow the steps above and this is where you end up: a temaki, drawn by you.
Every step in one picture