Watch it draw itself · tap to replay
How to Draw a Tea Set
Draw a tea set in 12 easy steps, about 9 minutes. Free, with a printable worksheet.
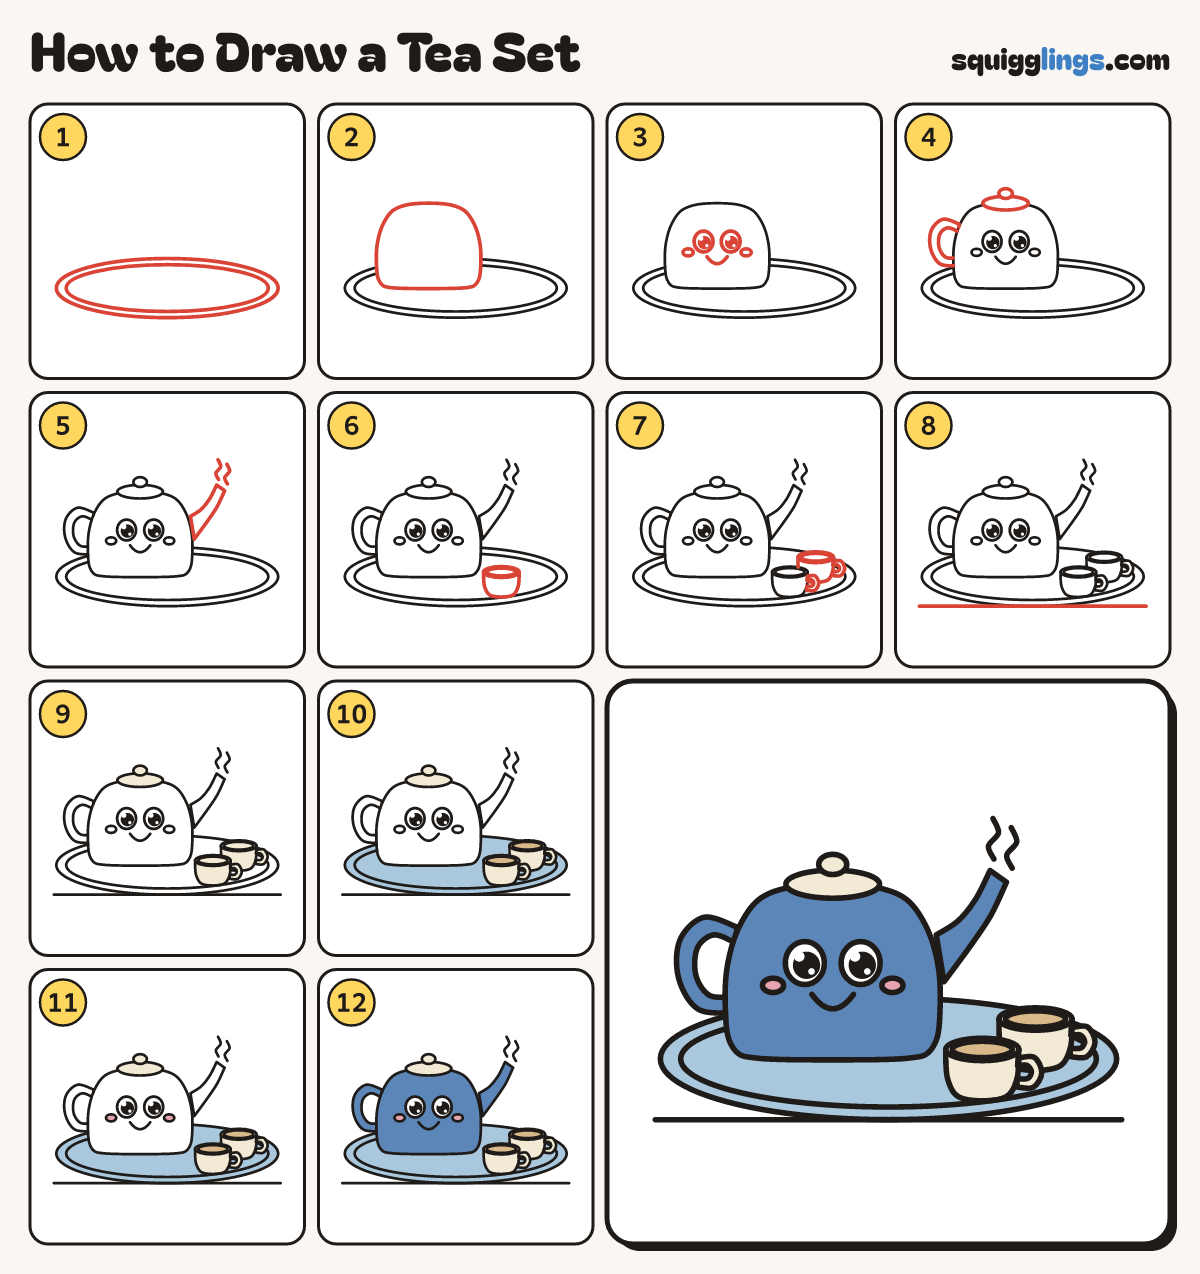
Each picture adds one red line. Draw that line, then scroll to the next picture. Rub out any dashed helper lines at the end. First up: the tray.
Step 1: The tray
Low on your paper draw a big flat oval tray, nearly page wide. Draw a second oval just inside.
Step 2: The teapot body
On the left of the tray draw the teapot: a soft dome on top and a fat round tummy below.
Step 3: A happy face
On the teapot draw 2 big eyes with black dots. Add a U smile and 2 cheeks.
Step 4: Lid, knob and handle
On top draw a flat oval lid with a small round knob. On the left draw a thick C handle.
Step 5: Spout and steam
On the right draw a fat spout curving up, wide at the teapot and thin at the tip. Add 2 steam lines.
Step 6: The first cup
Right of the teapot draw an oval rim with an oval inside. From its left end curve under to its right.
Step 7: The second cup
Higher on the right draw another cup. Start at its left rim, curve under, stop at its right. Add handles.
Step 8: The table
Draw a table line under the tray from well left to well right, just touching its bottom.
Step 9: Cream lid and cups
Colour the lid, the knob and both cups cream.
Step 10: Tan tea, sky tray
Colour the tea inside each cup tan and the tray sky blue around the teapot and cups.
Step 11: Pink cheeks
Colour the cheeks pink.
Step 12: Blue teapot
Colour the teapot, spout and handle blue around the cheeks, leaving the eyes white. Your tea set is ready!
Your finished drawing
Follow the steps above and this is where you end up: a tea set, drawn by you.
Every step in one picture