Watch it draw itself · tap to replay
How to Draw Stonehenge
Draw Stonehenge in 13 easy steps, about 10 minutes. Free, with a printable worksheet.
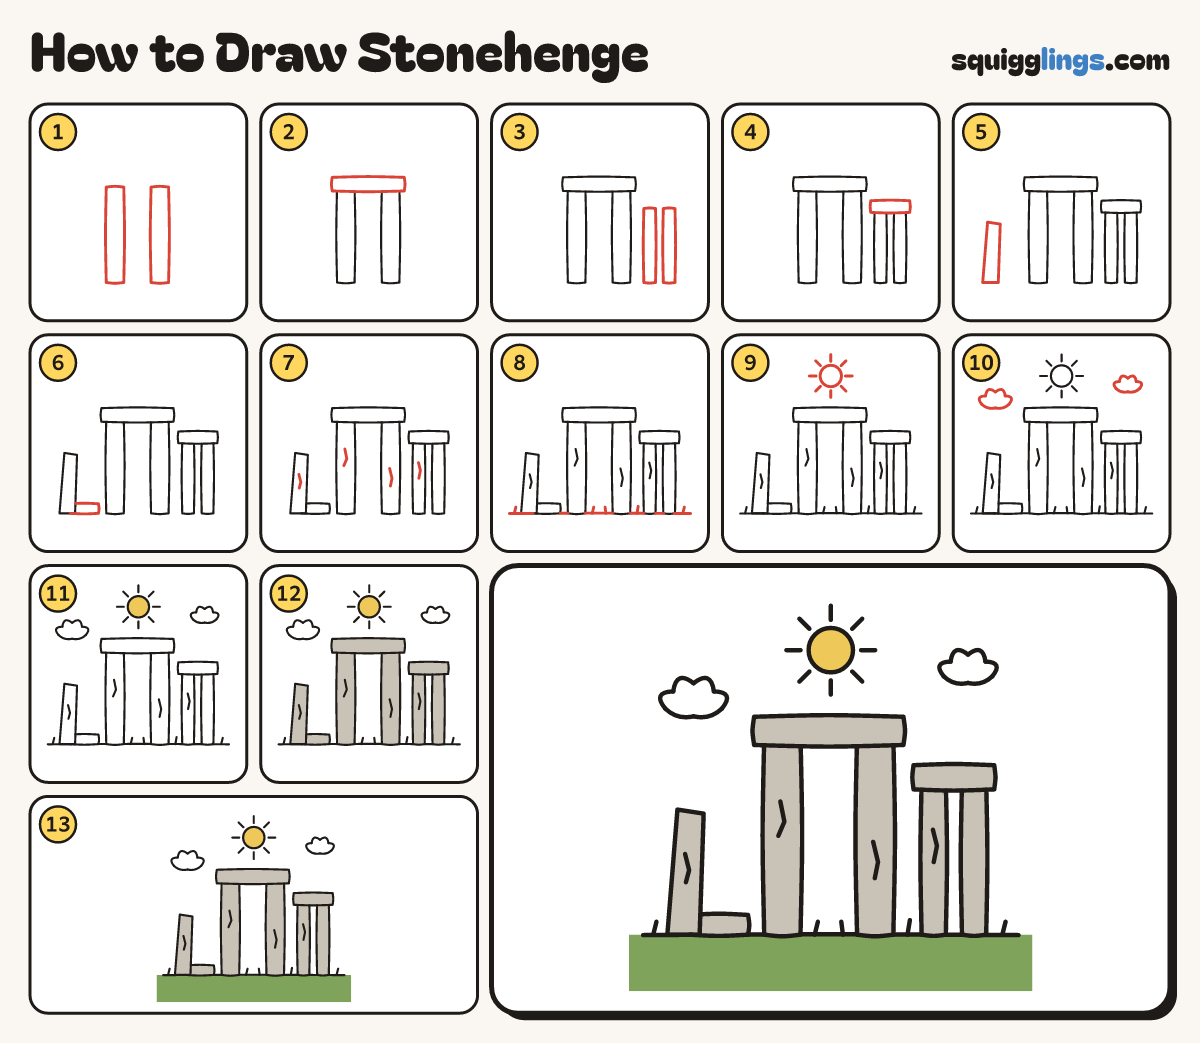
Each picture adds one red line. Draw that line, then scroll to the next picture. Rub out any dashed helper lines at the end. First up: two standing stones.
Step 1: Two standing stones
In the middle, draw 2 tall wobbly boxes a hand apart, from low on the ground up past the middle.
Step 2: The stone on top
Across the top of the 2 stones, draw a long flat wobbly box, sticking out a little past each side.
Step 3: Two smaller stones
To the right, a little lower, draw 2 shorter standing stones close together.
Step 4: Their top stone
Across the top of the 2 smaller stones, draw another flat stone lying on them.
Step 5: A leaning stone
On the left, draw a tall stone leaning right: start on the ground, slant up, across, and back down.
Step 6: A fallen stone
From the leaning stone's foot, draw a long low box lying on the ground. Stop before the tall stone.
Step 7: Cracks
Draw a little zigzag crack on a few stones: each tall stone, a small one and the leaning one.
Step 8: The grass
Draw a ground line right across the paper under the stones, and a few grass blades between them.
Step 9: The sun
Draw a round sun with 8 short rays high in the middle of the sky.
Step 10: Two clouds
Draw a puffy cloud on each side of the sun, lower down: bumps on top and 2 flatter bumps underneath.
Step 11: Yellow sun
Go over your lines, then colour the sun yellow.
Step 12: Grey stones
Colour all the stones grey, pressing softly so the cracks still show.
Step 13: Green grass
Colour the grass under the ground line green, out to the paper's edges. Your Stonehenge is done!
Your finished drawing
Follow the steps above and this is where you end up: Stonehenge, drawn by you.
Every step in one picture