Watch it draw itself · tap to replay
How to Draw a Snap Pea
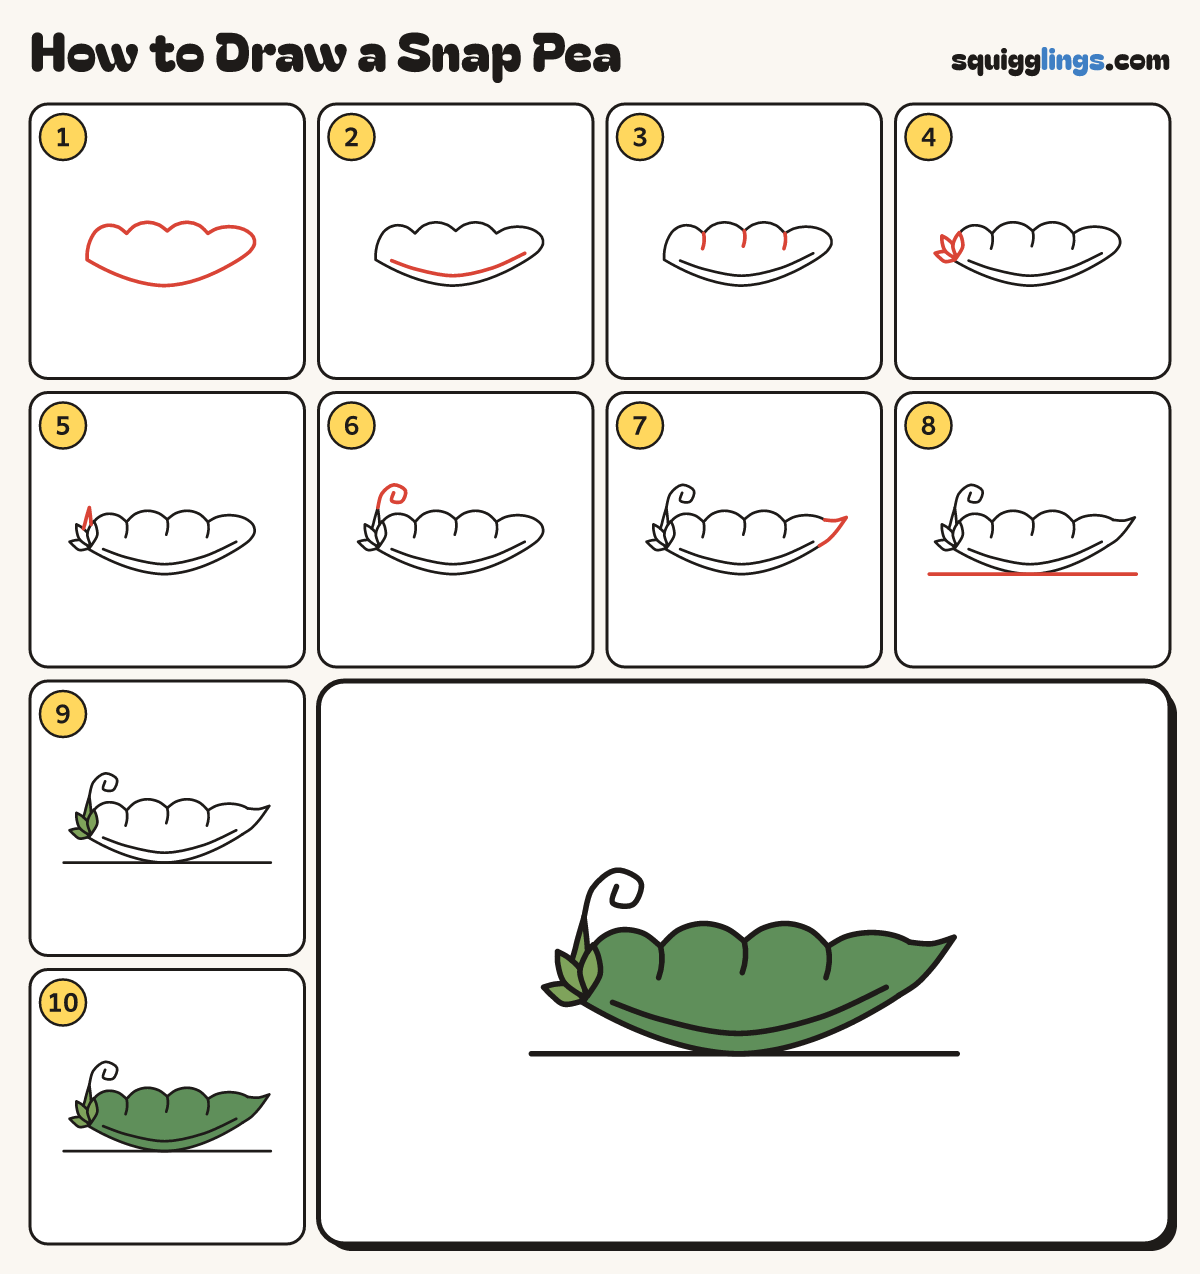
Draw a snap pea in 10 easy steps, about 8 minutes. Free, with a printable worksheet.
Each picture adds one red line. Draw that line, then scroll to the next picture. Rub out any dashed helper lines at the end. First up: the pod.
Step 1: The pod
Across the middle draw a plump pod lying down, round underneath, with 4 even bumps along the top.
Step 2: The seam
Inside the pod draw 1 long seam line, following the bottom curve a finger inside it, from end to tip.
Step 3: Pea lines
From each dip between the bumps draw a short bowed line down into the pod, stopping well above the seam.
Step 4: The cap
On the left end draw a cap of 3 little pointed leaves: one pointing left, one up-left, one straight up.
Step 5: The stem
From the middle of the cap draw a short stem going up, thinner at the top. Stop in the air.
Step 6: The tendril
From the top of the stem draw a thin curly tendril, looping over to the right like a spring.
Step 7: The tip
From the top by the round end, draw a pointed tip down to the bottom. Rub out the old end.
Step 8: The ground
Draw a long ground line under the pod, just touching its lowest point.
Step 9: Leafy cap and stem
Go over your lines, then colour the cap and the stem leaf green.
Step 10: Green pod
Colour the pod and its tip green, around the cap, and your snap pea is done!
Your finished drawing
Follow the steps above and this is where you end up: a snap pea, drawn by you.
Every step in one picture