Watch it draw itself · tap to replay
How to Draw a Slushie
Draw a slushie in 10 easy steps, about 8 minutes. Free, with a printable worksheet.
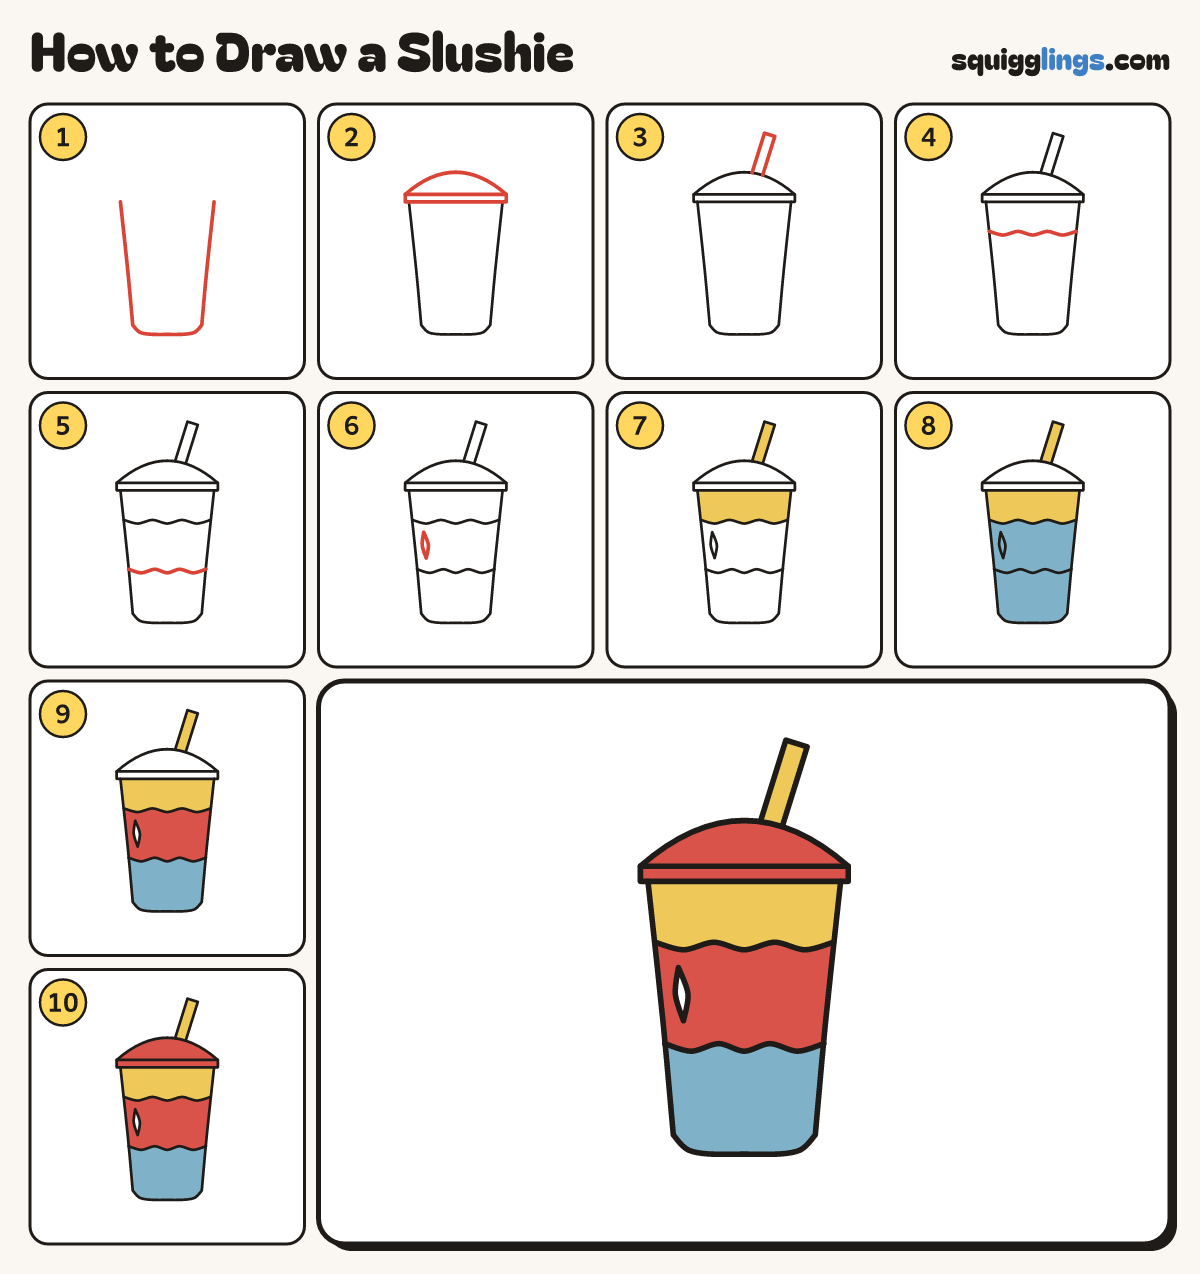
Each picture adds one red line. Draw that line, then scroll to the next picture. Rub out any dashed helper lines at the end. First up: tall cup.
Step 1: Tall cup
Start at the top left. Draw a long U with a flat bottom, and stop at the top right.
Tip The cup is taller than wide, a little narrower at the bottom.
Step 2: The lid
From the cup's top left, draw a thin band across to the top right. Add a low dome on top.
Step 3: Fat straw
From the top of the dome, draw a fat straw sticking up: 2 lines close together, with a flat top.
Step 4: Slush line
A little above the middle of the cup, draw a gentle wavy line from side to side.
Step 5: Second wave
A little below the middle of the cup, draw a second wavy line from side to side.
Step 6: A shine
Between the 2 waves, near the left side of the cup, draw a small thin sliver.
Tip Pointed at both ends.
Step 7: Yellow straw and top
Colour the straw yellow, and the slush between the lid and the first wave.
Step 8: Blue slush
Colour the cup blue from the lower wave down to the bottom.
Step 9: Red slush
Colour the band between the 2 waves red. Leave the shine white.
Step 10: Red lid
Colour the dome lid and the rim red. Your slushie is done!
Your finished drawing
Follow the steps above and this is where you end up: a slushie, drawn by you.
Every step in one picture