Watch it draw itself · tap to replay
How to Draw a Skink
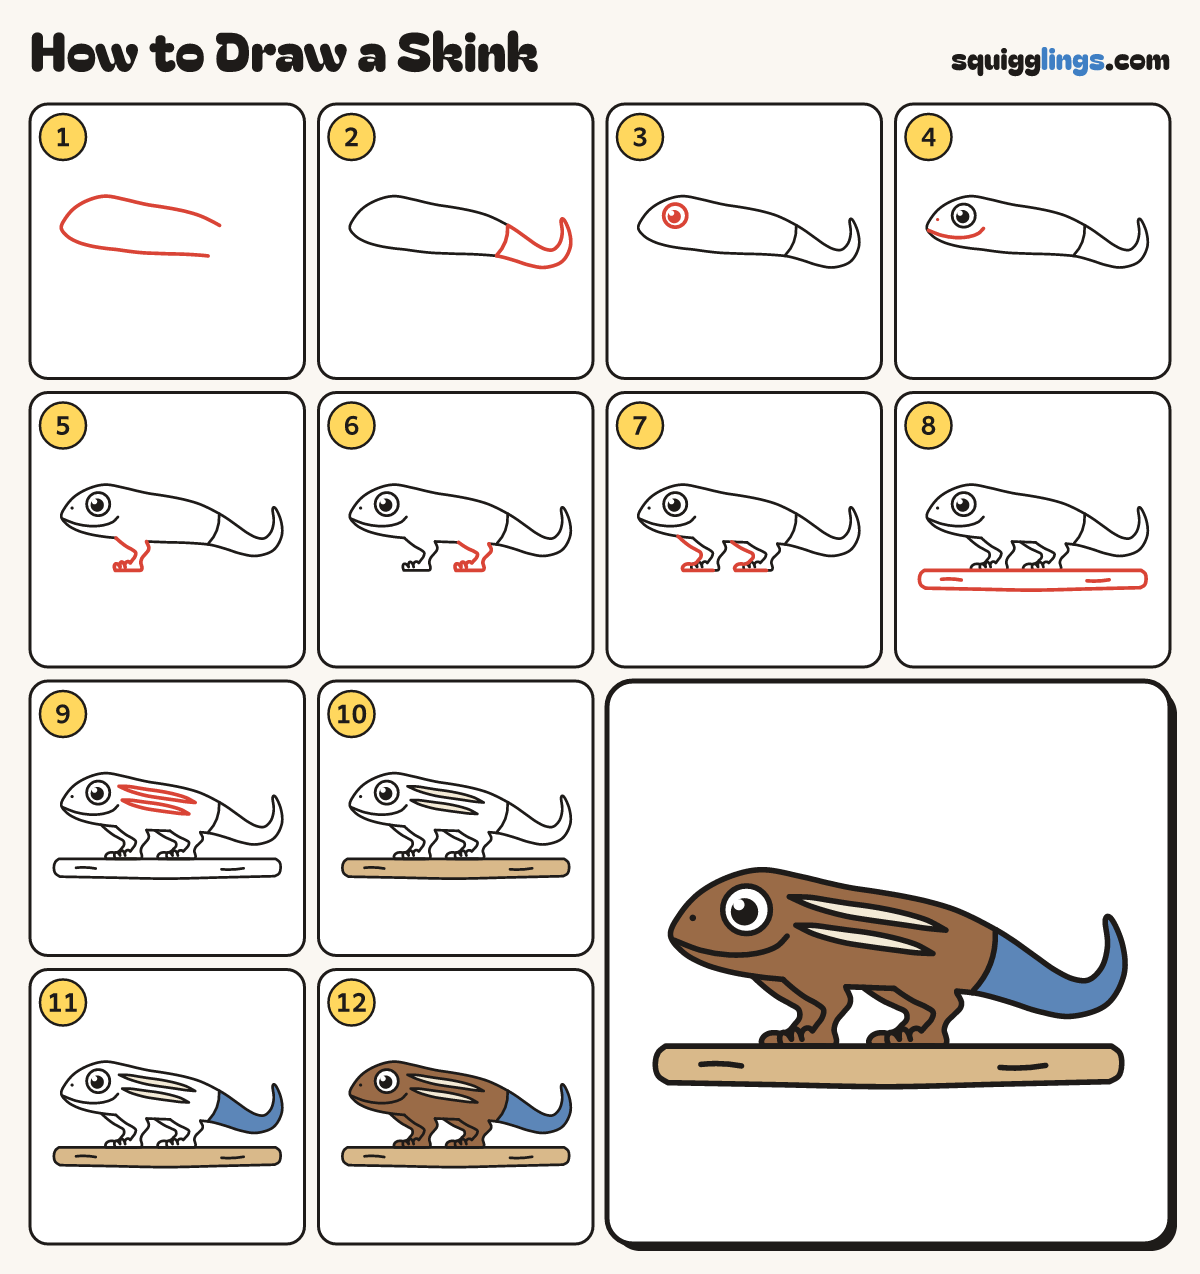
Draw a skink in 12 easy steps, about 9 minutes. Free, with a printable worksheet.
Each picture adds one red line. Draw that line, then scroll to the next picture. Rub out any dashed helper lines at the end. First up: head and body.
Step 1: Head and body
Start low on the right. Draw a tummy, round a smooth snout, and a long back. Stop above the start.
Tip Leave the right end open. A skink is long and low.
Step 2: Long tail
Close the open end with a curve. From its ends draw a long tail curling up to a point.
Tip The tail gets thinner all the way to its tip.
Step 3: The big eye
In the head, above the middle, draw one big round eye. Add a black pupil and a white shine.
Step 4: Grin and nostril
Start at the front of the snout. Draw a grin back under the eye, curling up. Dot a nostril.
Step 5: Front leg
Start on the tummy behind the head. Draw a bent leg, back to an elbow, down to 3 round toes.
Tip The leg leaves the tummy in a soft curve, like a lizard's bent arm.
Step 6: Back leg
Start on the tummy at the hips. Draw another bent leg, back to a knee, down to 3 round toes.
Step 7: Far legs
In front of each leg, draw the far leg peeking out: a slim bent strip with a small round foot.
Tip Each far leg bends the same way as the leg beside it.
Step 8: The branch
Under the feet draw a long branch with round ends. Add 2 short bark lines.
Tip All 4 feet stand on top of the branch.
Step 9: Two long stripes
From behind the eye, draw 2 long thin stripes along the body. Stop before the tail.
Tip Each stripe is thin at both ends and follows the back.
Step 10: Cream and light brown
Colour the 2 stripes cream. Colour the branch light brown, around the feet.
Step 11: Blue tail
Colour the tail bright blue, from the curved line all the way to the tip.
Step 12: Brown skink
Colour the head, body and legs brown, around the stripes. Leave the eye white.
Your finished drawing
Follow the steps above and this is where you end up: a skink, drawn by you.
Every step in one picture