Watch it draw itself · tap to replay
How to Draw a Shopping Cart
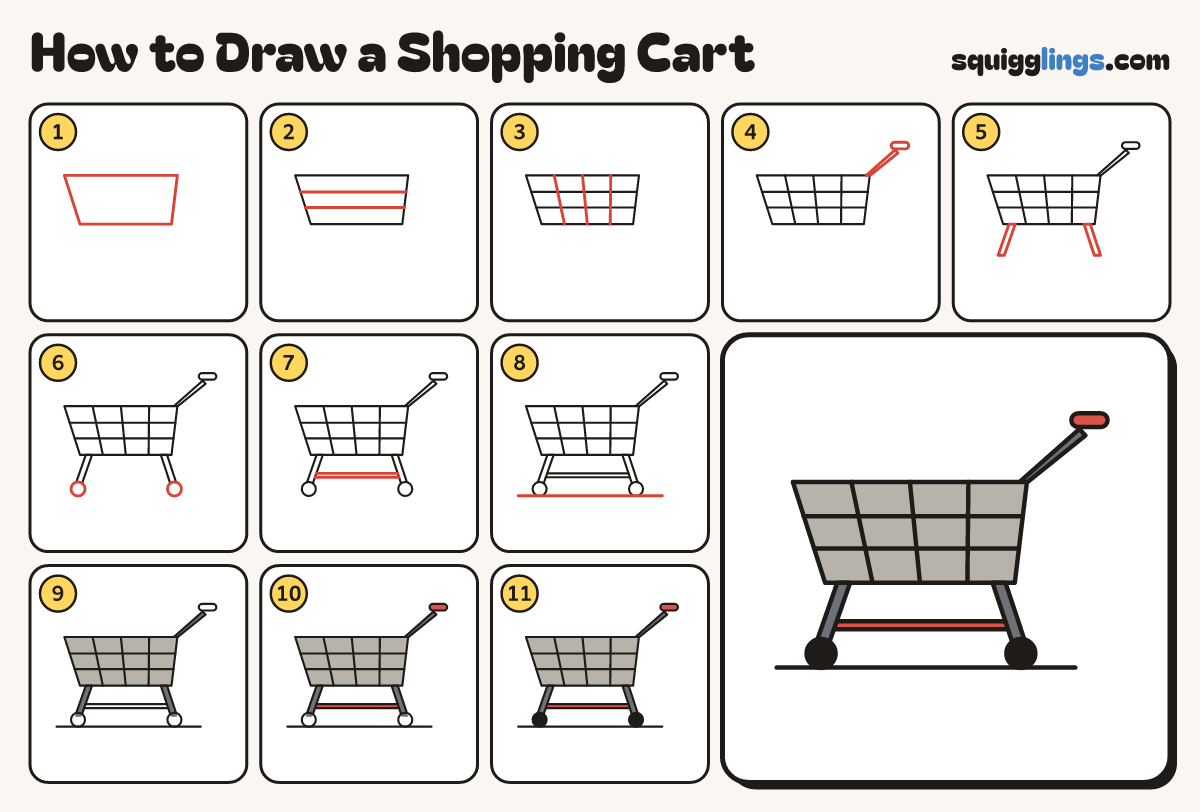
Draw a shopping cart in 11 easy steps, about 8 minutes. Free, with a printable worksheet.
Each picture adds one red line. Draw that line, then scroll to the next picture. Rub out any dashed helper lines at the end. First up: the basket.
Step 1: The basket
Above the middle, draw a basket: flat top, back wall leaning in a little, flat bottom, front wall leaning out.
Tip Wide at the top, narrower at the bottom, with a slanted front.
Step 2: Grid across
Inside the basket, draw 2 straight lines across, evenly spaced, from the front wall to the back wall.
Tip Keep the lines level, like shelves.
Step 3: Grid down
Draw 3 straight lines down the basket, from the top edge to the bottom edge, spaced evenly along both edges.
Tip The lines lean a little, like the walls.
Step 4: The handle
From the basket's top right corner, draw a thin bar slanting up right. Put a fat grip on its end.
Tip The grip is a little rounded pill, like on a bicycle.
Step 5: Two legs
Under the basket, draw 2 thin legs slanting down: the front one leaning left, the back one leaning right.
Tip Thin strips, like drinking straws.
Step 6: Two little wheels
At the bottom of each leg, draw a small round wheel over the end of the leg.
Tip Shopping cart wheels are tiny, about as big as your pinky nail.
Step 7: The bottom rack
Above the wheels, rule a line from the front leg across to the back leg. Add a second line below.
Step 8: The ground
Start just left of the front wheel. Rule a long line under both wheels, stopping just past the back wheel.
Tip Both wheels should sit right on the line.
Step 9: Grey basket, slate legs
Colour the basket light grey so the wire lines still show. Colour the legs and the handle bar slate grey.
Step 10: Red grip and rack
Colour the handle grip and the bottom rack red.
Step 11: Black wheels
Colour both wheels black.
Your finished drawing
Follow the steps above and this is where you end up: a shopping cart, drawn by you.
Every step in one picture