Watch it draw itself · tap to replay
How to Draw a Rhodesian Ridgeback
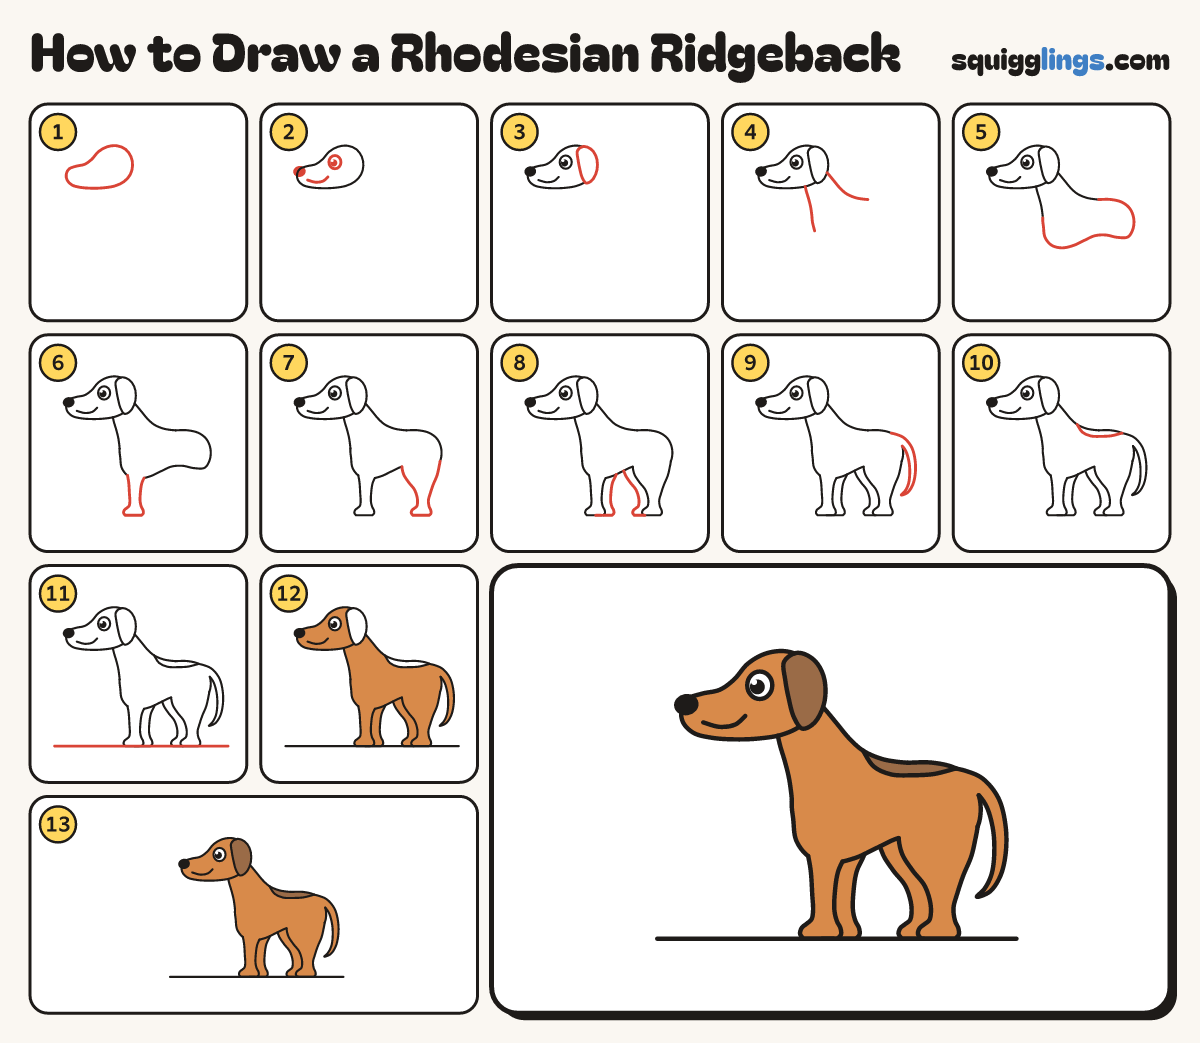
Draw a rhodesian ridgeback in 13 easy steps, about 10 minutes. Free, with a printable worksheet.
Each picture adds one red line. Draw that line, then scroll to the next picture. Rub out any dashed helper lines at the end. First up: big head.
Step 1: Big head
Near the top left, draw a head: round at the back, with a thick snout that ends blunt and round.
Tip The snout is about as long as the round part.
Step 2: Eye, nose and smile
In the round part draw one big eye. Add a black nose on the snout tip and a smile.
Step 3: Floppy ear
At the back of the head, draw a soft ear hanging down from the top, with a round tip.
Step 4: Strong neck
From behind the ear, draw a curve down to the back. From the chin, draw one down to the chest.
Step 5: Lean body
From the neck, draw a long back and a round bottom, then a tucked-up tummy and a deep chest.
Tip A ridgeback is a strong, lean running dog.
Step 6: Front leg
From the chest, draw a strong leg down to a round paw. Keep the bottom of the paw flat.
Tip The leg gets thinner on the way down.
Step 7: Back leg
Under the bottom, draw a wide thigh, then a leg that bends back and comes down to a round paw.
Step 8: Far legs
Draw the 2 far legs peeking out: one behind the front leg, one in front of the back leg.
Tip Only a strip of each far leg shows.
Step 9: Long tail
From the top of the bottom, draw a long tail hanging down. Make it thinner towards the tip.
Step 10: The ridge
Start on the back behind the neck. Draw a line just below it, ending on the back near the tail.
Tip This strip of fur grows the wrong way. It gives the ridgeback its name.
Step 11: The ground
Draw a long flat ground line under all 4 paws, from past the nose to past the tail.
Step 12: Ginger coat
Go over your lines. Colour the head, neck, body, legs and tail ginger, around the ear and the ridge.
Tip Leave the eye white.
Step 13: Brown ear and ridge
Colour the ear and the ridge on the back dark brown. Your Rhodesian ridgeback is ready!
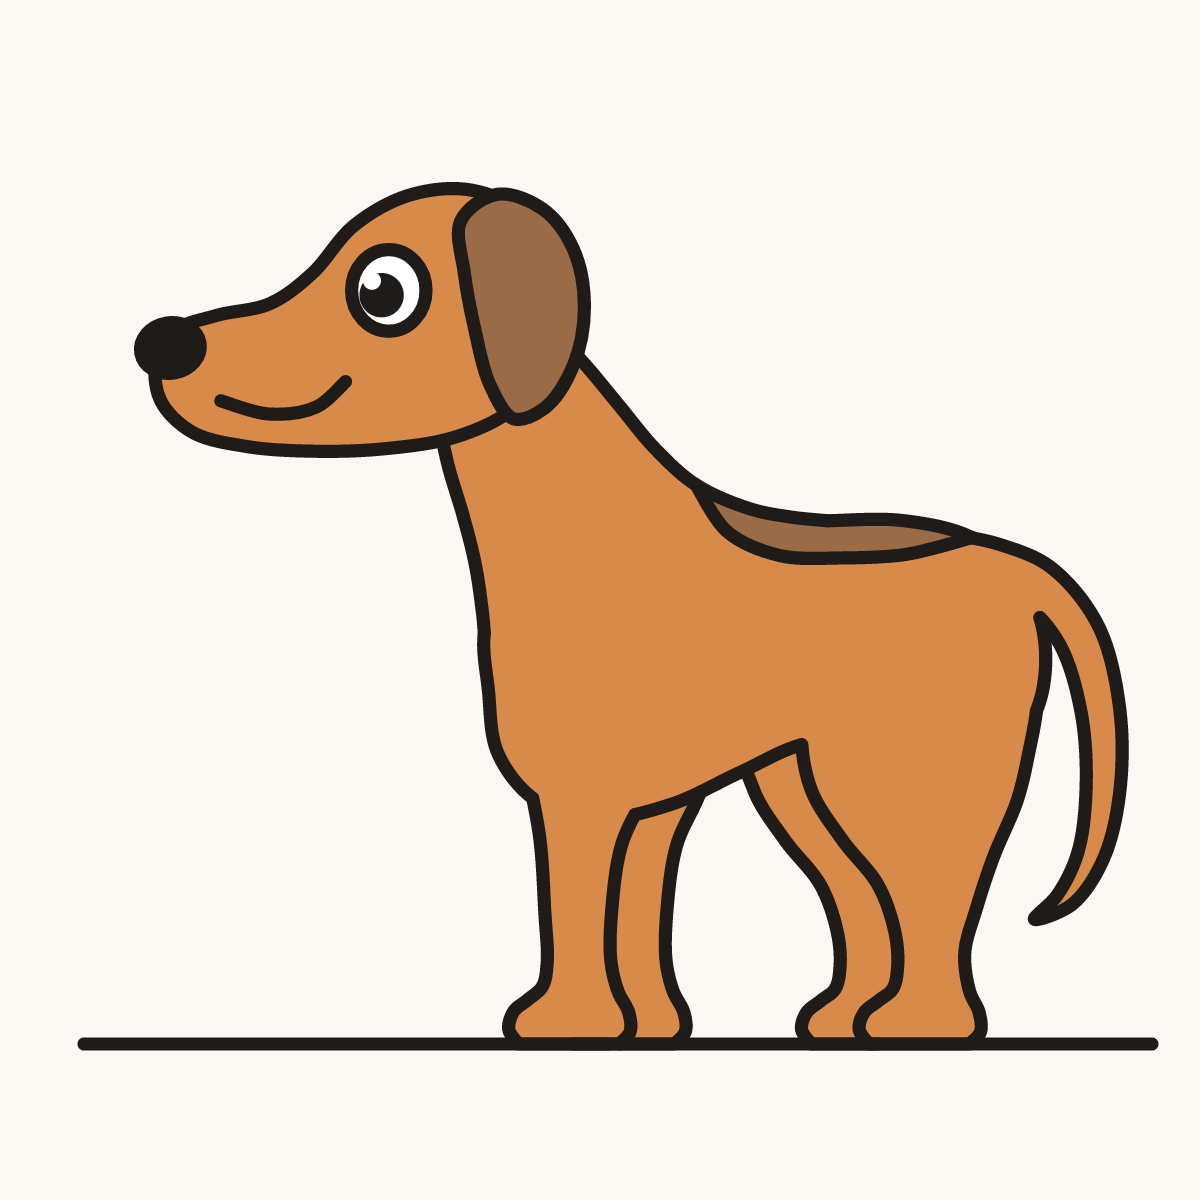
Your finished drawing
Follow the steps above and this is where you end up: a rhodesian ridgeback, drawn by you.
Every step in one picture