Watch it draw itself · tap to replay
How to Draw an Archerfish
Draw an archerfish in 12 easy steps, about 9 minutes. Free, with a printable worksheet.
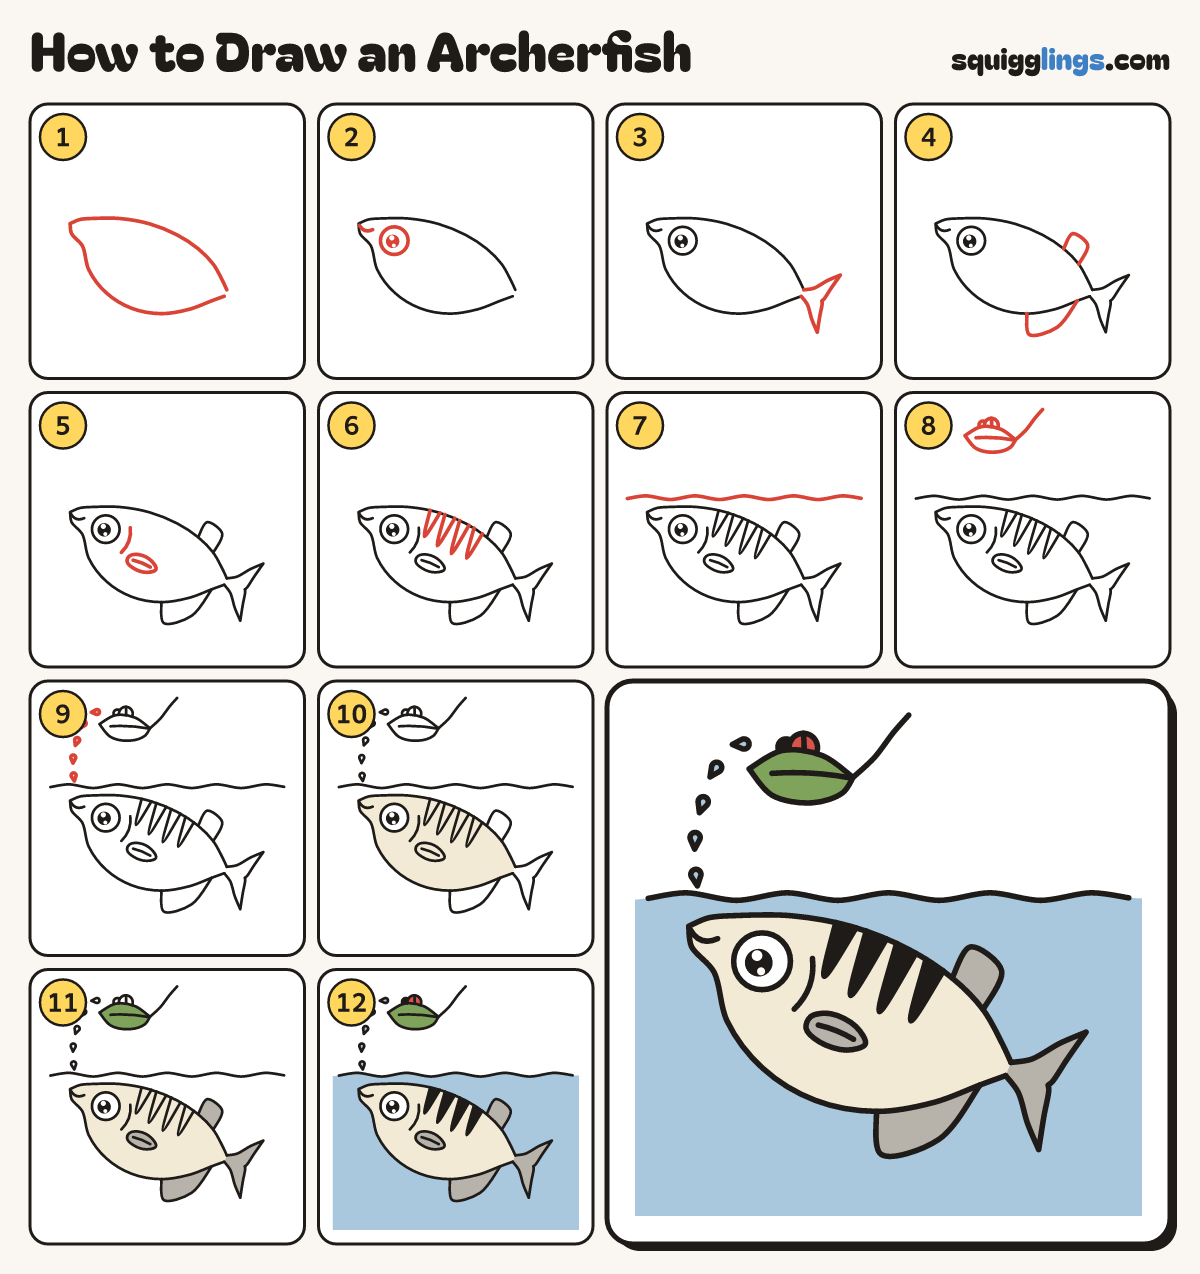
Each picture adds one red line. Draw that line, then scroll to the next picture. Rub out any dashed helper lines at the end. First up: tilted body.
Step 1: Tilted body
Low down, start near the right. Draw a straight back up to a pointy snout, then a round tummy back.
Tip The fish tilts nose-up. Leave a narrow neck at the back.
Step 2: Eye and mouth
Behind the snout draw one big round eye with a black dot and a shine. Add a little smile.
Step 3: Forked tail
Start where the back ended. Draw a point out, a dent in, then a point back to the tummy's end.
Step 4: Back fins
Near the tail, start on the back and draw a low pointy fin, back to the back. Add one underneath.
Step 5: Gill and side fin
Behind the eye draw a short C for the gill. Behind it draw a small leaf fin with one ray.
Step 6: Four bars
Between the gill and the back fin draw 4 bars hanging down from the back like comb teeth.
Tip Wide at the top, pointy at the bottom, never reaching the tummy.
Step 7: Water surface
Above the fish draw one long gently wavy line from edge to edge for the top of the water.
Step 8: Leaf and bug
From the top edge draw a stem curving down to a leaf over the water. Add a bug on top.
Step 9: Water jet
Just above the water in front of the mouth, draw a row of 5 drops arcing up to the bug.
Tip Archerfish spit water to knock bugs off leaves.
Step 10: Cream fish
Colour the fish cream, leaving the eye, the side fin and the 4 bars white.
Step 11: Grey fins, green leaf
Colour the tail and all the fins grey, and the leaf green.
Step 12: Blue water, black bars
Colour the water and drops light blue around the fish, the bars black, the bug red with a black head.
Your finished drawing
Follow the steps above and this is where you end up: an archerfish, drawn by you.
Every step in one picture