Watch it draw itself · tap to replay
How to Draw a Raven Silhouette
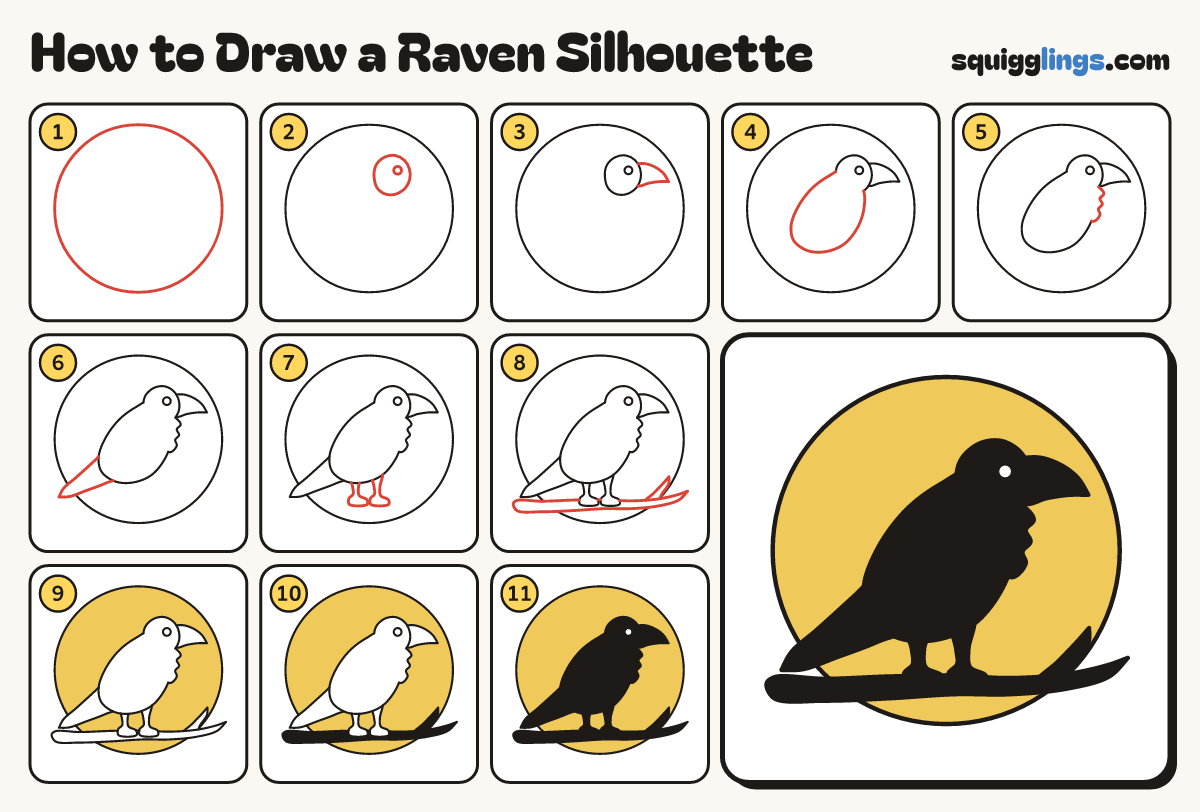
Draw a raven silhouette in 11 easy steps, about 8 minutes. Free, with a printable worksheet.
Each picture adds one red line. Draw that line, then scroll to the next picture. Rub out any dashed helper lines at the end. First up: big moon.
Step 1: Big moon
Draw a big round moon that fills most of your paper. Go slowly so it stays round.
Tip Draw it lightly. The raven will cover parts of it.
Step 2: Head and eye
A little right of the middle, near the top of the moon, draw a rounded head. Add one tiny eye.
Step 3: Heavy beak
Start on the front of the head. Draw a thick beak with a curved top, back to the chin.
Tip A raven's beak is big and heavy, nearly as long as its head.
Step 4: Long body
Start behind the head. Curve down the sloping back, round the tummy, and up to the chin.
Tip Rub out the head line inside the body, so they join into one shape.
Step 5: Shaggy throat
Start under the beak. Draw 3 soft feather bumps down the front of the neck to the chest.
Step 6: Wedge tail
Start on the lower back. Draw a long tail down to the left, ending in a blunt point.
Tip The tail is about as long as the body.
Step 7: Legs and feet
Under the tummy draw 2 short legs. Give each a foot with toes pointing forward.
Step 8: The branch
Under the feet draw a long branch across the paper, thin at the right end. Add one short twig.
Tip The feet sit on top of the branch.
Step 9: Pale yellow moon
Colour the moon pale yellow. Go carefully around the raven and the branch.
Step 10: Black branch
Colour the branch and its twig black, going around the feet.
Step 11: Solid black raven
Colour the whole raven black, even the beak and legs. Leave the tiny eye white.
Tip A silhouette is a solid dark shape with no details inside.
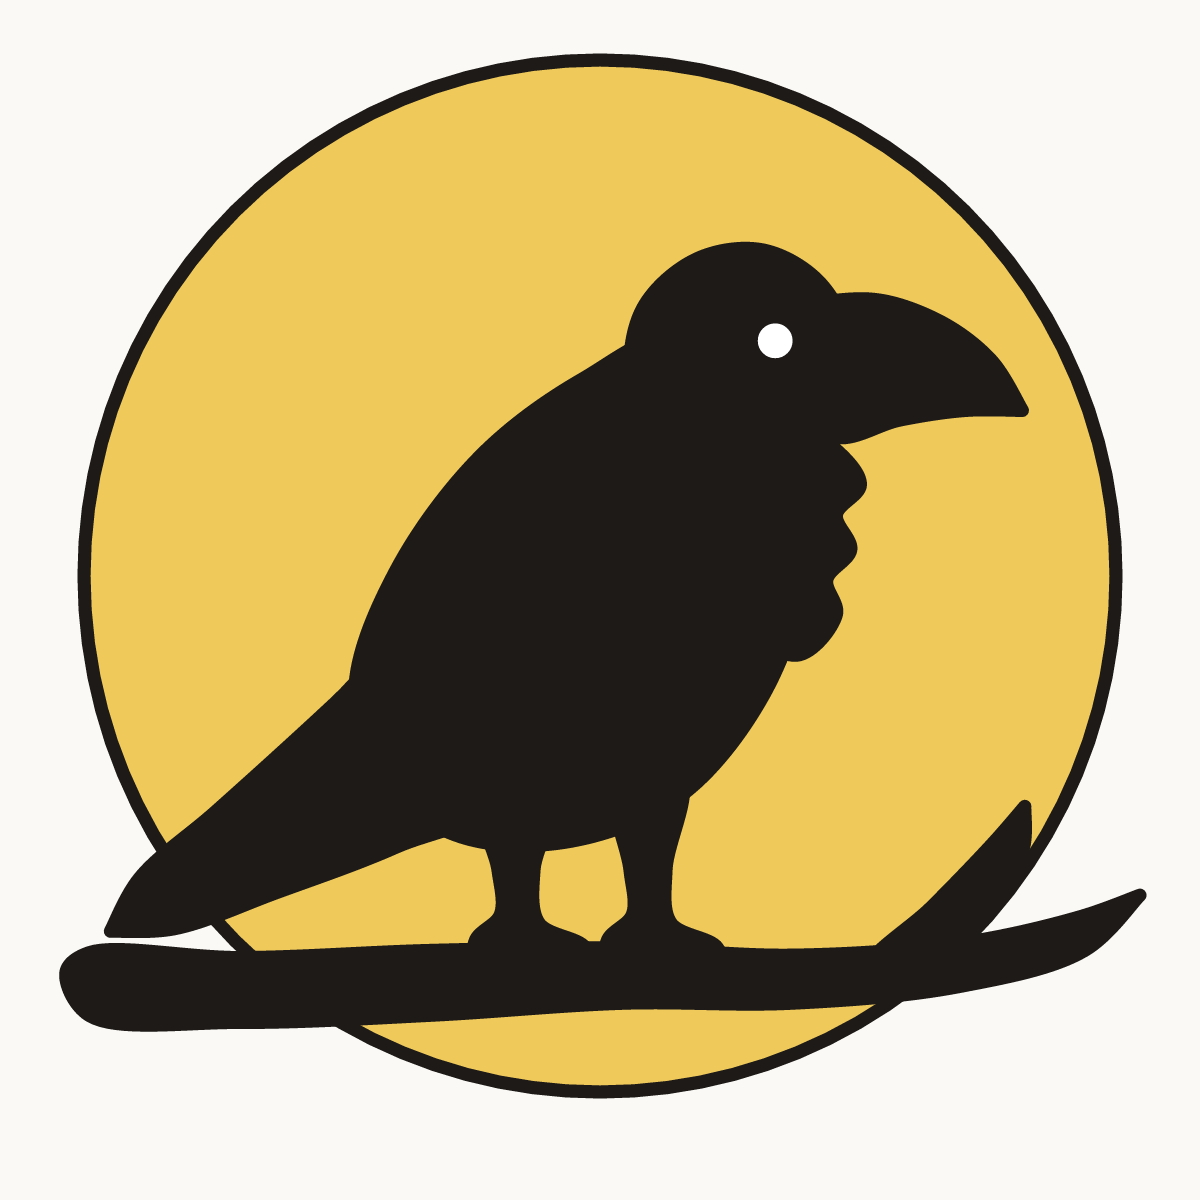
Your finished drawing
Follow the steps above and this is where you end up: a raven silhouette, drawn by you.
Every step in one picture