Watch it draw itself · tap to replay
How to Draw a Radiator
Draw a radiator in 12 easy steps, about 9 minutes. Free, with a printable worksheet.
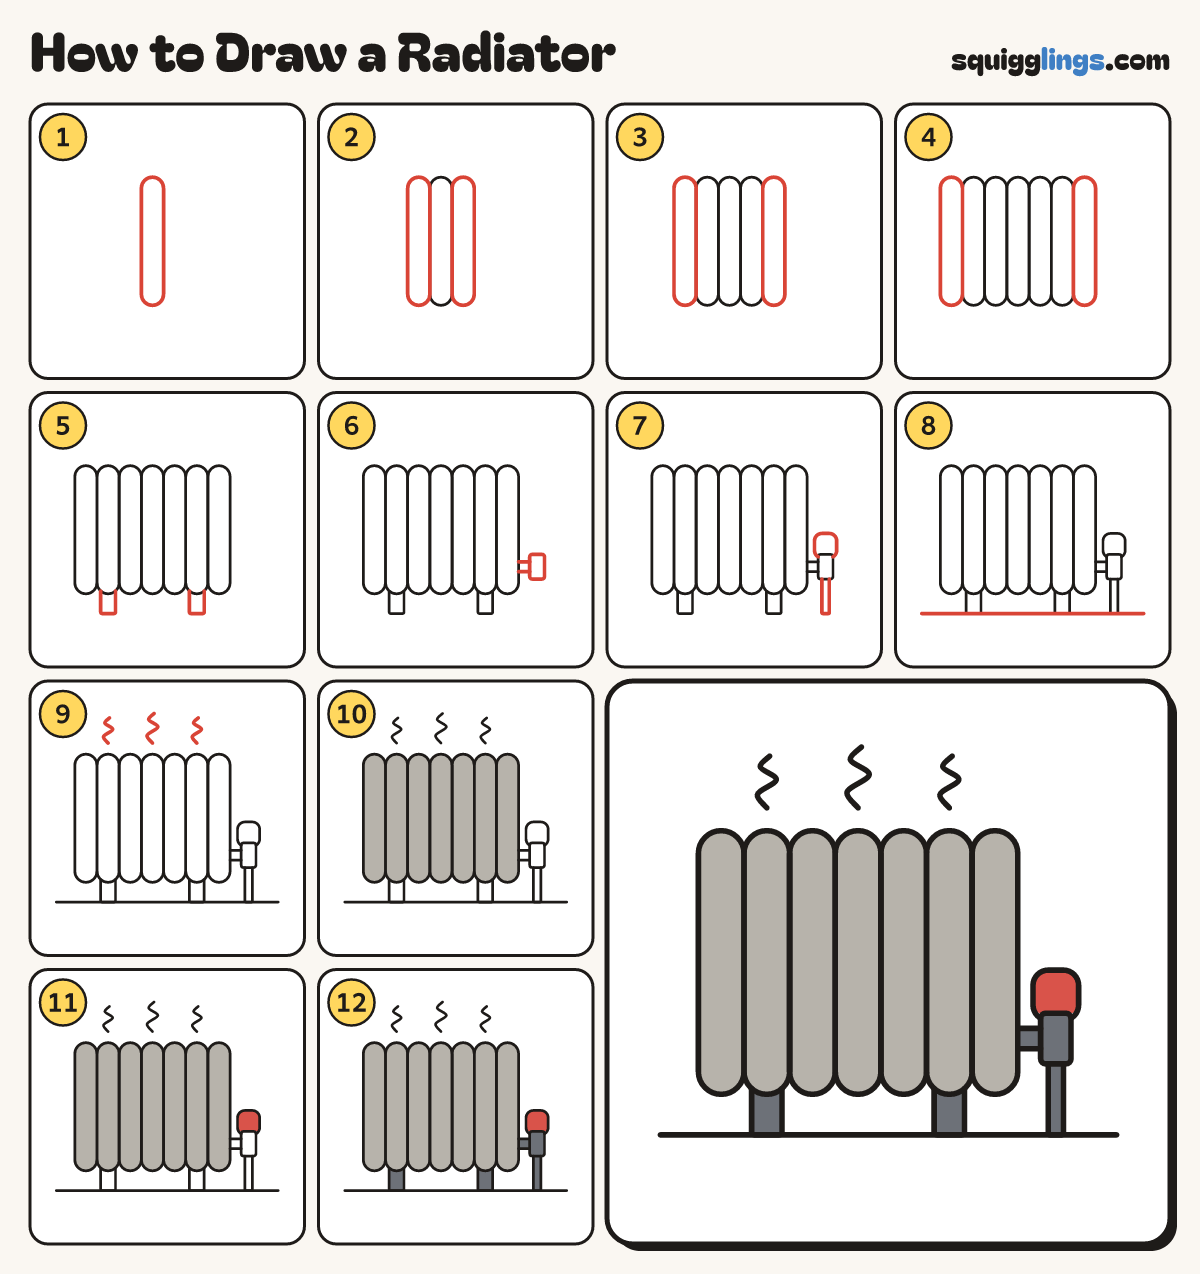
Each picture adds one red line. Draw that line, then scroll to the next picture. Rub out any dashed helper lines at the end. First up: the middle column.
Step 1: The middle column
A little left of the middle draw a tall thin shape with a round top and a round bottom.
Tip Like a very long pill standing up.
Step 2: Two more columns
Draw one more column on each side, the same size, touching the first one.
Step 3: Five columns
Add another column on each side. Now you have 5 in a row.
Tip Keep the tops level, like fence posts.
Step 4: Seven columns
Add the last column on each side. Count them: 7 columns.
Step 5: Two feet
Under the second column from each end draw a small box foot.
Step 6: The valve
Low on the right, start on the last column. Draw 2 short lines. Stop and add a small box.
Tip Hot water flows in through here.
Step 7: Knob and pipe
On top of the small box draw a round knob. Under the box draw a pipe straight down.
Tip The pipe ends level with the feet.
Step 8: The floor
Draw a straight floor line from far left to far right, touching the feet and the pipe.
Step 9: Warm air
Above the radiator draw 3 wiggly lines rising up, the middle one a bit taller.
Step 10: Light grey columns
Go over your lines. Colour all 7 columns light grey.
Step 11: Red knob
Colour the round knob red.
Step 12: Dark grey parts
Colour the feet, the valve and the pipe dark grey. Your radiator is warm!
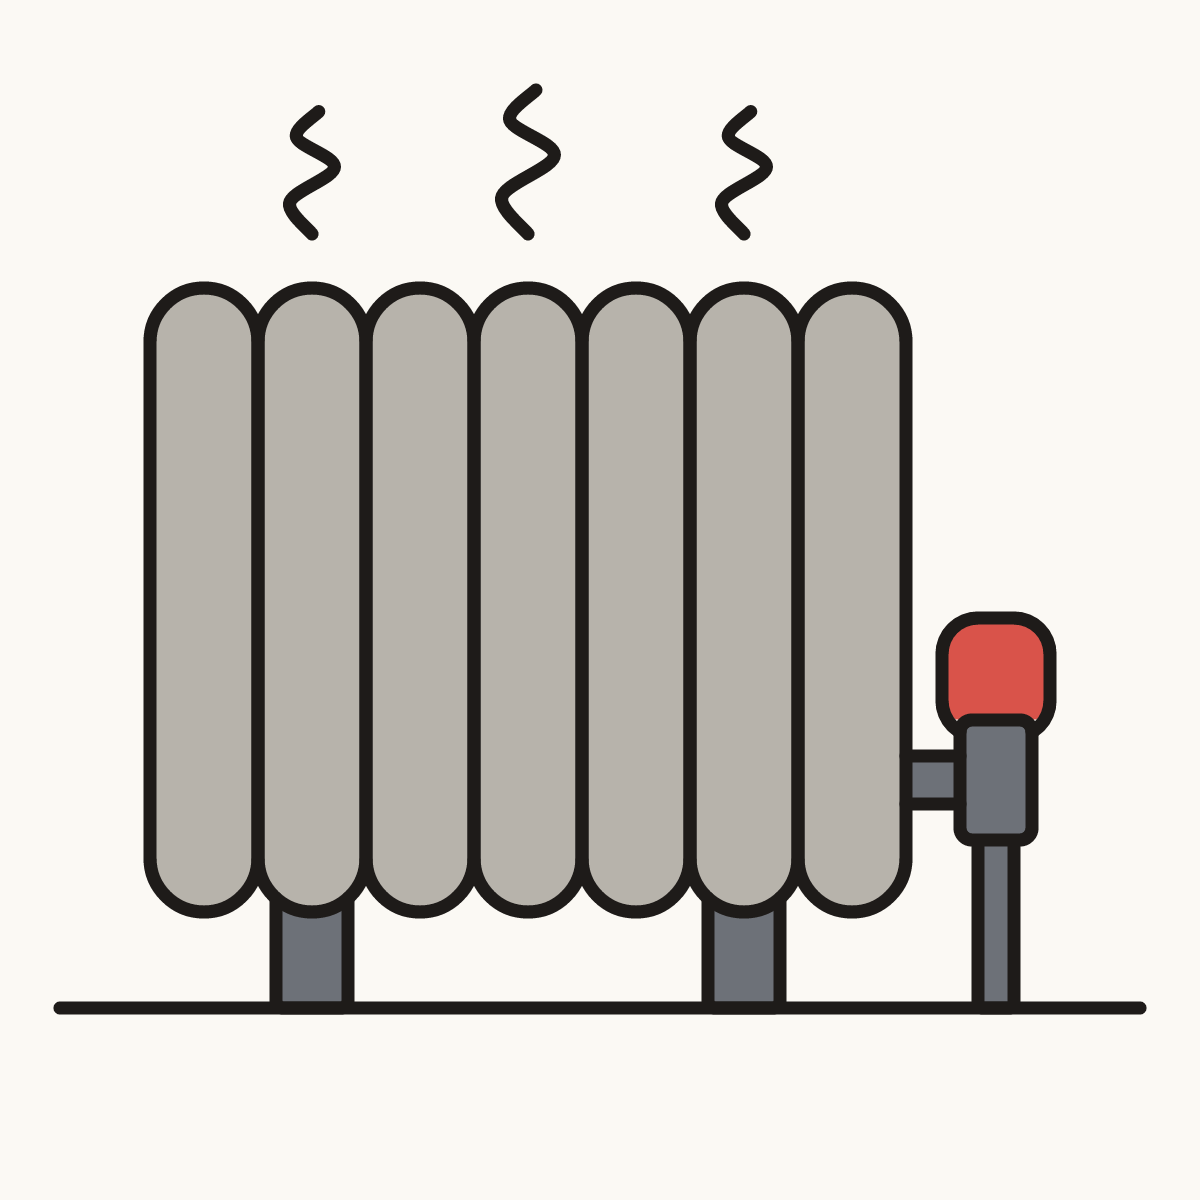
Your finished drawing
Follow the steps above and this is where you end up: a radiator, drawn by you.
Every step in one picture