Watch it draw itself · tap to replay
How to Draw a Pendulum
Draw a pendulum in 12 easy steps, about 9 minutes. Free, with a printable worksheet.
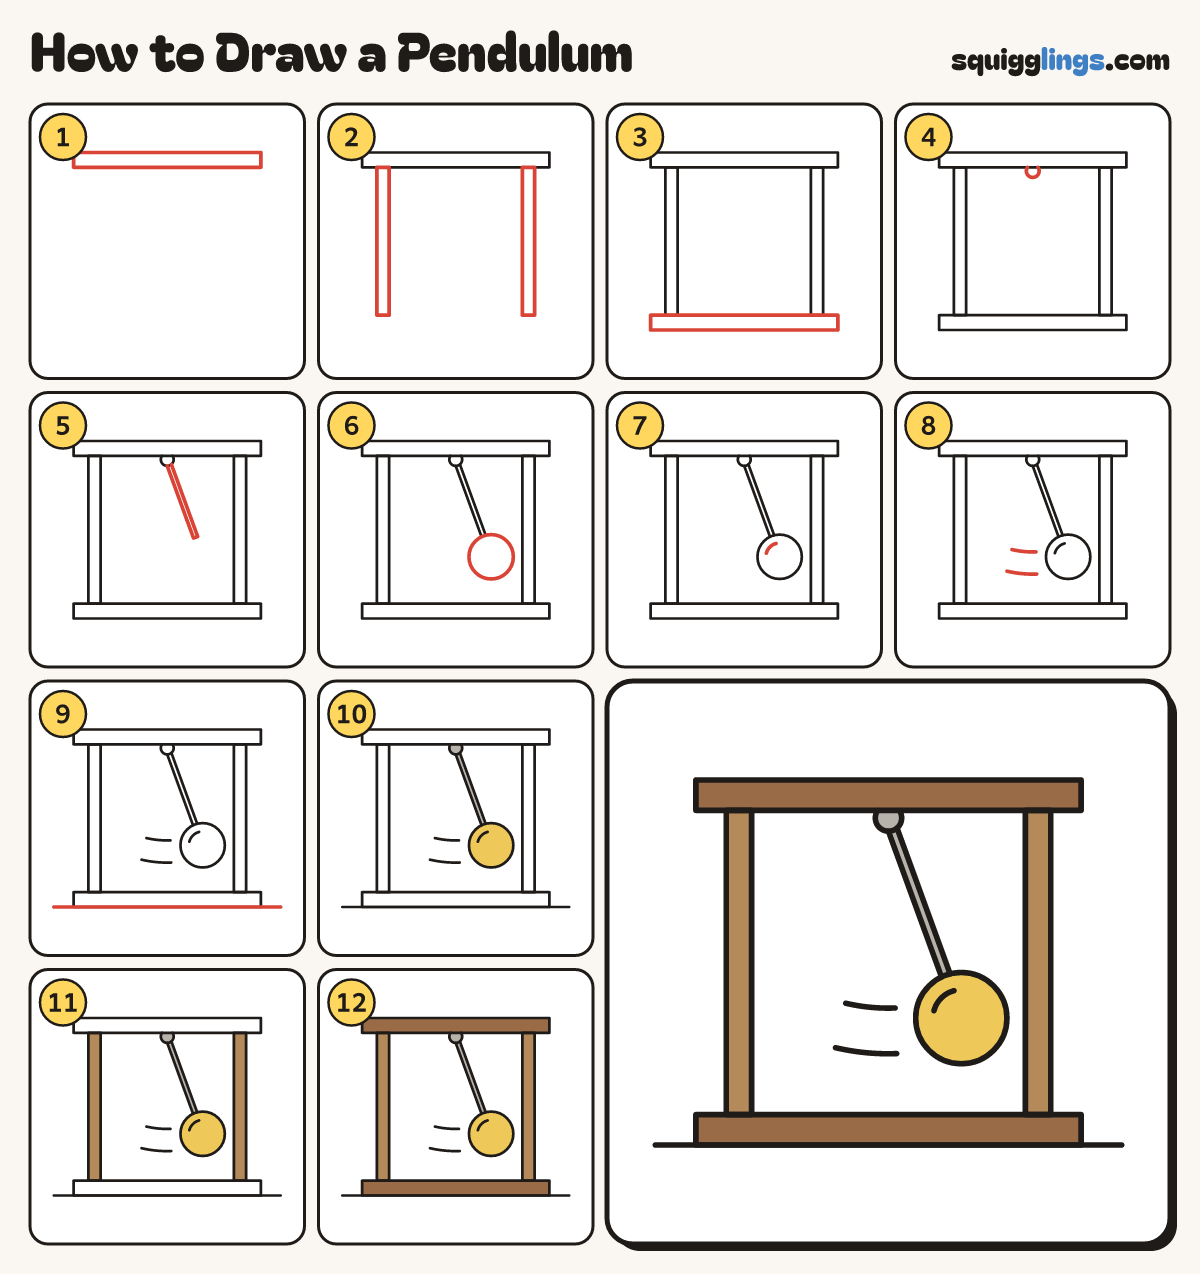
Each picture adds one red line. Draw that line, then scroll to the next picture. Rub out any dashed helper lines at the end. First up: the top bar.
Step 1: The top bar
Near the top draw a long thin box across the page for the top bar.
Step 2: Two posts
Under the bar, near each end, draw a tall thin post straight down. Stop both near the bottom.
Step 3: The base
Under the posts draw a long flat box, as wide as the top bar, for the base.
Step 4: The pivot
Under the middle of the top bar draw a small half circle, like a tiny bowl.
Tip The pivot is the point the pendulum swings from.
Step 5: The rod
From the half circle draw a long thin rod slanting down to the right, past the middle.
Step 6: The heavy ball
On the end of the rod draw a big round ball for the weight.
Tip Keep the ball well clear of the right post so it has room to swing.
Step 7: A shine
Inside the ball, near its top left, draw a short curved shine line.
Step 8: Swing lines
Left of the ball draw 2 short curved lines in the air, to show it swinging.
Step 9: The ground
Draw a ground line under the base, from the far left to the far right.
Step 10: Gold ball, grey rod
Colour the ball yellow like gold, and the rod and the half circle grey.
Step 11: Wooden posts
Colour the 2 tall posts light brown.
Step 12: Dark bars
Go over your lines, then colour the top bar and the base dark brown. Your pendulum is done!
Your finished drawing
Follow the steps above and this is where you end up: a pendulum, drawn by you.
Every step in one picture