Watch it draw itself · tap to replay
How to Draw a Peacock Feather
Draw a peacock feather in 11 easy steps, about 8 minutes. Free, with a printable worksheet.
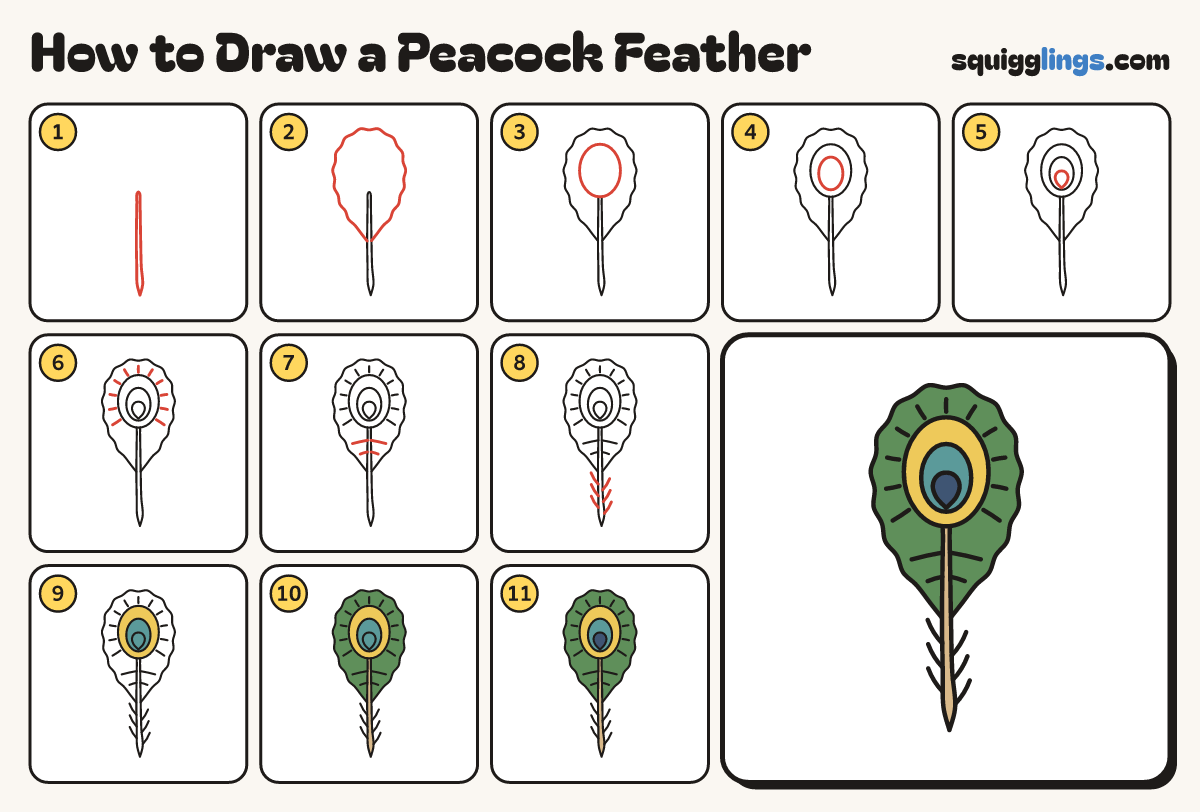
Each picture adds one red line. Draw that line, then scroll to the next picture. Rub out any dashed helper lines at the end. First up: the stem.
Step 1: The stem
Near the bottom, draw a long skinny stem up past the middle. Make it pointy at the bottom.
Step 2: The feather shape
Around the stem top, draw a tall upside-down teardrop with a soft wavy edge, its point on the stem.
Tip Make it much taller than it is wide.
Step 3: The eye
Inside the feather, a little above the middle, draw a tall oval. Keep it a finger inside the edge.
Step 4: Inner eye
Inside the oval, draw a smaller tall oval, a little lower than the middle.
Step 5: The centre
Inside the small oval, draw a little upside-down teardrop. Round on top, pointy at the bottom.
Step 6: Feather lines
Start just outside the eye. Draw short lines out toward the feather edge, all the way round like sun rays.
Tip Stop a little short of the edge.
Step 7: Side lines
Below the eye, start on the stem. Draw 2 lines out on each side, stopping short of the feather edge.
Step 8: Wispy barbs
Draw 3 soft wisps each side of the bare stem. Start on the stem, curl up, stop in the air.
Step 9: Gold and teal eye
Colour the big oval eye gold yellow, then the smaller oval inside it teal.
Step 10: Tan stem, green feather
Colour the stem tan. Then colour the feather shape green, around the eye and the stem.
Step 11: Blue centre
Colour the little teardrop deep blue. Go over your lines and your peacock feather is done!
Your finished drawing
Follow the steps above and this is where you end up: a peacock feather, drawn by you.
Every step in one picture