Watch it draw itself · tap to replay
How to Draw a Parachute
Draw a parachute in 13 easy steps, about 10 minutes. Free, with a printable worksheet.
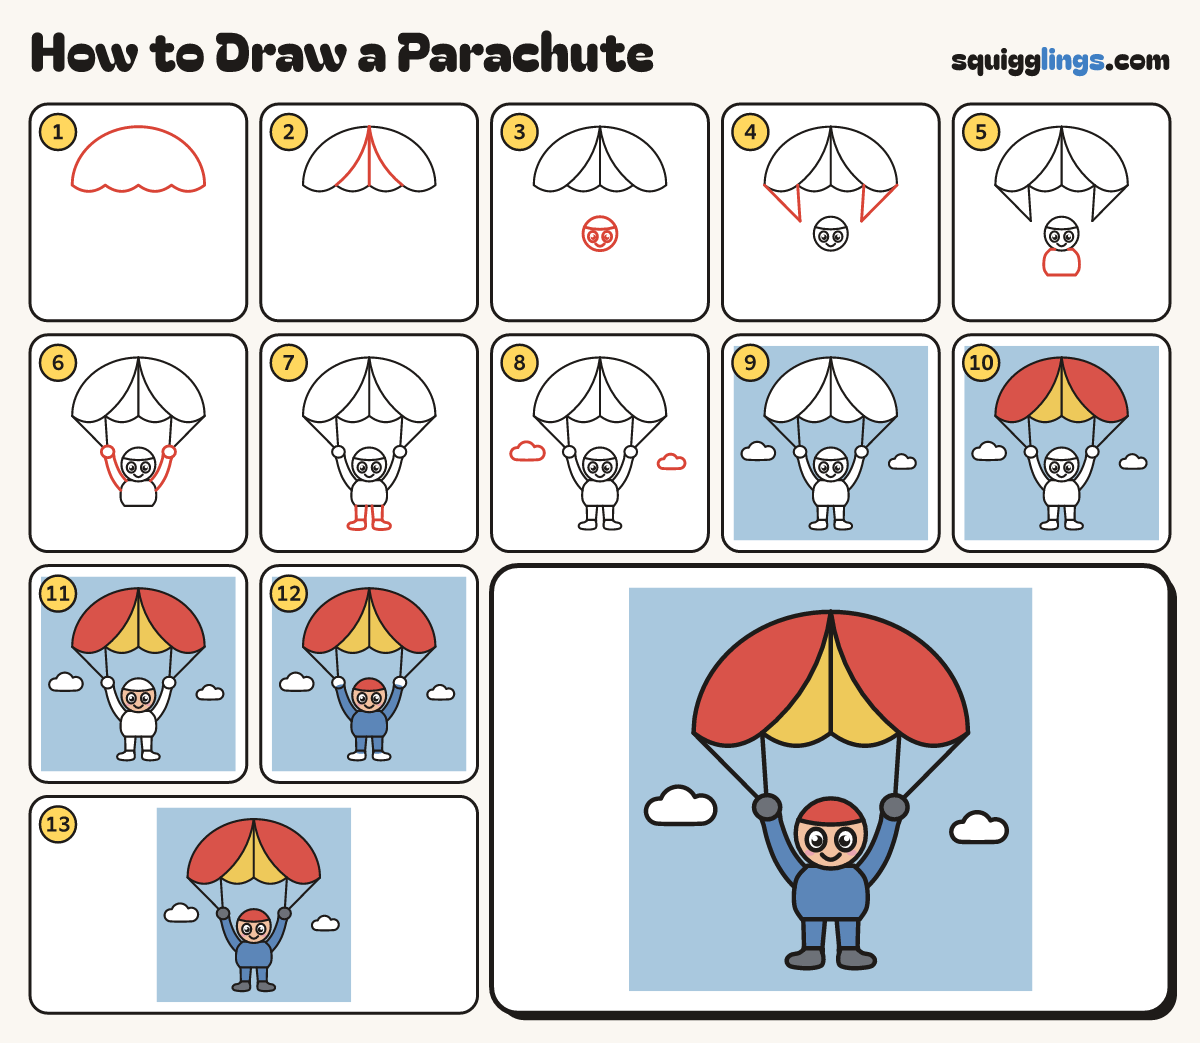
Each picture adds one red line. Draw that line, then scroll to the next picture. Rub out any dashed helper lines at the end. First up: the canopy.
Step 1: The canopy
Near the top, draw a big rainbow dome. Come back along the bottom with 4 round bumps hanging down.
Step 2: Canopy stripes
From the dome top, draw a line down to the middle dip, and a curve down to each outer dip.
Step 3: Helmet and face
Below the canopy, leaving a gap, draw a round head. Add a helmet line, 2 eyes and a smile.
Step 4: Four strings
From each canopy end and the 2 outside dips, draw a straight string down. Pairs meet beside the head.
Step 5: The body
Under the head, draw a soft rounded body, a little wider at the bottom.
Step 6: Arms up
From each shoulder, draw a bent arm reaching up to where the strings meet. Add a round glove holding them.
Step 7: Legs and boots
Under the body, draw 2 short legs a finger apart, with a little boot on each, toes pointing out.
Step 8: Two clouds
Left of the pilot, draw a puffy cloud with 3 bumps and a flat bottom. Add a smaller one right.
Step 9: Blue sky
Colour the sky light blue all around the canopy, strings and pilot. Leave the 2 clouds white.
Step 10: Red and yellow panels
Colour the 2 outside panels of the canopy red and the 2 middle panels yellow.
Step 11: Peach face
Colour the face under the helmet line peach and add 2 pink cheeks. Leave the eyes white.
Step 12: Red helmet, blue suit
Colour the helmet red. Colour the body, arms and legs blue.
Step 13: Grey gloves and boots
Go over your lines. Colour the 2 gloves and the 2 boots dark grey, and your parachute is done.
Your finished drawing
Follow the steps above and this is where you end up: a parachute, drawn by you.
Every step in one picture