Watch it draw itself · tap to replay
How to Draw a Paper Airplane
Draw a paper airplane in 10 easy steps, about 8 minutes. Free, with a printable worksheet.
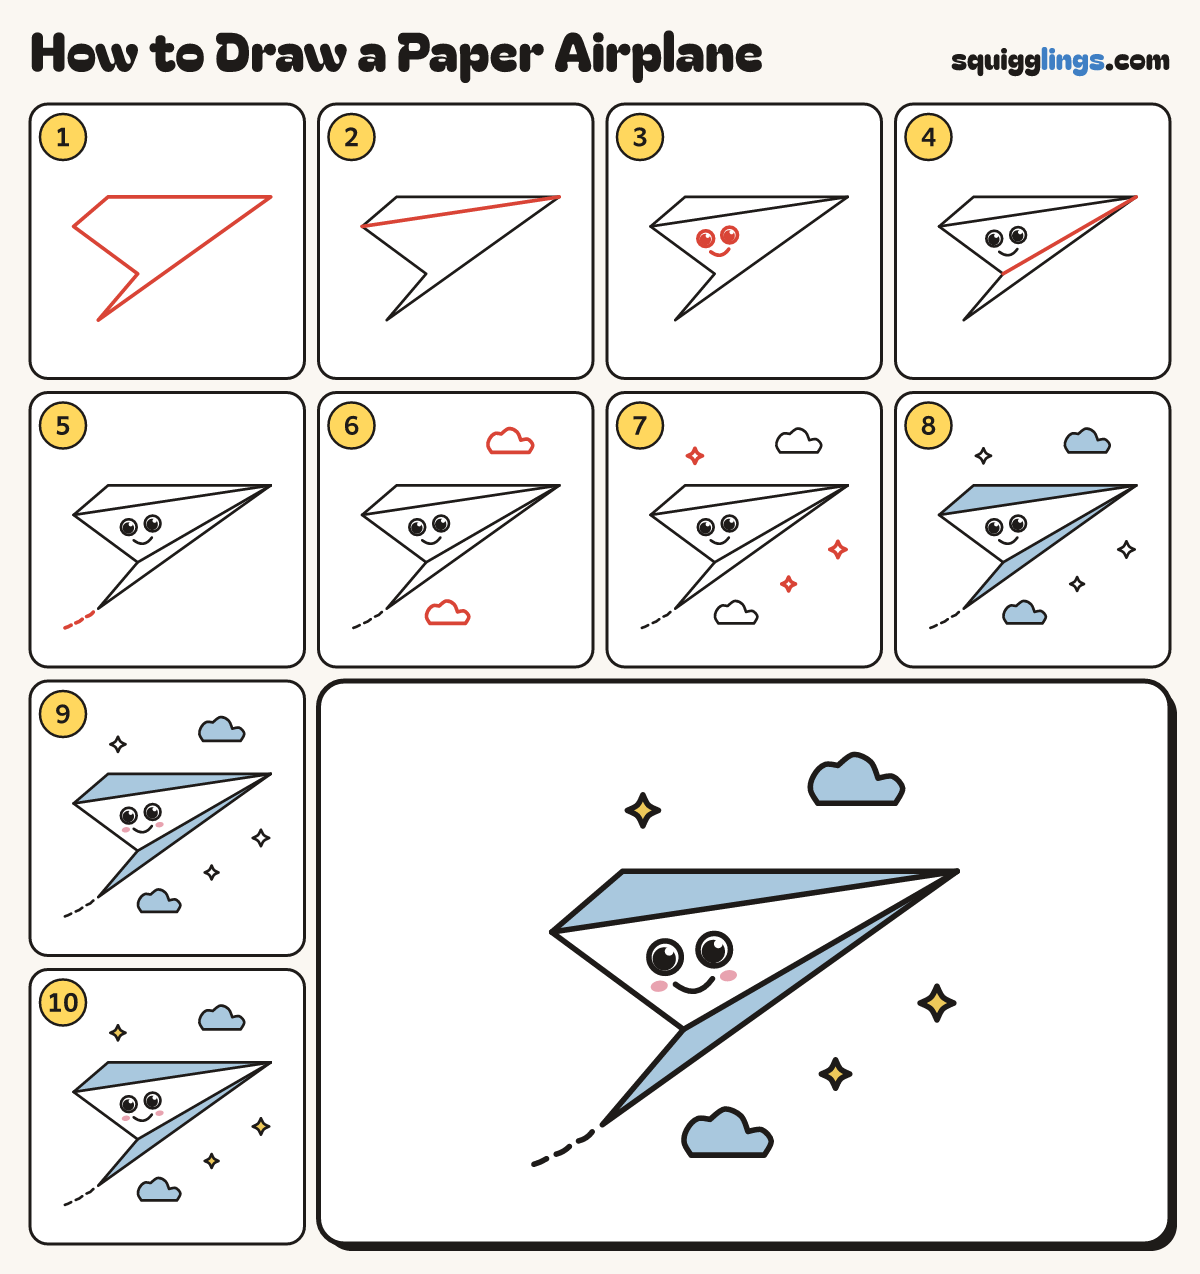
Each picture adds one red line. Draw that line, then scroll to the next picture. Rub out any dashed helper lines at the end. First up: the paper dart.
Step 1: The paper dart
Start at the sharp nose on the right. Draw a long dart of 5 straight lines, back to the nose.
Tip All corners, no curves. The wing tip sticks out at the back.
Step 2: The near wing
Rule 1 straight line from the nose back to the wing tip. That splits the 2 wings.
Step 3: A happy face
On the near wing, draw 2 round eyes with black dots. Smile: start under one eye, end under the other.
Tip Leave a small gap between the eyes, and a white shine in each black dot.
Step 4: The fold
Rule 1 straight line from the nose back to the middle corner at the back. That is the fold.
Step 5: The trail
Behind the tail corner, draw 3 short dashes curving down and away. That is the path it just flew.
Step 6: Clouds
Draw a cloud top right and one below the plane: 3 round bumps on a flat bottom.
Step 7: Sparkles
Draw 3 small sparkle stars around the plane, like plus signs with curvy sides pinched in the middle.
Step 8: Sky blue
Colour the far wing, the underside and both clouds sky blue. Leave the near wing and eyes white.
Step 9: Pink cheeks
Colour 2 small pink cheeks, one either side of the smile.
Step 10: Yellow stars
Colour the sparkle stars yellow. Go over your lines and your paper airplane is done!
Your finished drawing
Follow the steps above and this is where you end up: a paper airplane, drawn by you.
Every step in one picture