Watch it draw itself · tap to replay
How to Draw a Palm Tree
Draw a palm tree in 10 easy steps, about 8 minutes. Free, with a printable worksheet.
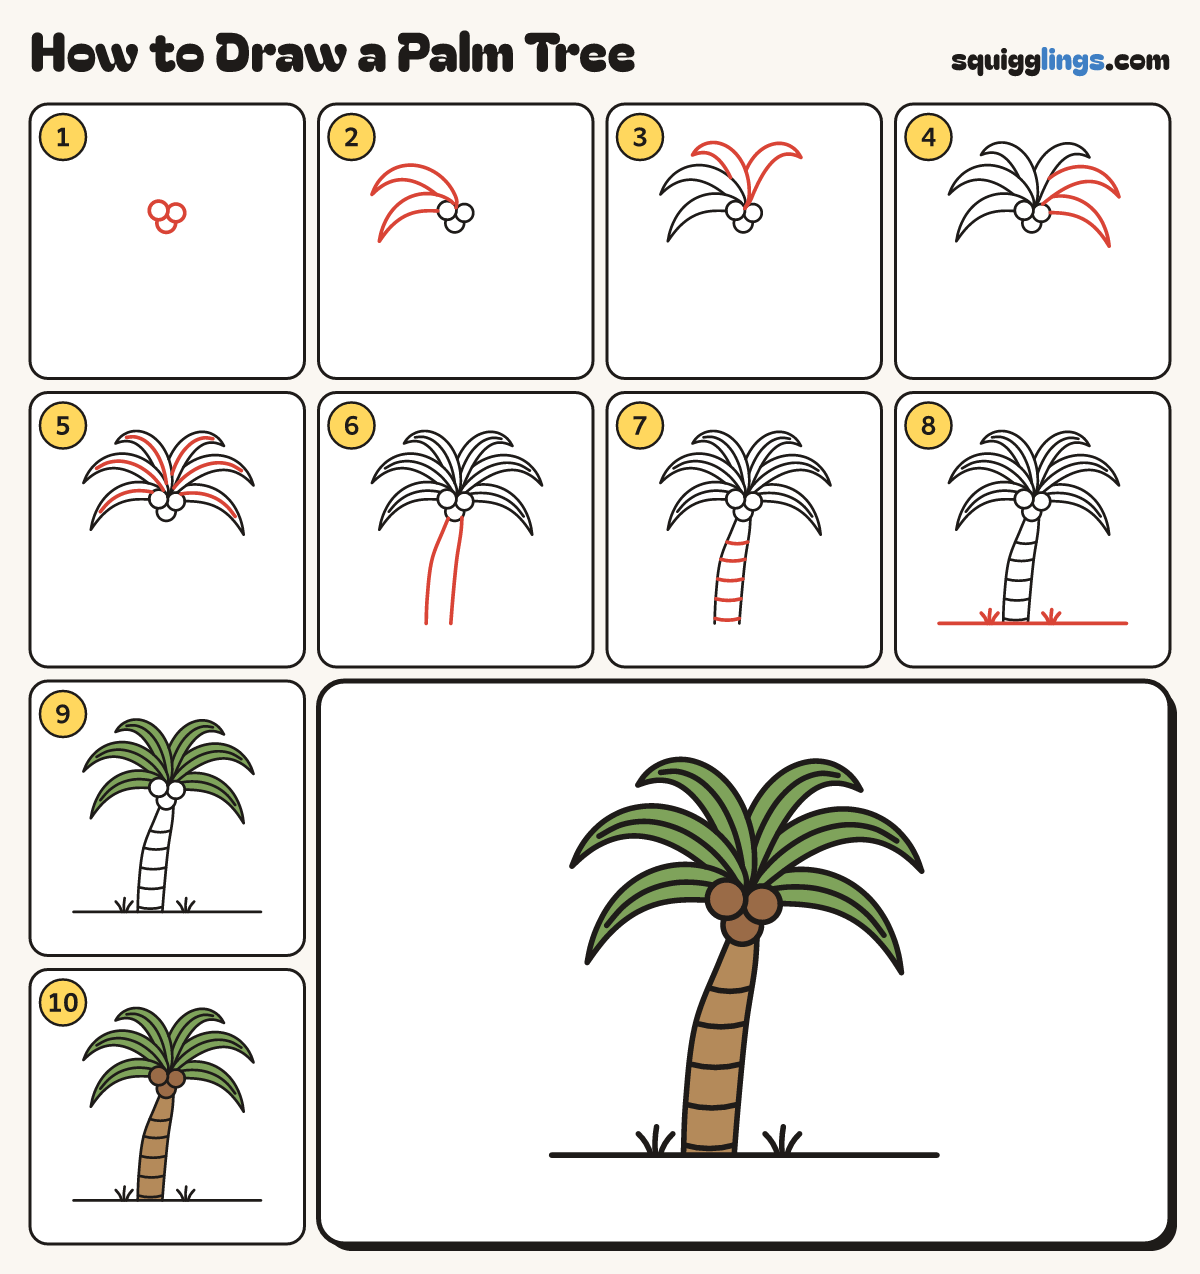
Each picture adds one red line. Draw that line, then scroll to the next picture. Rub out any dashed helper lines at the end. First up: three coconuts.
Step 1: Three coconuts
Above the middle of your paper, draw 3 coconuts in a bunch: 2 side by side, one lower in front.
Step 2: Two fronds
From the coconuts, draw a long leaf drooping down to the left, and one arching up over to the left.
Tip Each leaf rises a little, then bends and droops at its pointy tip.
Step 3: Two more fronds
From the top of the coconuts, draw 2 leaves arching up and over, one bending left, one bending right.
Step 4: The last two fronds
From the coconuts, draw one more leaf arching out to the right, and one drooping down below it.
Tip Now 6 fronds fan out from the coconuts.
Step 5: Midribs
Inside each frond, draw one curved line down the middle, from near the coconuts to just short of the tip.
Step 6: The trunk
Start low on the left. Draw 2 trunk lines curving up to the right until they reach the coconuts.
Tip The trunk gets narrower as it climbs.
Step 7: Trunk rings
Draw a short sagging curve across the trunk near the bottom. Repeat every finger-width up to the coconuts.
Step 8: Ground and grass
Draw a long ground line through the bottom of the trunk. Add a 3-blade grass tuft on each side.
Step 9: Green fronds
Colour all six fronds leaf green, right up to their pointy tips.
Step 10: Wood trunk, brown coconuts
Colour the trunk wood brown, stopping at the coconuts, and the coconuts a darker brown. Go over your lines!
Your finished drawing
Follow the steps above and this is where you end up: a palm tree, drawn by you.
Every step in one picture