Watch it draw itself · tap to replay
How to Draw an Okapi
Draw an okapi in 18 steps, about 14 minutes. Free, with a printable worksheet.
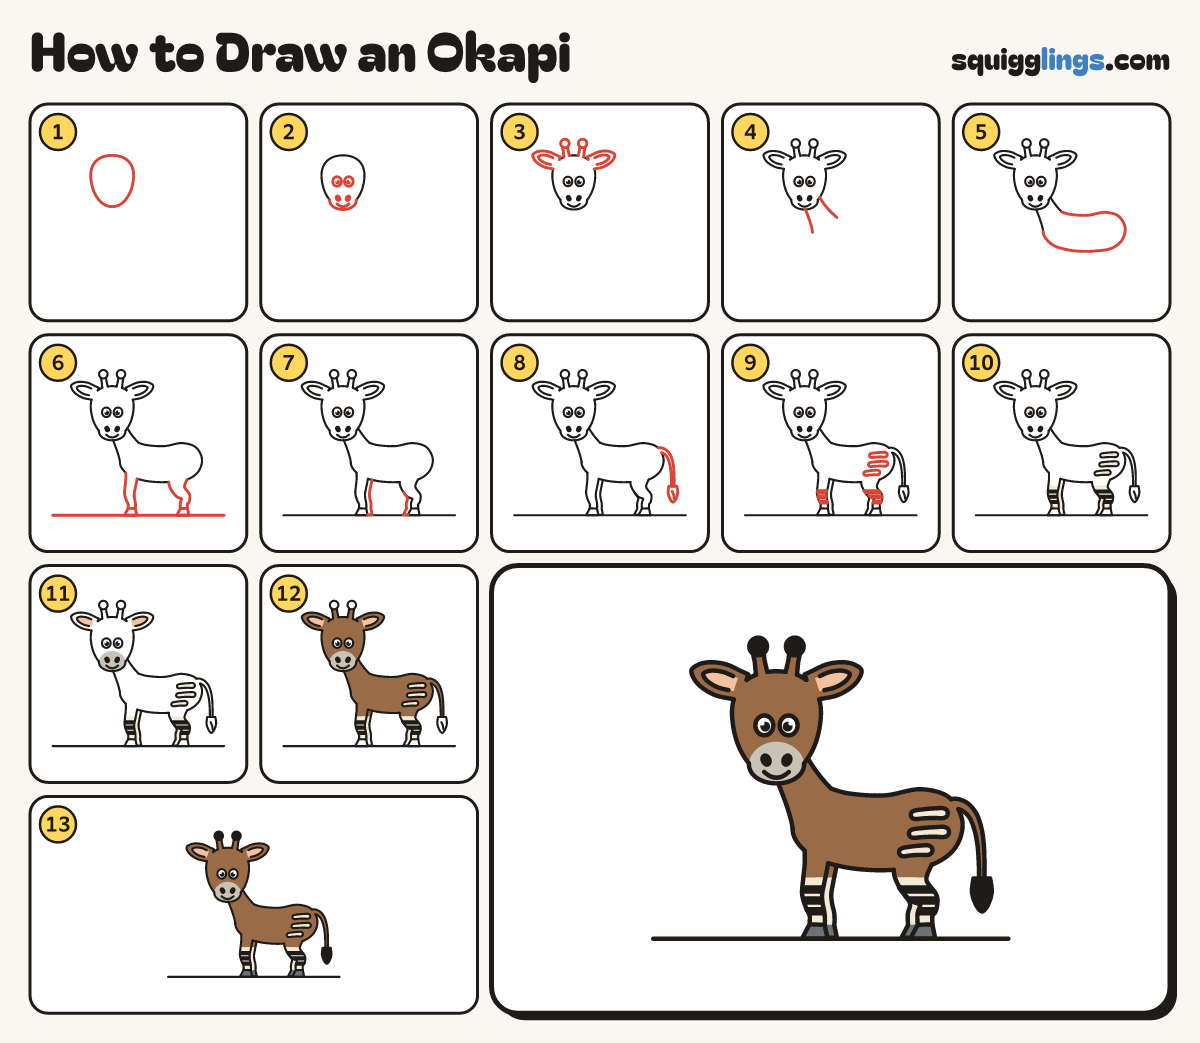
Each picture adds one red line. Draw that line, then scroll to the next picture. Rub out any dashed helper lines at the end. First up: soft egg head.
Step 1: Soft egg head
Near the top left draw a big egg head, wider at the top. Leave a little room above for horns.
Tip The head is big: nearly half as long as the body.
Step 2: Big leaf ears
On each side of the head draw a big leaf ear pointing out and up, with a small leaf inside.
Tip The left ear is a little smaller.
Step 3: Big eyes
On the middle of the head, a little to the left, draw 2 big oval eyes with black dots.
Tip Leave a tiny white shine in each eye.
Step 4: Snout and smile
Under the left eye draw a snout poking past the head. From its nose draw down, stopping at a smile.
Tip Colour the nose black. Rub out the head line inside the snout.
Step 5: Two short horns
On top of the head draw 2 short horns with round knobs on top. They lean apart a little.
Step 6: Long neck and back
Start below the right ear. Draw a long sloping neck and back, stopping half way round the bottom.
Tip The back keeps sloping down, all the way to the bottom.
Step 7: Front leg
Draw a ground line. From under the chin, draw the chest and a leg down to a hoof, then up.
Tip The leg is wide at the top and thin lower down.
Step 8: Tummy and back leg
From the front leg draw the tummy. Then a round thigh down to a hoof and up to the bottom.
Tip The back leg bends back half way down.
Step 9: Far legs
Under the tummy draw 2 more slim legs peeking out, one behind each leg you drew.
Tip All 4 hooves stand on the ground line.
Step 10: Four hooves
Draw a short curved line across each leg, just above the ground, to make 4 hooves.
Step 11: Tail and tuft
On the bottom draw a thin tail hanging down to a leaf-shaped tuft. Add a short line across the tail.
Step 12: Rump stripes
Draw 3 stripes on the bottom and back leg. Each starts on the back edge and narrows to a round point.
Tip Stripes on its bottom are what make it an okapi.
Step 13: Front leg stripes
Draw 2 short stripes on the front leg. They start on the front edge and point to the right.
Step 14: Four socks
Draw a short curved line across each leg, half way between the tummy and the hoof.
Step 15: Cream stripes and socks
Colour the 5 stripes and the 4 socks cream.
Step 16: Ears and snout
Colour the inside of each ear peach and the snout light grey.
Step 17: Brown coat
Colour the okapi brown, around the stripes, socks, snout and ear middles. Leave the horns, tuft, hooves and eyes white.
Step 18: Black and grey
Colour the 2 horns and the tail tuft black and the 4 hooves dark grey. Your okapi is done!
Your finished drawing
Follow the steps above and this is where you end up: an okapi, drawn by you.
Every step in one picture