Watch it draw itself · tap to replay
How to Draw a Maze
Draw a maze in 11 easy steps, about 8 minutes. Free, with a printable worksheet.
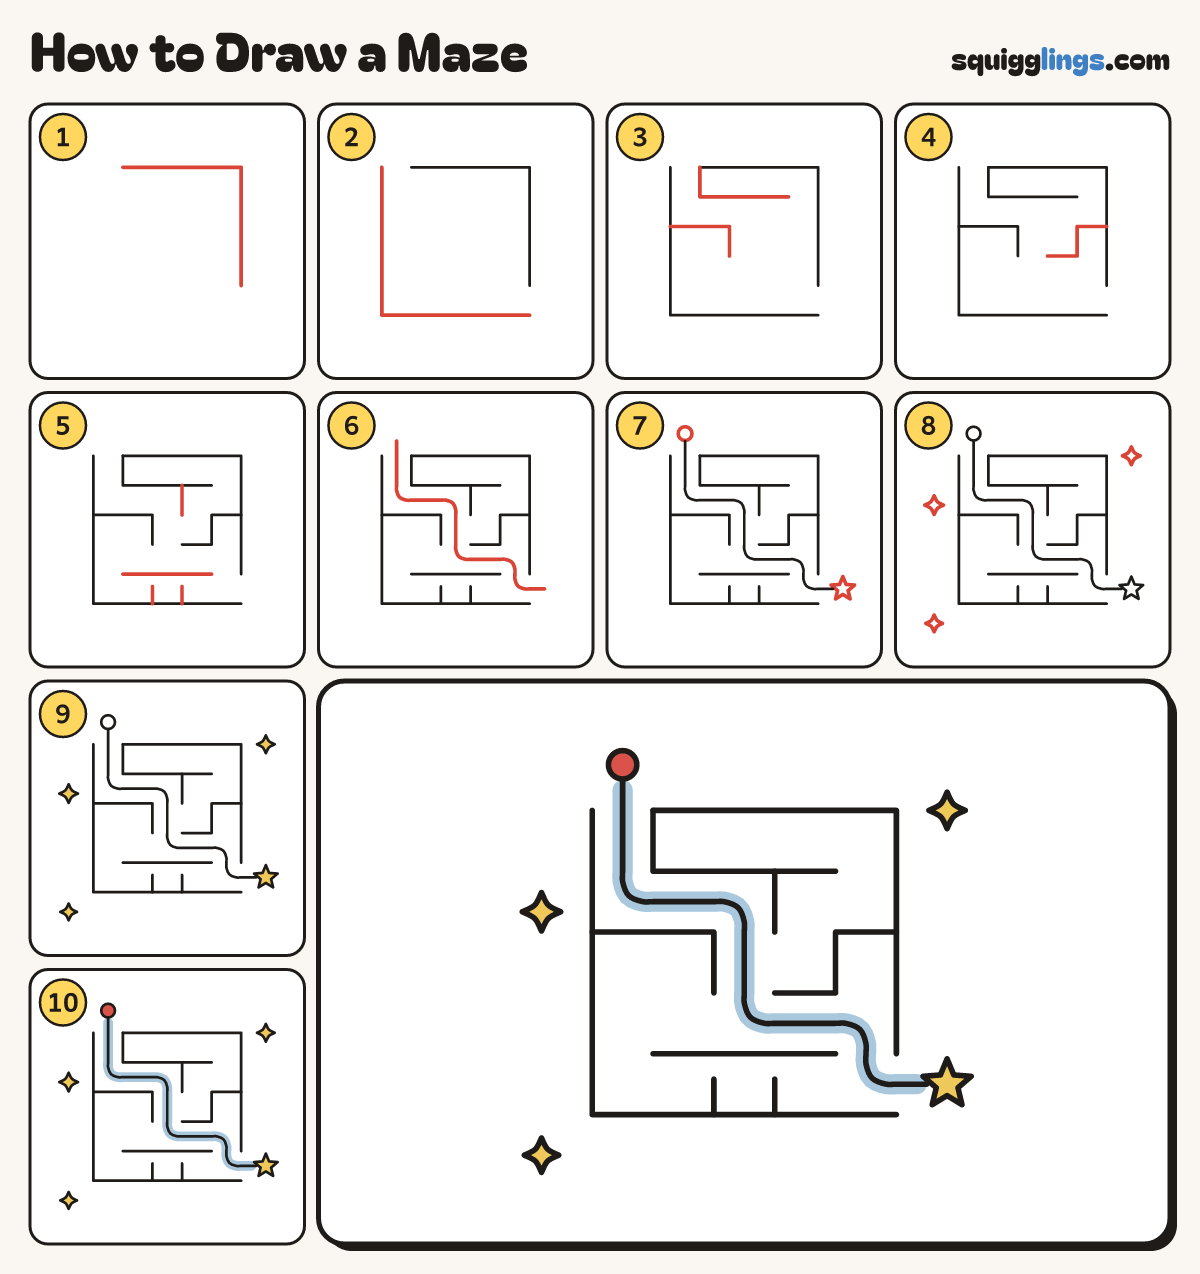
Each picture adds one red line. Draw that line, then scroll to the next picture. Rub out any dashed helper lines at the end. First up: top and right walls.
Step 1: Top and right walls
Start a little in from the top-left corner. Draw across to the top-right, then down, stopping before the bottom.
Step 2: Left and bottom walls
Start at the top-left corner. Draw down to the bottom-left, then across to the bottom-right. Leave both gaps open.
Step 3: A wall from the top
Start on the top wall past the gap. Draw down a step, left a step, far down, then right.
Tip One step is as wide as the gap. Keep every hallway that wide.
Step 4: A tall hairpin
Start on the bottom wall. Draw far up, a step left, far back down, then a step left.
Step 5: 2 branch walls
Add 2 walls to the hairpin: an L on the left near the top, a line right from the middle.
Step 6: A hook wall
Start on the top wall near the right. Draw down 2 steps, right a step, then up a step.
Step 7: Side walls
Draw 3 walls in from the right wall, the middle one turning down, and a short one from the left.
Step 8: Start and finish
Above the top gap draw a round dot for the start. Outside the right gap draw a 5-pointed star.
Step 9: Sparkles
Draw 3 sparkle stars around the maze: 4 dots like a plus sign joined by curves that dip in.
Step 10: Yellow star and sparkles
Go over your lines. Colour the star and the 3 sparkles yellow.
Step 11: Blue path, red start
Colour a blue path from the dot through the maze to the star. Colour the dot red.
Tip Your path never crosses a wall.
Your finished drawing
Follow the steps above and this is where you end up: a maze, drawn by you.
Every step in one picture