Watch it draw itself · tap to replay
How to Draw a Macaron
Draw a macaron in 10 easy steps, about 8 minutes. Free, with a printable worksheet.
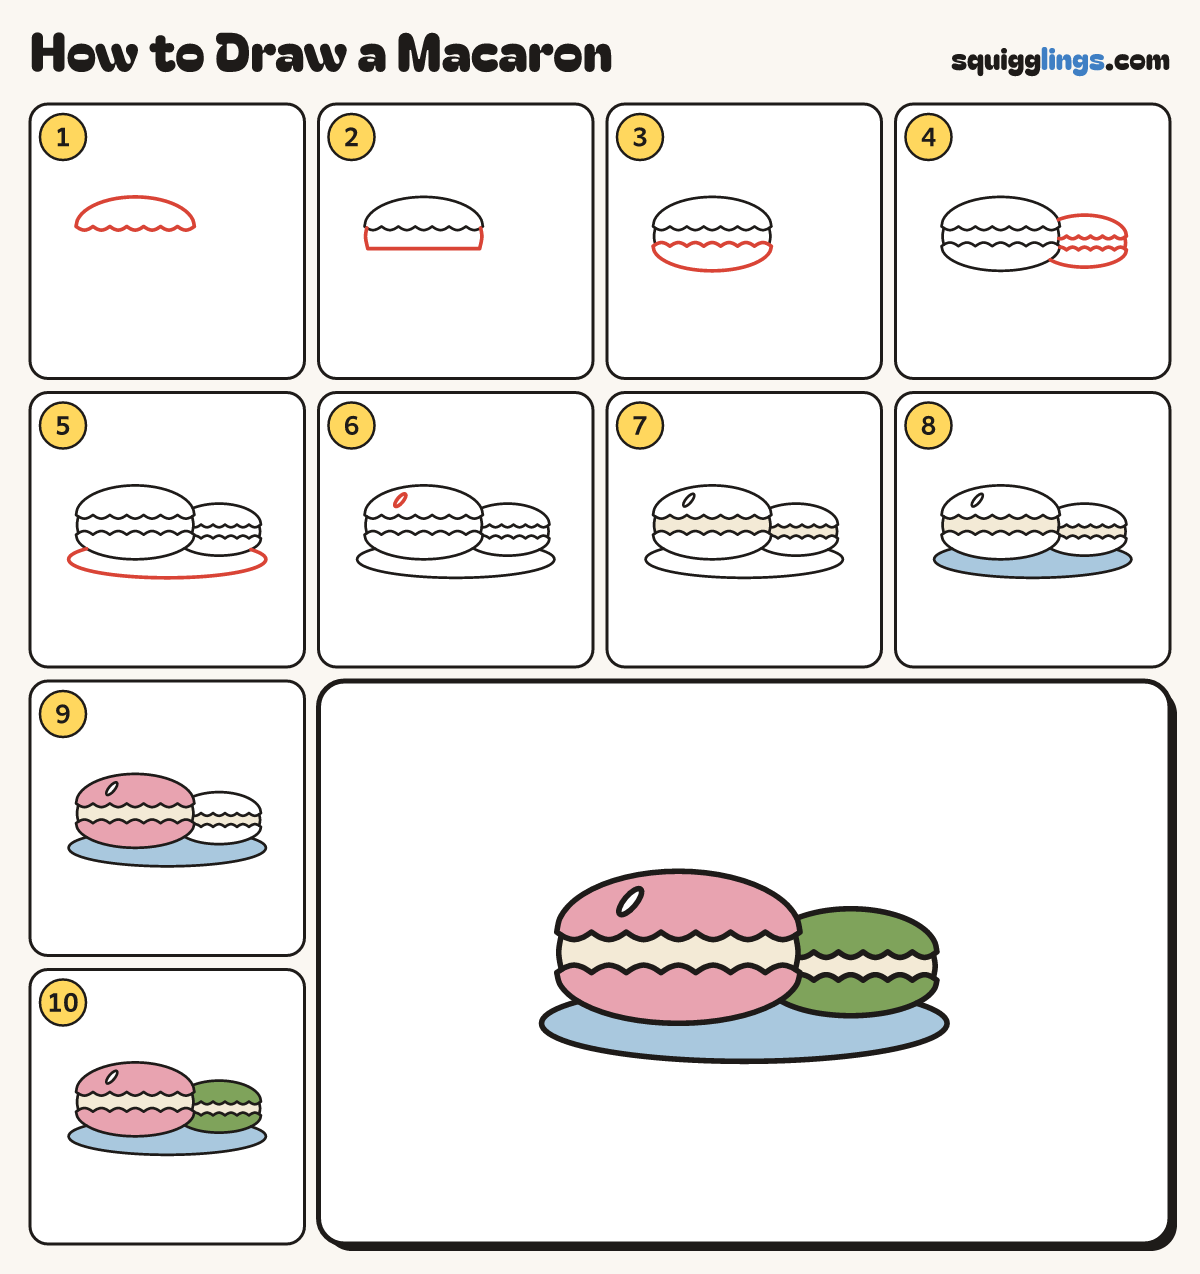
Each picture adds one red line. Draw that line, then scroll to the next picture. Rub out any dashed helper lines at the end. First up: the top shell.
Step 1: The top shell
Left of the middle draw a low wide dome, with tiny lace bumps along its flat bottom.
Tip Keep it low, like a gentle hill: much wider than tall.
Step 2: The filling
Under the dome draw a fat filling with rounded ends, a little narrower than the frilly edge.
Step 3: The bottom shell
Under the filling draw the dome again upside down, with its frilly bumps along the top.
Tip 2 frilly shells make a sandwich.
Step 4: A second macaron
To the right draw a smaller macaron the same way, tucked behind. Start and stop where it meets the first.
Step 5: The plate
Start on the left, level with the big macaron's bottom. Draw a flat oval plate behind both.
Step 6: A shine
On the big top shell, near its top left, draw a small tilted oval for a shine.
Step 7: Cream fillings
Go over your lines, then colour both fillings cream.
Step 8: Sky plate
Colour the plate sky blue around the macarons.
Step 9: Pink shells
Colour the 2 shells of the big macaron pink, leaving the shine white.
Step 10: Green shells
Colour the shells of the small macaron leaf green.
Your finished drawing
Follow the steps above and this is where you end up: a macaron, drawn by you.
Every step in one picture