Watch it draw itself · tap to replay
How to Draw a Leopard
Draw a leopard in 13 steps, about 10 minutes. Free, with a printable worksheet.
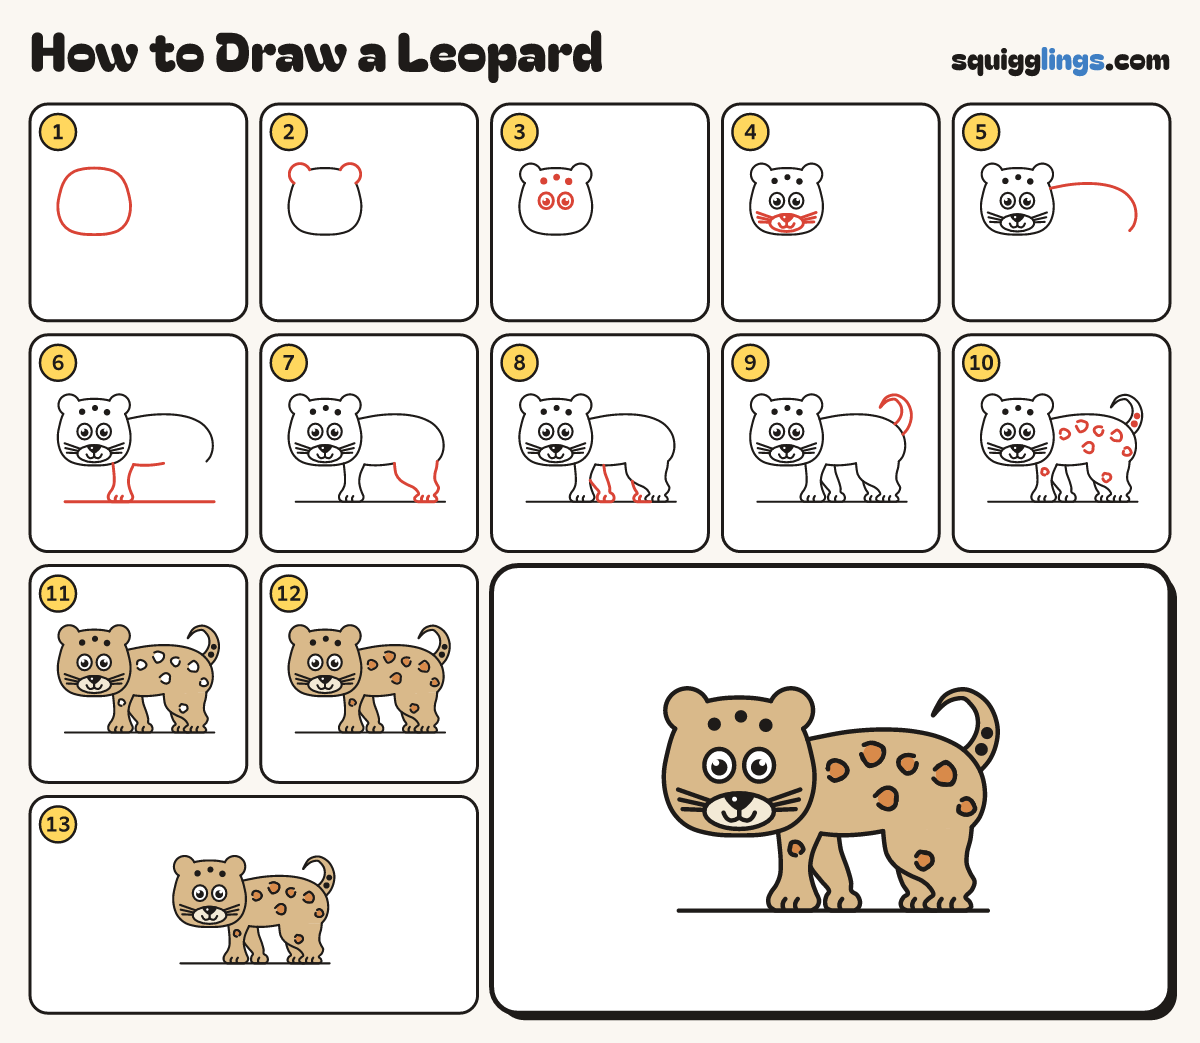
Each picture adds one red line. Draw that line, then scroll to the next picture. Rub out any dashed helper lines at the end. First up: wide head.
Step 1: Wide head
On the left, draw a big wide head with a flat top and round chin, wider than it is tall.
Tip The head is almost half the leopard. Leave room for the body.
Step 2: Round ears
Draw a round ear on each top corner, from the head back to the head.
Tip Round like half a cookie, not pointy. Rub out the head line inside the ear.
Step 3: Eyes and spots
In the middle of the head, draw 2 big egg eyes with black dots. Dot 3 spots across the forehead.
Tip Leave a tiny white shine in each eye.
Step 4: Nose and whiskers
Under the eyes, draw an oval, black nose and w smile. Whiskers start on the oval, stopping inside the head.
Tip 3 whiskers a side, fanned like fingers. Keep them off the head line.
Step 5: The back
Start behind the head. Draw a long gentle back, round a big bottom, and stop level with the chin.
Tip Keep the back high and nearly flat: a leopard is long and sleek.
Step 6: Front leg and tummy
From the chin, draw a long leg down to a paw, then along the tummy, stopping halfway along the body.
Tip Rule a ground line low on the page first. The tummy stays high: leopard legs are long.
Step 7: Back leg
Start where the tummy stopped. Draw a thigh, a long leg down to a paw, and up to the bottom.
Tip The thigh is a big round drumstick. The paw is wider than the leg.
Step 8: Far legs
Draw 2 far legs: from the front leg back to a small paw, and from the thigh to a paw.
Tip Only draw the parts you can see. 2 paws in front, 2 behind.
Step 9: Long tail
Start on top of the bottom. Draw a thick tail curling up toward the head, then down to the bottom.
Tip Thick at the root, thin at the tip. Keep the curl off the back.
Step 10: Leopard spots
Draw 8 wobbly broken rings: 6 on the body, 1 on each near leg. Dot 2 spots on the tail.
Tip Rings are Cs that almost close, all different sizes. Leave the tummy plain.
Step 11: Tan fur
Colour the muzzle cream. Colour the rest tan, leaving the ring middles white. Leave the eyes white.
Step 12: Ginger middles
Colour the middle of each broken ring ginger, right up to the ring.
Step 13: Black rings
Colour each broken ring black, pressing hard over your pencil line.
Your finished drawing
Follow the steps above and this is where you end up: a leopard, drawn by you.
Every step in one picture