Watch it draw itself · tap to replay
How to Draw a Kid on Scooter
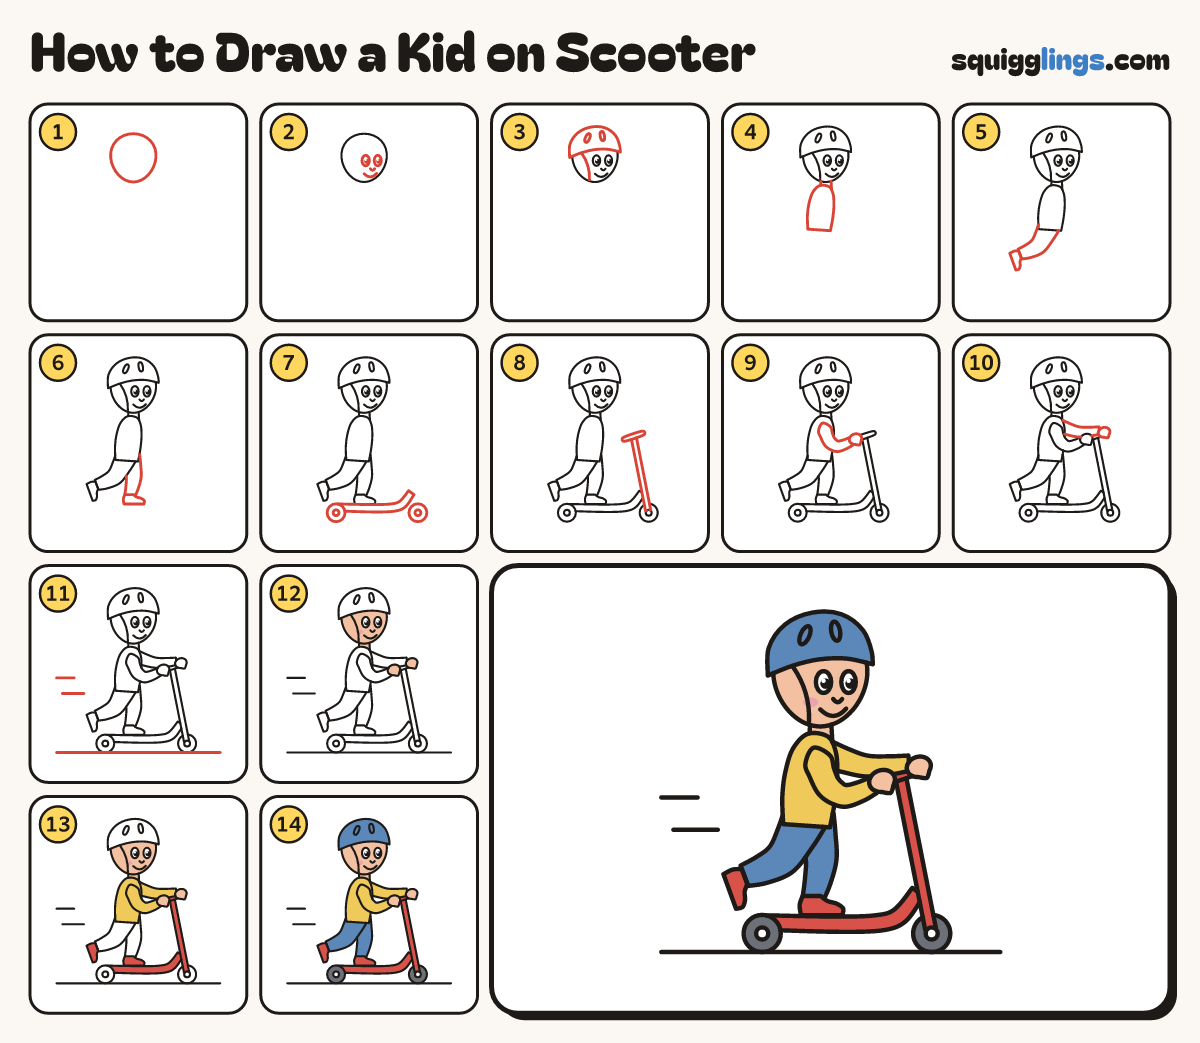
Draw a kid on scooter in 14 easy steps, about 11 minutes. Free, with a printable worksheet.
Each picture adds one red line. Draw that line, then scroll to the next picture. Rub out any dashed helper lines at the end. First up: egg head.
Step 1: Egg head
Near the top of your paper draw an egg head, a little narrower at the chin.
Tip Leave lots of room below for the body and the scooter.
Step 2: The face
On the right half of the head draw 2 oval eyes with black dots, a tiny nose and a smile.
Tip The face sits to the right because the kid is riding that way.
Step 3: Helmet
Draw a helmet over the top of the head. Add 2 air slots and a chin strap.
Tip The helmet is a bit bigger than the head.
Step 4: Neck and body
Draw a short neck. Under it draw a narrow bean body with a flat bottom.
Tip From the side a body is narrower than the head.
Step 5: Pushing leg
From the bottom of the body draw a leg bending back at the knee. Add a shoe, toe pointing down.
Tip This leg has just pushed off the ground.
Step 6: Standing leg
Draw the other leg straight down from behind the first. Give it a flat shoe pointing right.
Tip Legs are wide at the top and thin at the ankle.
Step 7: Deck and wheels
Under the flat shoe draw a long thin deck that climbs at the front. Add a wheel at each end.
Tip Put a little circle in the middle of each wheel.
Step 8: Stem and handlebar
From the front wheel draw a tall thin stem up to chest height. Cross its top with a short handlebar.
Tip Lean the stem back a little, towards the kid.
Step 9: Near arm
From the shoulder draw an arm bending forward. End it in a round hand on the handlebar's near end.
Tip Rub out the body line inside the arm.
Step 10: Far arm
Draw the other arm peeking out above the first. Its hand holds the far end of the handlebar.
Step 11: Ground and speed
Draw a long ground line under both wheels. Add 2 short speed lines behind the kid.
Step 12: Peach skin, pink cheek
Colour a pink cheek. Colour the face, neck and both hands peach. Leave the eyes white.
Step 13: Yellow top, red scooter
Colour the top and both sleeves yellow. Colour the shoes, deck, stem and handlebar red.
Step 14: Blue and dark grey
Colour the helmet and trousers blue. Colour both tyres dark grey, leaving their middles white.
Tip Go over your lines to finish.
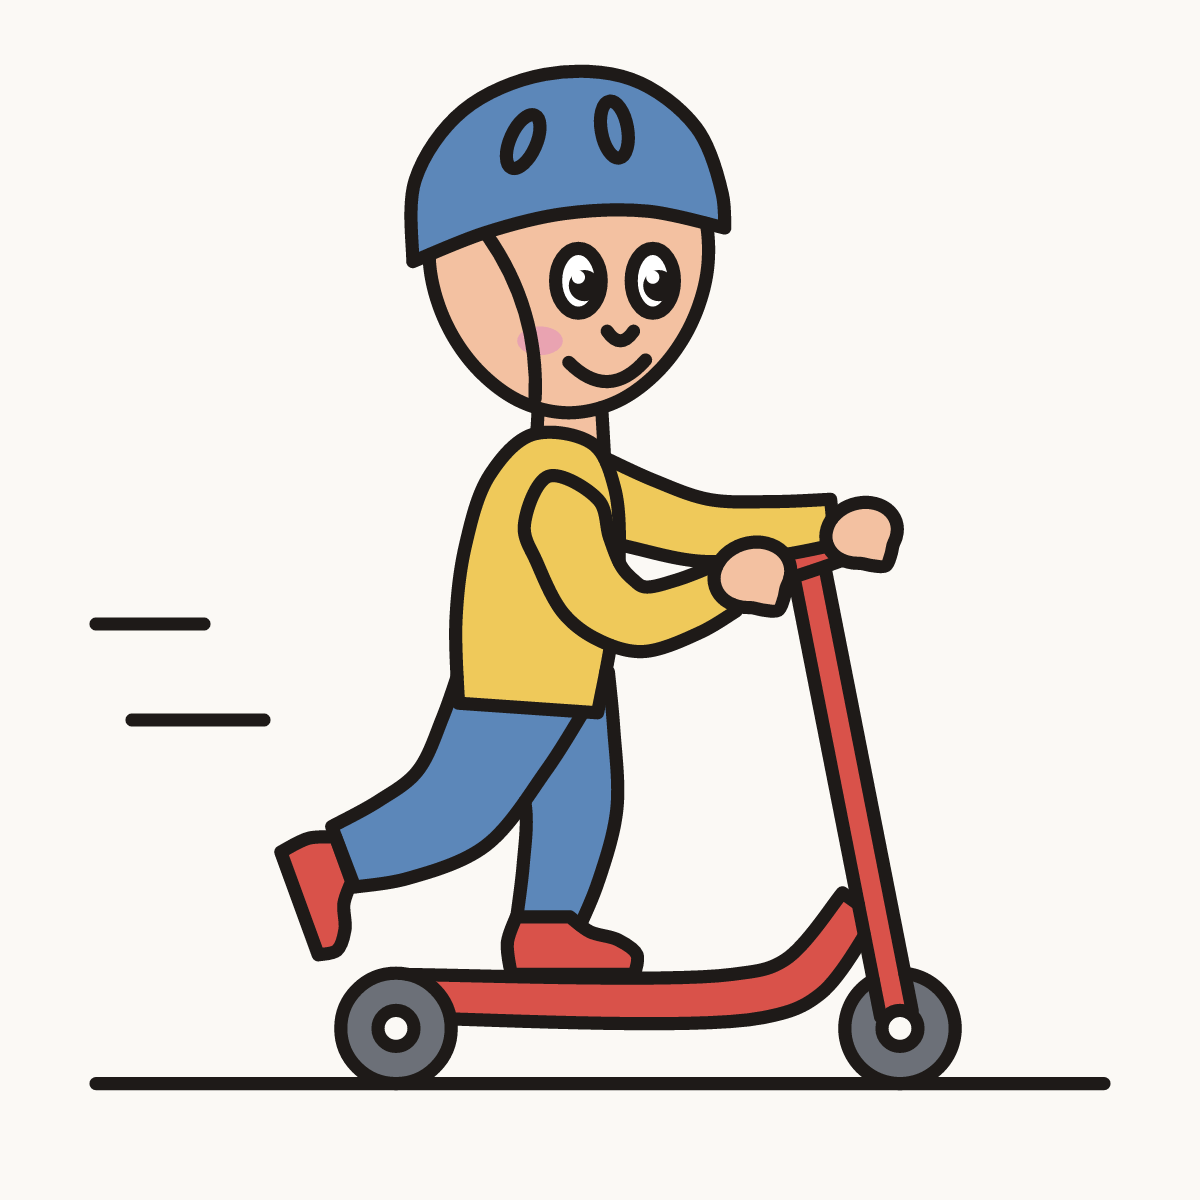
Your finished drawing
Follow the steps above and this is where you end up: a kid on scooter, drawn by you.
Every step in one picture