Watch it draw itself · tap to replay
How to Draw a Kea
Draw a kea in 12 easy steps, about 9 minutes. Free, with a printable worksheet.
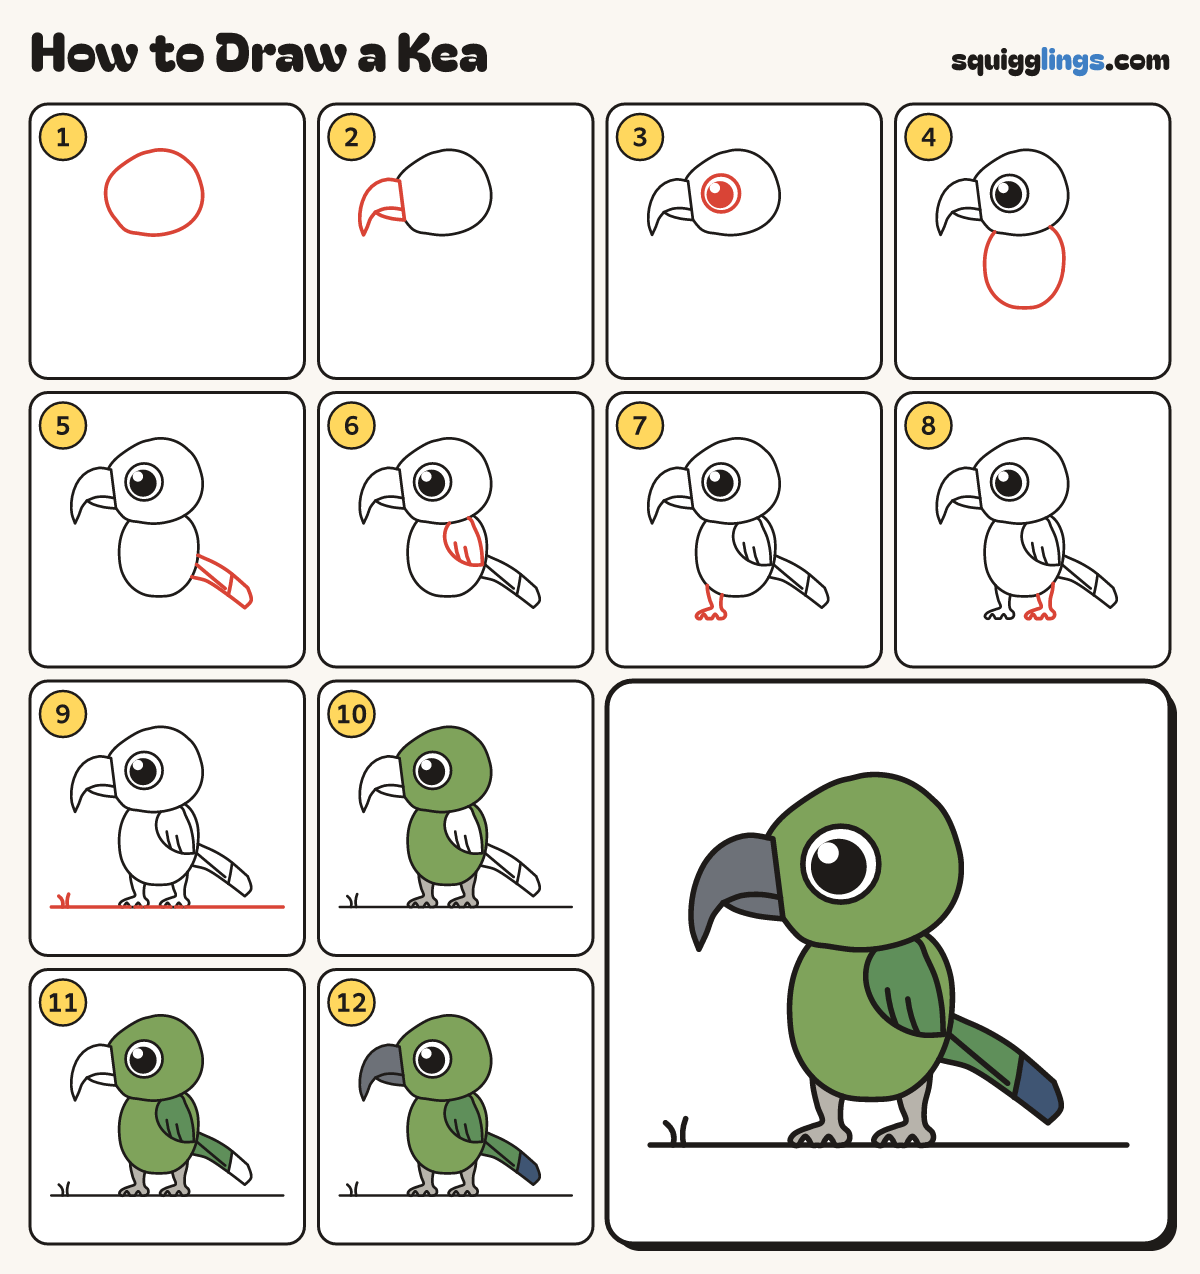
Each picture adds one red line. Draw that line, then scroll to the next picture. Rub out any dashed helper lines at the end. First up: the head.
Step 1: The head
Near the top left draw a big round head, a little wider than tall, with a tiny chin bump.
Tip Leave room on the right and below for the body.
Step 2: Long hooked beak
Start high on the head's front. Draw a long slim beak hooking down below the chin. Add a mouth line.
Tip A kea's beak is long and slim, much slimmer than a parrot's stubby hook.
Step 3: One big eye
A finger behind the beak draw a big round eye. Fill it with a black dot, leaving a white speck.
Step 4: Plump body
Start low on the back of the head. Draw the back down, round a fat belly, stop under the beak.
Tip The body is a plump egg, narrower than the head.
Step 5: Long banded tail
From the rump, draw a long tail to a round tip and back. Add a middle line and a band.
Step 6: Folded wing
Start under the back of the head. Draw a teardrop wing along the side, ending on the rump.
Step 7: Front leg and toes
Start on the tummy. Draw a short leg getting thinner, ending in 3 chubby round toes, back up.
Step 8: Back leg and toes
Draw the other leg the same way, a hand further back. Start and stop on the tummy line.
Tip Leave a gap between the 2 feet.
Step 9: Ground and grass
Draw a ground line under the toes from edge to edge. Add a grass tuft on the left.
Step 10: Grey legs, olive kea
Colour the legs and toes grey. Colour the head and body olive green, leaving the eye and wing white.
Step 11: Green wing and tail
Colour the wing and the long tail a deeper green, up to the band near the tip.
Step 12: Dark beak, navy tip
Colour the long beak dark grey and the tail tip past the band navy. Your kea is done!
Your finished drawing
Follow the steps above and this is where you end up: a kea, drawn by you.
Every step in one picture