Watch it draw itself · tap to replay
How to Draw a Hippo Face in the Water
Draw a hippo face in the water in 11 easy steps, about 8 minutes. Free, with a printable worksheet.
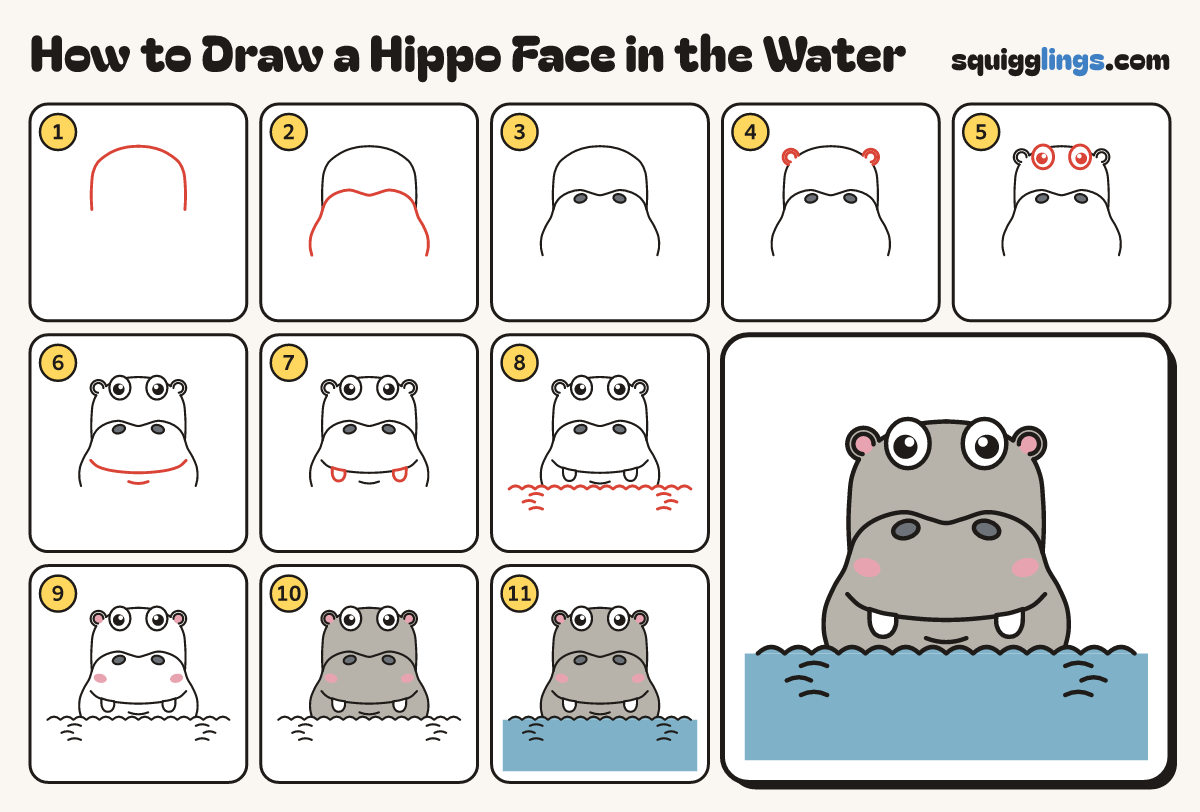
Each picture adds one red line. Draw that line, then scroll to the next picture. Rub out any dashed helper lines at the end. First up: dome head.
Step 1: Dome head
Start on the left, above the middle. Go up, over a soft rainbow, and down the right side, stopping level.
Tip Wider than tall, like a loaf. Leave lots of room below.
Step 2: Big saggy nose
Low on the head, draw 2 soft hills. From each end, swing a cheek out and down, stopping low.
Tip The nose is even wider than the head. Leave the bottom open for the water.
Step 3: The nostrils
On each hill, draw a sideways oval nostril and colour it dark grey.
Step 4: Tiny round ears
On each top corner of the head, draw a tiny circle ear with a smaller rainbow inside.
Tip Hippo ears are tiny, like 2 buttons.
Step 5: Periscope eyes
Just inside each ear, draw a big egg eye poking up above the head line. Add black dots with shines.
Tip Hippo eyes sit on top so they can peek out of the water.
Step 6: Banana smile
Draw a long banana smile from cheek to cheek, ends curling up, with a little chin curve under it.
Step 7: Two stubby tusks
Near each end of the smile, draw a short rounded tusk hanging down from the smile line.
Step 8: The water
From the left edge, draw little waves right across the paper, joining the ends of the nose. Add ripples.
Step 9: Pink ears and cheeks
Colour the inside of each ear pink, and add a pink blush on each big cheek.
Step 10: Grey hippo
Colour the hippo grey down to the waves, around the pink and nostrils. Leave the eyes and tusks white.
Step 11: Blue water
Colour the water blue, from the waves down to the bottom of the paper.
Your finished drawing
Follow the steps above and this is where you end up: a hippo face in the water, drawn by you.
Every step in one picture