Watch it draw itself · tap to replay
How to Draw a Harvest Mouse
Draw a harvest mouse in 12 steps, about 9 minutes. Free, with a printable worksheet.
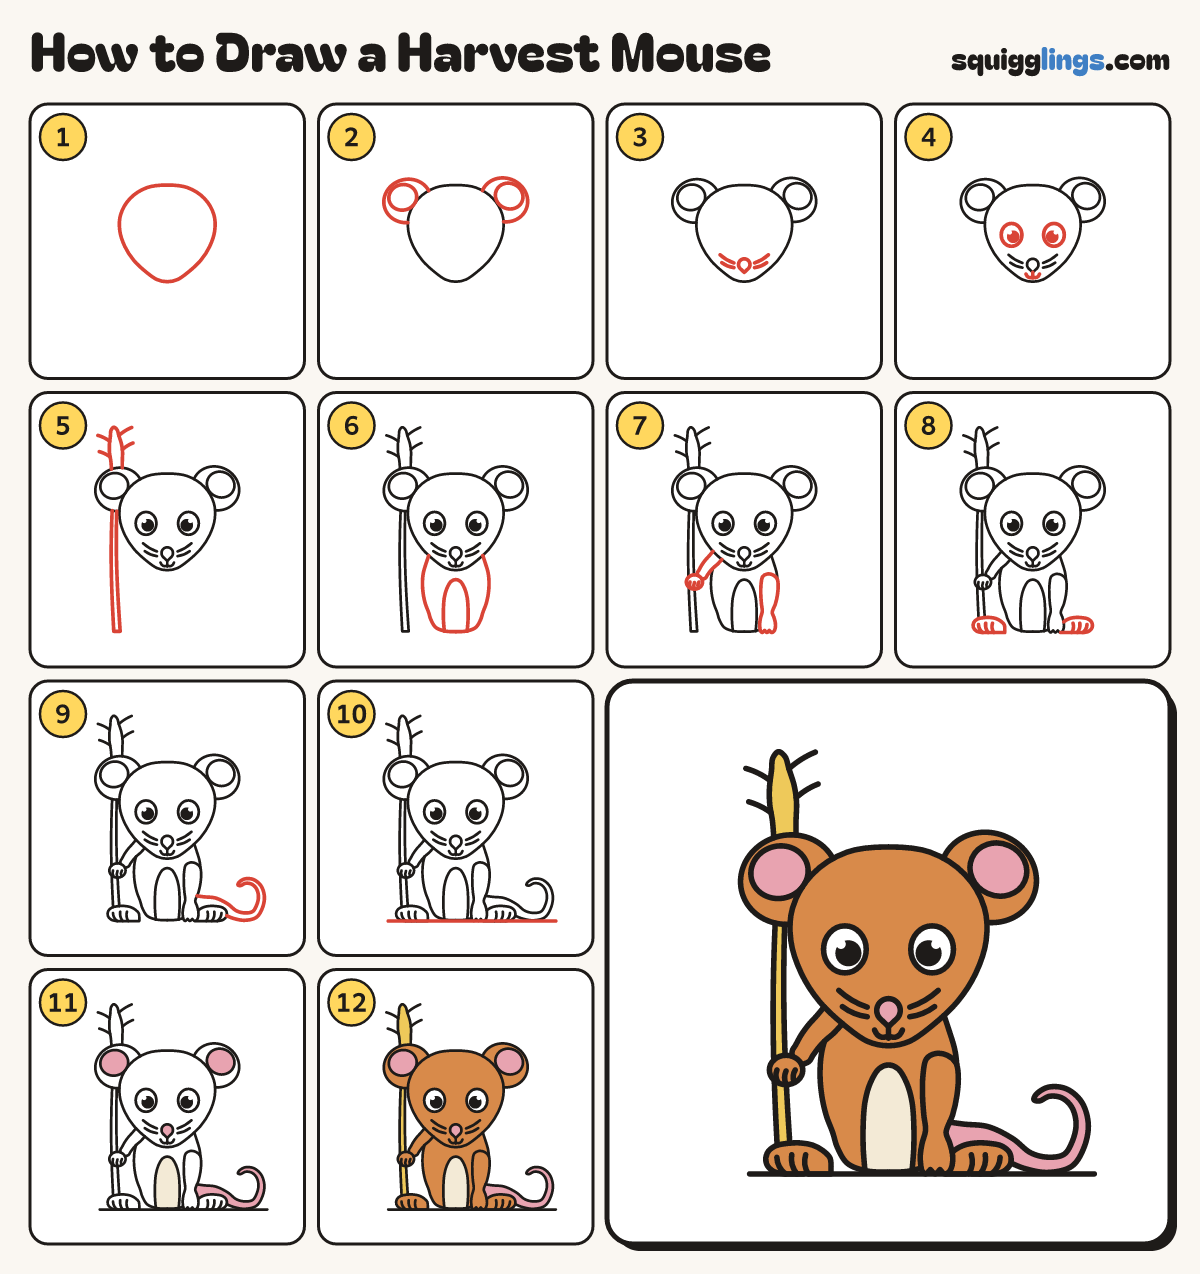
Each picture adds one red line. Draw that line, then scroll to the next picture. Rub out any dashed helper lines at the end. First up: round head.
Step 1: Round head
Near the top draw a big upside-down teardrop head, as big as your fist. The point is the nose.
Tip Leave room at the sides for huge ears.
Step 2: Huge round ears
On each side of the head draw a huge round ear. Add a smaller oval inside each one.
Tip Mouse ears sit on the sides, not on top.
Step 3: Nose and whiskers
At the point of the head draw a small nose. Add 2 short whiskers on each cheek, sweeping back.
Step 4: Eyes and tiny smile
Draw 2 big eyes above the whiskers, with black dots. From the nose draw a tiny smile, stopping under it.
Step 5: Wheat stalk
Draw a tall stem from the ground up past the left ear, then a wheat head with 4 spikes.
Step 6: Pear body
Start under the left cheek. Draw a pear body down and round, up to the right cheek. Add a tummy.
Step 7: Arm and leg
From the left shoulder draw a short arm to the stalk, with a paw. Draw a right leg down.
Step 8: Back feet
On the ground at each side of the body, draw a small mitten foot with 3 short toe lines.
Step 9: Long thin tail
From the body, behind the right foot, draw a long tail that gets thinner and curls up at the end.
Step 10: The ground
Draw a flat ground line under the paws, feet and tail, from past the left foot to past the tail.
Step 11: Cream tummy, pink ears
Colour the tummy cream, and the inside of the ears, the nose and the tail pink.
Step 12: Yellow wheat, ginger fur
Colour the wheat yellow, then the mouse ginger, going around the pink and cream parts. Leave the eyes white.
Your finished drawing
Follow the steps above and this is where you end up: a harvest mouse, drawn by you.
Every step in one picture