Watch it draw itself · tap to replay
How to Draw a Frilled Dragon
Draw a frilled dragon in 16 steps, about 12 minutes. Free, with a printable worksheet.
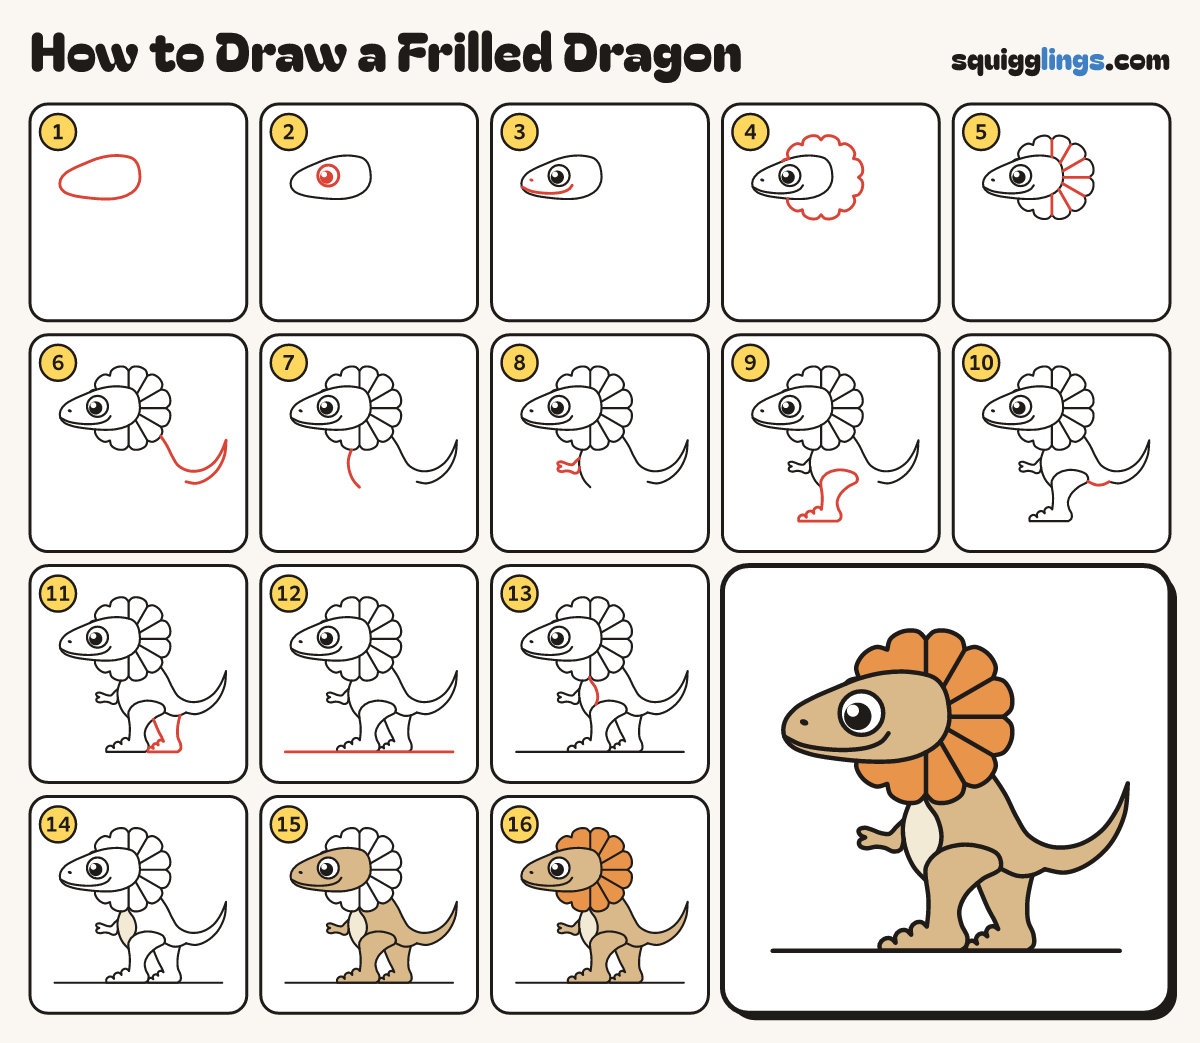
Each picture adds one red line. Draw that line, then scroll to the next picture. Rub out any dashed helper lines at the end. First up: wedge head.
Step 1: Wedge head
Near the top left draw a long rounded wedge head lying on its side, with the nose on the left.
Step 2: Big eye
In the middle of the head draw 1 big circle eye. Add a big black dot and a white shine.
Step 3: Grin and nostril
Start at the snout tip. Draw a long grin back under the eye, curling up. Dot a nostril.
Step 4: The frill
Round the back of the head draw a big ring of round bumps, much bigger than the head.
Tip Lift your pencil where the head covers the frill.
Step 5: Frill folds
From behind the head draw 7 straight lines fanning out to the dips between the bumps.
Tip Like the ribs of an umbrella.
Step 6: Back and long tail
Start low on the frill. Draw the back, then a long tail to a point. Come back underneath and stop.
Tip The tail is as long as the whole lizard.
Step 7: Chest
Start under the frill. Draw a C curve down for the chest. Stop level with the tail's end.
Step 8: Little arm
On the chest draw a little bent arm with 2 round fingers. Start and stop on the chest.
Step 9: Big near leg
Start at the end of the chest. Draw a leg down to 3 toes, then up round a fat thigh.
Step 10: Tummy
Start at the back of the thigh. Draw one short saggy curve back. Stop where the tail line ended.
Step 11: Far leg
Start behind the thigh. Draw a far leg peeking out, down to 3 toes. Stop on the tummy.
Step 12: The ground
Draw a long ground line under both feet. Start well to the left and stop well to the right.
Step 13: Tummy patch
Start under the frill. Draw a long curve down the chest and stop on the thigh.
Step 14: Cream tummy
Colour the tummy patch cream.
Step 15: Tan lizard
Colour the head, body, tail, legs and arm tan, around the patch. Leave the eye and the frill white.
Step 16: Orange frill
Colour the whole frill orange, right out to the bumpy edge. Your frilled dragon is done!
Your finished drawing
Follow the steps above and this is where you end up: a frilled dragon, drawn by you.
Every step in one picture