Watch it draw itself · tap to replay
How to Draw a Fairy Silhouette
Draw a fairy silhouette in 12 easy steps, about 9 minutes. Free, with a printable worksheet.
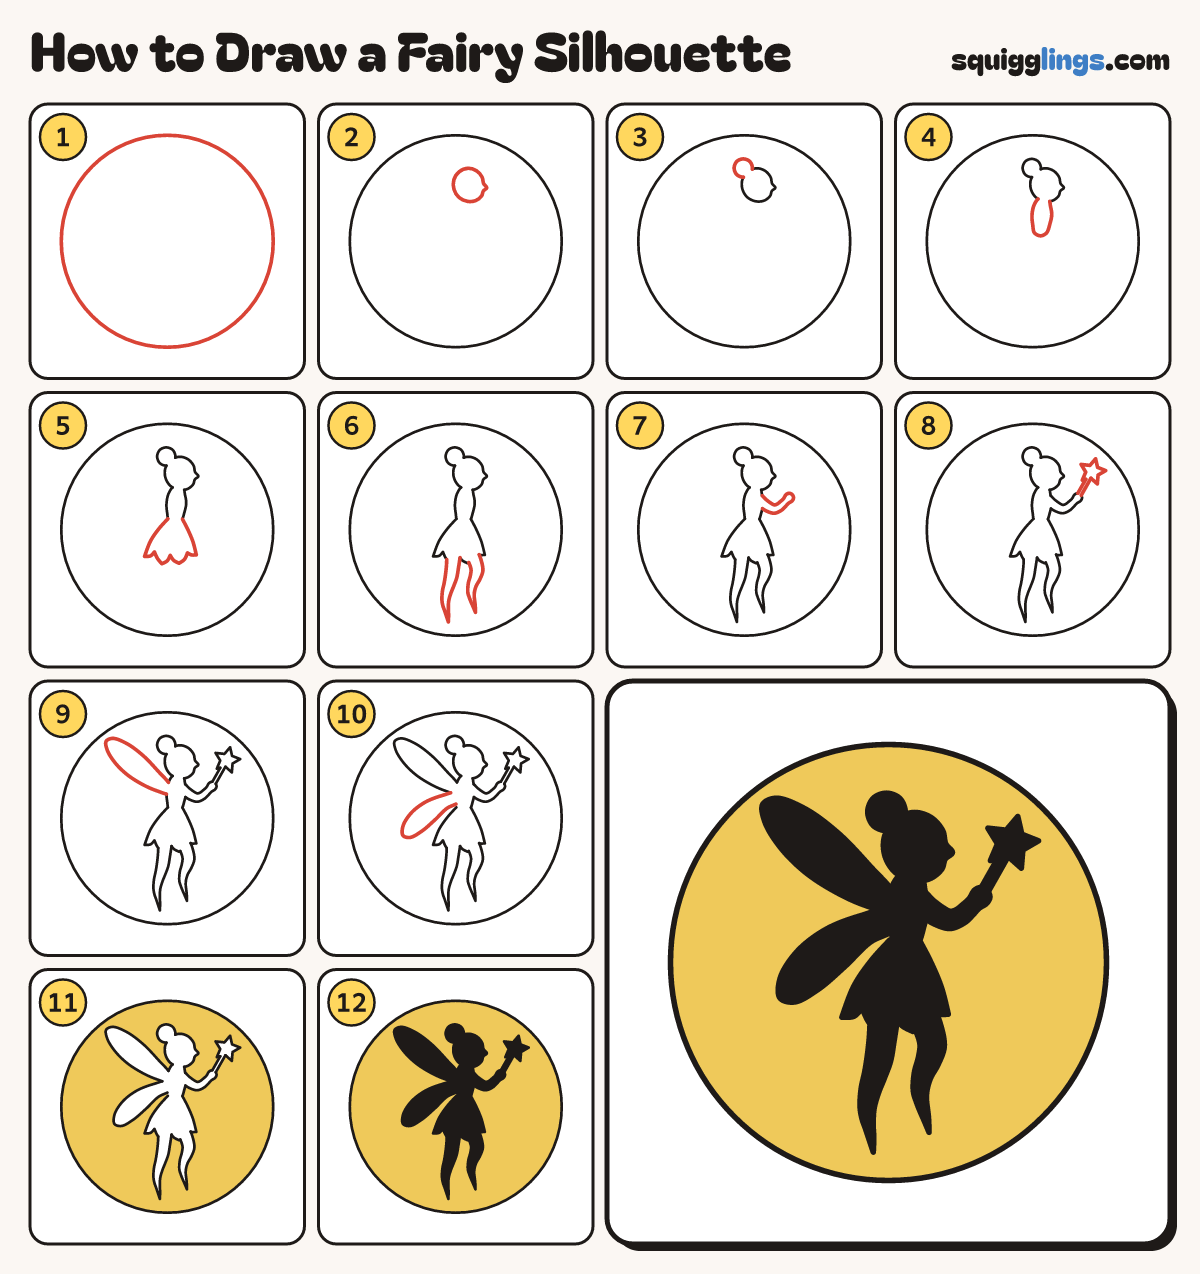
Each picture adds one red line. Draw that line, then scroll to the next picture. Rub out any dashed helper lines at the end. First up: full moon.
Step 1: Full moon
Draw a huge round moon that nearly fills your paper.
Tip Draw it lightly. The fairy flies in front of it.
Step 2: Head
In the top half of the moon draw a small round head. Add a tiny nose bump on the right.
Step 3: Hair bun
On the top left of the head draw a small round bun.
Step 4: Body
Under the head draw a short neck and a small body, slimmer at the waist.
Step 5: Petal skirt
From the waist draw a skirt flaring out. Finish the bottom edge with 4 pointed petals.
Tip Make the skirt much wider than the body.
Step 6: Legs and toes
Under the skirt draw 2 slim legs, the front one bent at the knee. End each in a pointed toe.
Tip Each leg gets slimmer down to the ankle.
Step 7: Reaching arm
From the shoulder draw an arm reaching out to the right, bent at the elbow, with a small hand.
Step 8: Wand and star
From the hand draw a thin wand pointing up. Draw a star on its tip.
Step 9: Top wing
From the back draw a big leaf-shaped wing reaching up to the left.
Tip Make the top wing longer than the body.
Step 10: Lower wing
Under it draw a smaller wing reaching down to the left.
Step 11: Yellow moon
Colour the moon yellow. Go around the fairy, the wings, the wand and the star.
Step 12: Dark fairy
Colour the whole fairy black: hair, body, skirt, legs, wings, wand and star.
Tip A silhouette is a solid dark shape with no details inside.
Your finished drawing
Follow the steps above and this is where you end up: a fairy silhouette, drawn by you.
Every step in one picture