Watch it draw itself · tap to replay
How to Draw an Eagle Flying
Draw an eagle flying in 10 easy steps, about 8 minutes. Free, with a printable worksheet.
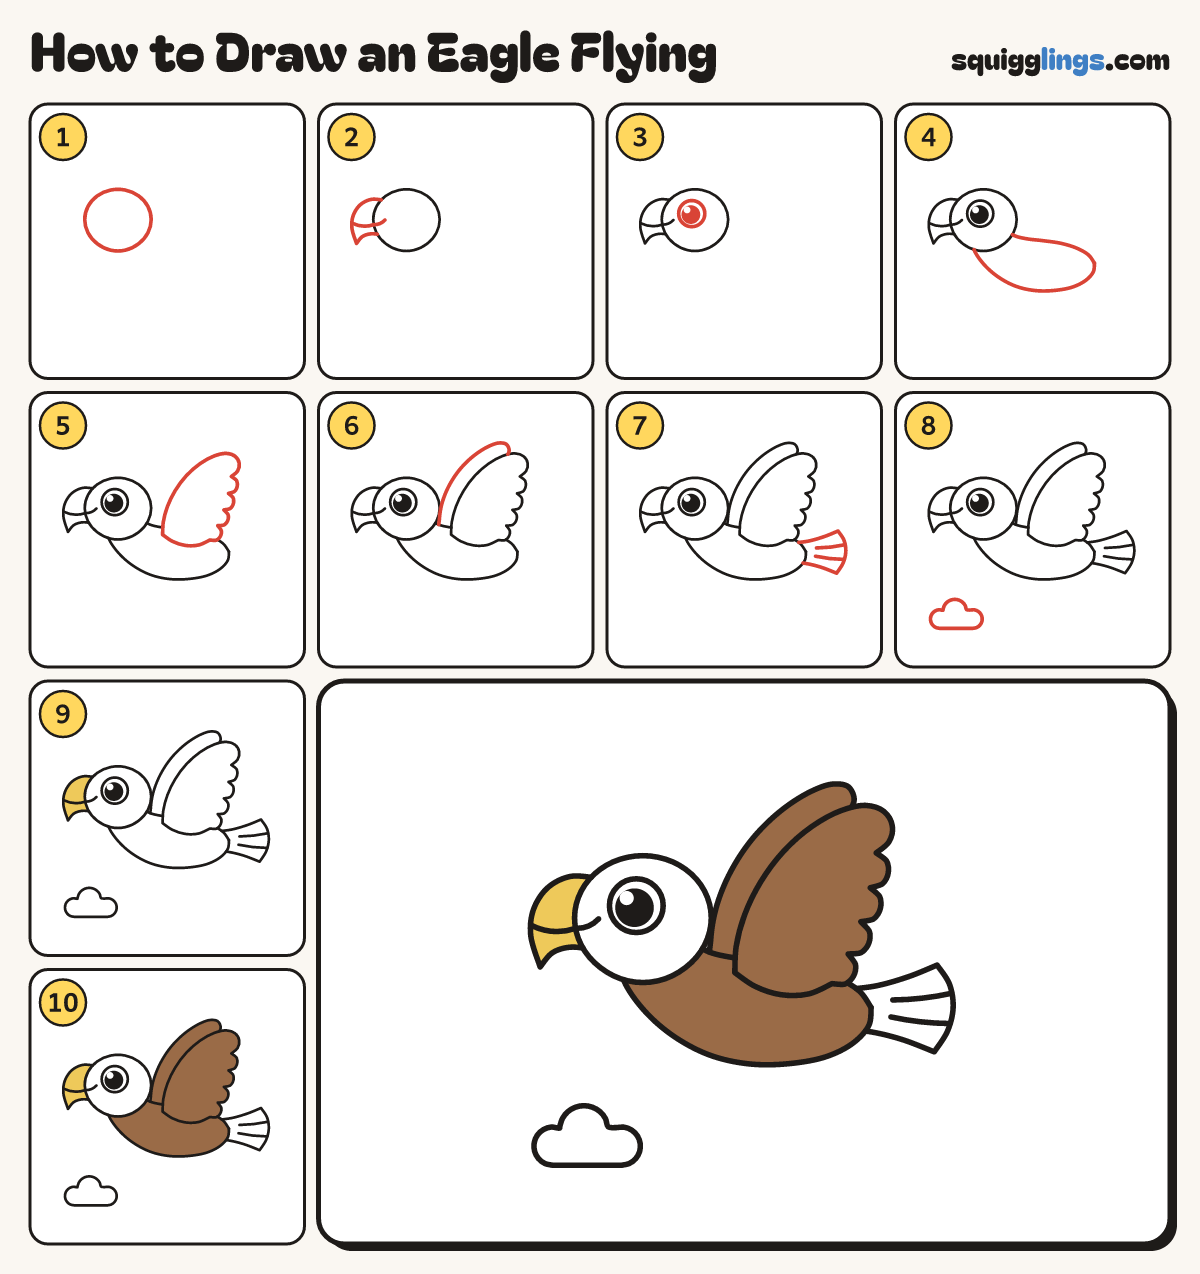
Each picture adds one red line. Draw that line, then scroll to the next picture. Rub out any dashed helper lines at the end. First up: round head.
Step 1: Round head
On the left of your paper, draw a big round head, a little wider than tall.
Tip Leave room on the right for the body and wings.
Step 2: Hooked beak
On the front of the head, draw a big beak that hooks down to a point. Add a smile line.
Tip Short and fat, not a long bill.
Step 3: Big shiny eye
Draw a big round eye near the beak. Add a black dot with a small shine.
Step 4: Plump body
Start behind the head. Draw a long back to a round end, then curve under the tummy to the head.
Step 5: Big open wing
Start on the back. Draw a big wing up to a round tip, then 4 soft bumps down.
Tip Round feather bumps, not sharp points.
Step 6: Other wing
From the back, draw a strip up beside the big wing to a round tip. Stop on the big wing.
Step 7: Fan tail
From the round end, draw a fan tail out behind, wider at the end. Add 2 feather lines.
Step 8: Puffy cloud
Under the head, draw a little cloud with 3 round puffs and a flat bottom.
Step 9: Yellow beak
Colour the beak yellow. Leave the head, the eye and the fan tail white.
Step 10: Brown body and wings
Colour the body and both wings brown. Your eagle is soaring!
Your finished drawing
Follow the steps above and this is where you end up: an eagle flying, drawn by you.
Every step in one picture