Watch it draw itself · tap to replay
How to Draw a Crow Flying
Draw a crow flying in 10 easy steps, about 8 minutes. Free, with a printable worksheet.
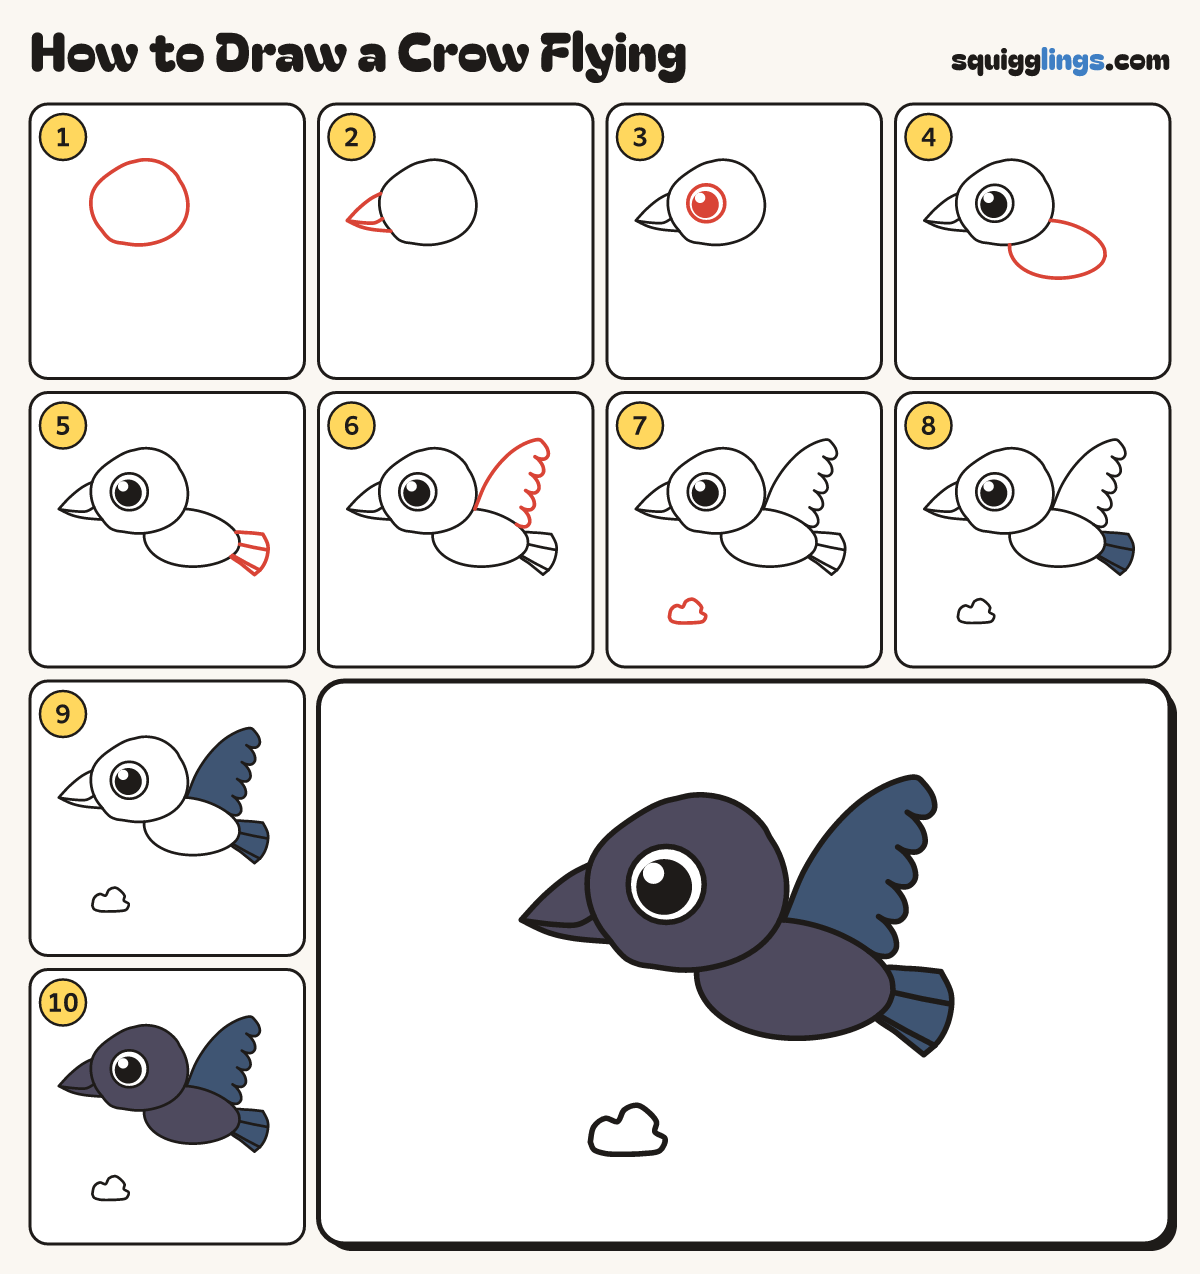
Each picture adds one red line. Draw that line, then scroll to the next picture. Rub out any dashed helper lines at the end. First up: the head.
Step 1: The head
Near the top left draw a big round head, a little wider than tall.
Step 2: Long pointed beak
On the front of the head draw a long triangle beak. Add a mouth line, tip to head, curling up.
Step 3: One big eye
A finger behind the beak, draw a big round eye. Fill it with a black dot, leaving a white shine.
Step 4: Plump body
From the back of the head draw a plump egg body lying flat to the right. Stop under the head.
Tip Keep the body lying flat, not hanging down, so your crow is flying.
Step 5: Fan tail
Start on the rump. Draw a fan tail pointing back. Stop on the tummy. Add 2 feather lines.
Step 6: Open wing
Start behind the head. Draw a wing up to a tip, then 5 round feather fingers down to the back.
Tip Keep each feather finger round at the end, not pointy.
Step 7: A puffy cloud
Below the head, draw a little cloud: 3 round puffs on top and a flat bottom.
Step 8: Blue-black tail
Colour the fan tail navy, a blue-black.
Step 9: Blue-black wing
Colour the big wing navy too, feather fingers and all.
Step 10: Black head and body
Colour the head, beak and body black, around the wing and tail. Leave the eye and the cloud white.
Tip Press lightly so your lines still show.
Your finished drawing
Follow the steps above and this is where you end up: a crow flying, drawn by you.
Every step in one picture