Watch it draw itself · tap to replay
How to Draw a Crosswalk
Draw a crosswalk in 12 easy steps, about 9 minutes. Free, with a printable worksheet.
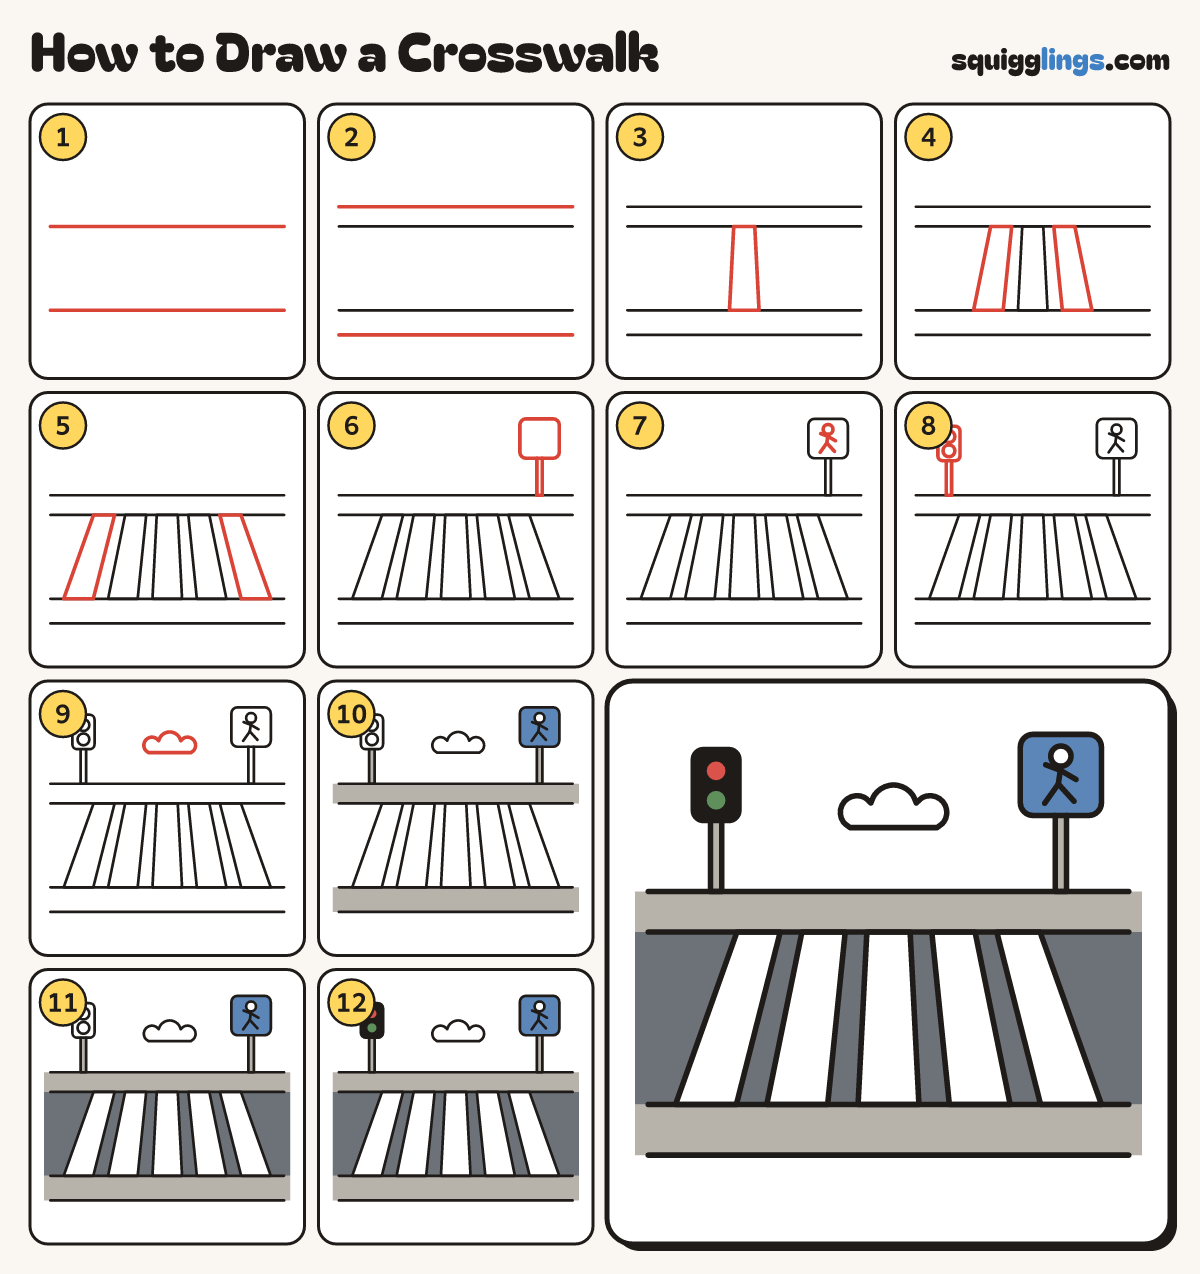
Each picture adds one red line. Draw that line, then scroll to the next picture. Rub out any dashed helper lines at the end. First up: the road.
Step 1: The road
Draw 2 long road lines across the middle, a hand apart. Start at one edge and stop at the other.
Tip You are looking across the road: the top line is the far side.
Step 2: Two kerbs
Draw a long line a finger below the road and another a finger above it, edge to edge: the pavements.
Step 3: The middle stripe
Draw a tall stripe in the middle of the road, from bottom line to top line, thinner at the top.
Tip The far end is thinner because it is further away.
Step 4: Two more stripes
Draw the same stripe on each side of the middle one, a stripe-width apart, leaning in a little.
Step 5: The outside stripes
Draw 1 more stripe at each end of the row, the same gap away. Now 5 bars cross the road.
Step 6: Pole and sign
On the right of the far pavement draw a thin pole going up, with a square sign on top.
Step 7: Walking person
In the sign draw a round head. From under it draw a body line, stopping halfway. Add legs and arms.
Step 8: Little walk light
On the far pavement, left side, draw a thin pole. Put a tall box on top with 2 round lights.
Step 9: Cloud
High above the road draw a puffy cloud with 3 bumps on top and a flat bottom.
Step 10: Grey pavements, blue sign
Go over your lines. Colour the pavements and poles grey, and the sign blue, leaving the little person white.
Step 11: Slate road, white stripes
Colour the road slate grey, going carefully round the 5 stripes so they stay white.
Step 12: Red and green lights
Colour the top light red and the bottom light green. Colour the box black around them. Leave the cloud white.
Your finished drawing
Follow the steps above and this is where you end up: a crosswalk, drawn by you.
Every step in one picture