Watch it draw itself · tap to replay
How to Draw Coal
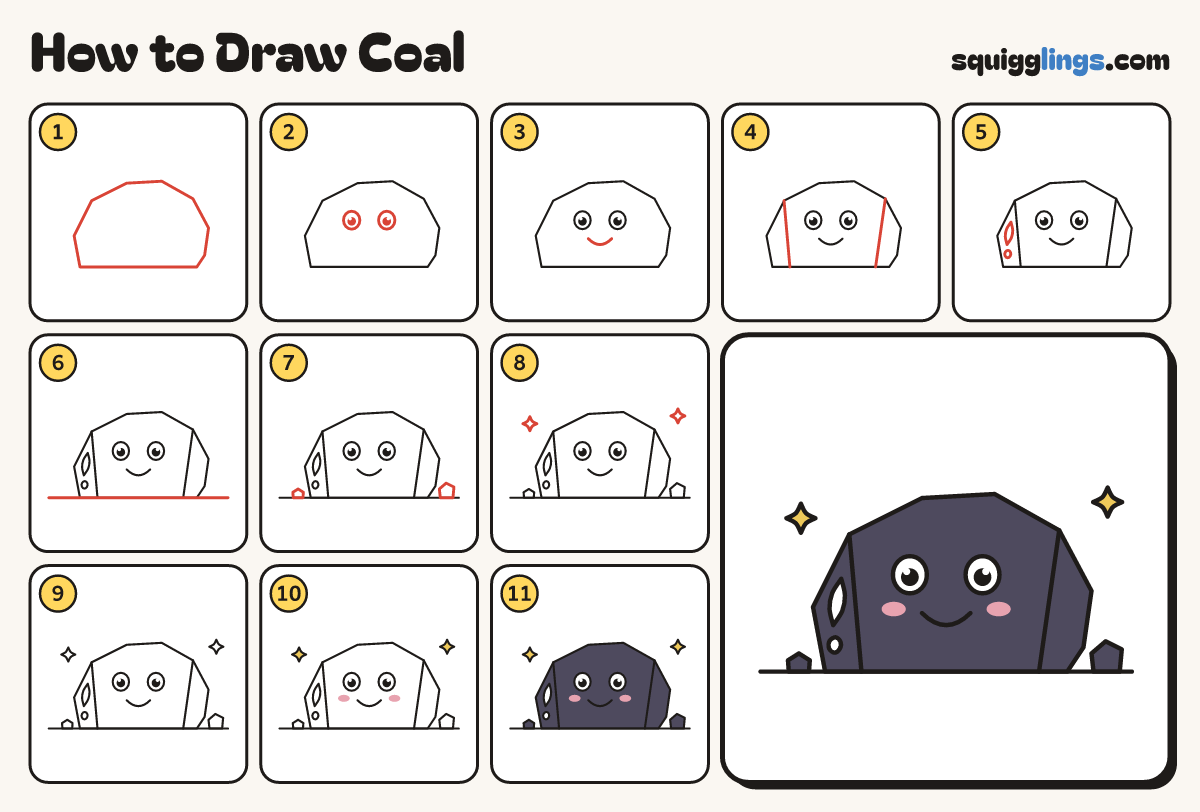
Draw coal in 14 easy steps, about 11 minutes. Free, with a printable worksheet.
Each picture adds one red line. Draw that line, then scroll to the next picture. Rub out any dashed helper lines at the end. First up: the big lump.
Step 1: The big lump
In the middle draw a big chunky lump with straight sides, 8 corners, a flat top and a flat bottom.
Tip Coal is a broken chunk: corners, not round bumps.
Step 2: Two big eyes
Draw 2 big egg eyes low on the lump, with a black dot and a shine in each.
Step 3: A happy mouth
Under the eyes draw a short flat line. Hang a U from its two ends for an open smile.
Step 4: Flat faces
Join the top left and right corners with a bent line. From the bend, draw a line to the bottom.
Step 5: A small lump
On the right draw a small lump with 6 corners on the ground. Give it the same 2 lines.
Step 6: A lump behind
On the left draw a lump peeking out from behind, down to the ground. Add a bent line across it.
Step 7: The top lump
Behind the pile draw a tall lump poking up, with a bent line across its top and a line down.
Step 8: Shiny glints
Draw 3 skinny leaf shapes for glints: one on the big lump, the left lump and the top lump.
Step 9: The ground
Draw a long ground line under the pile, from side to side.
Step 10: Pink cheeks
Give the coal 2 pink cheeks and colour the mouth pink.
Step 11: A hot glow
The small lump is glowing hot. Colour its top face yellow and its left face orange.
Step 12: Red hot
Colour the right face of the small lump red. Now it glows like a hot ember.
Step 13: Grey tops
Colour the top face of the 3 biggest lumps grey.
Step 14: Black coal
Colour everything else black. Leave the eyes and the 3 glints white. Your coal is done!
Tip Press softly so your lines still show.
Your finished drawing
Follow the steps above and this is where you end up: coal, drawn by you.
Every step in one picture