Watch it draw itself · tap to replay
How to Draw a Clothesline
Draw a clothesline in 12 easy steps, about 9 minutes. Free, with a printable worksheet.
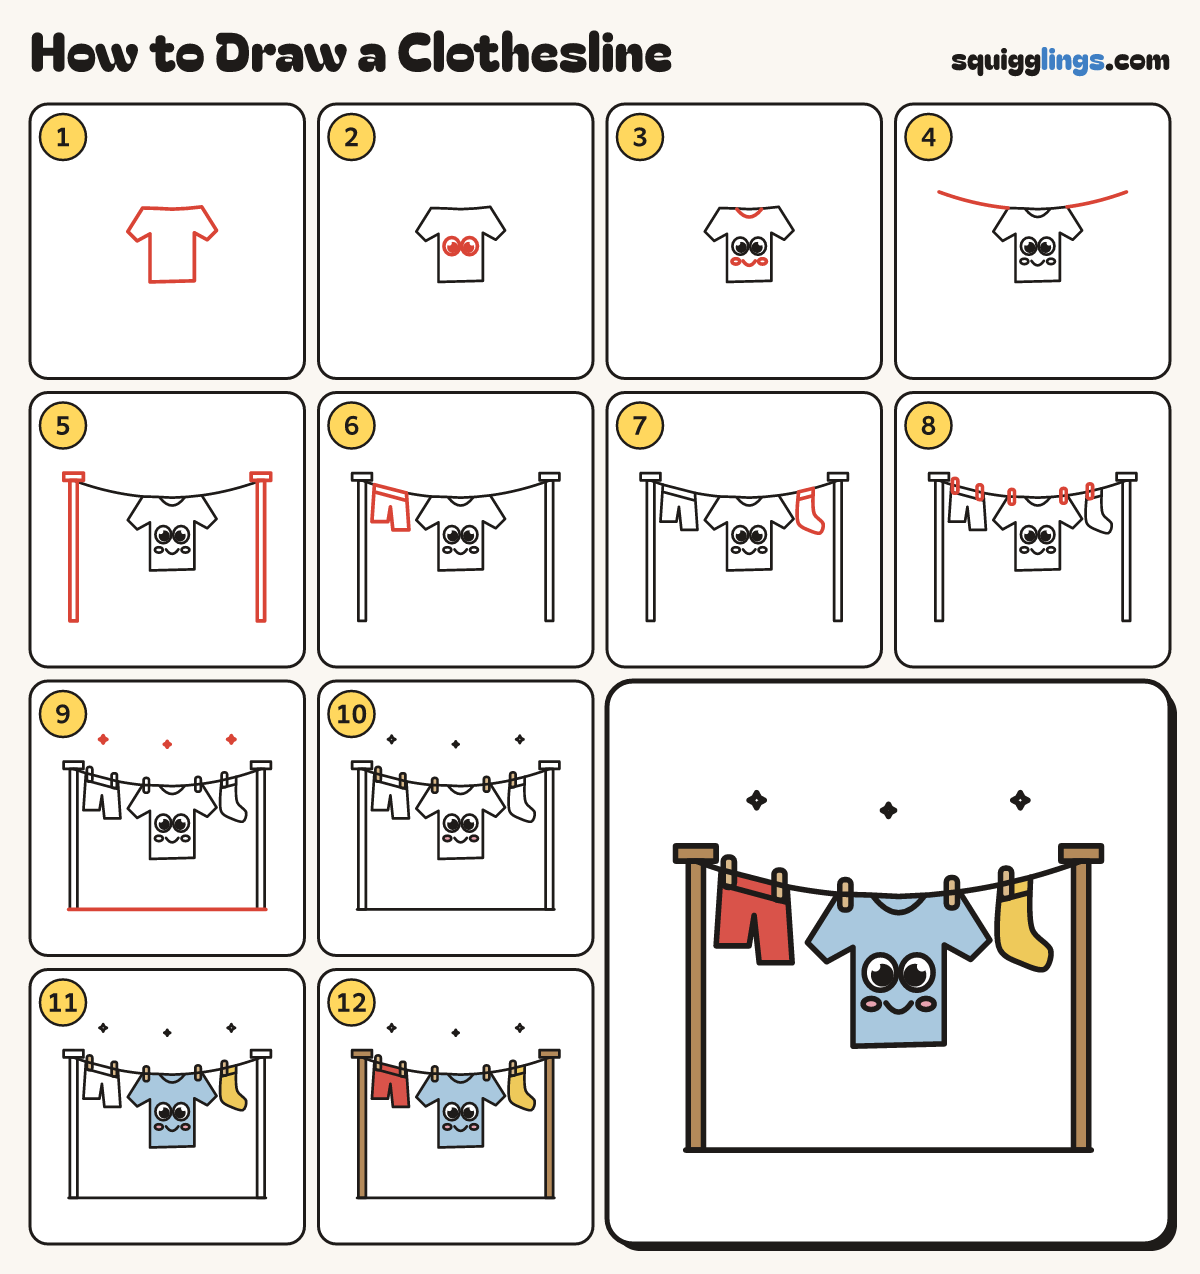
Each picture adds one red line. Draw that line, then scroll to the next picture. Rub out any dashed helper lines at the end. First up: the shirt.
Step 1: The shirt
In the middle of your paper draw a T-shirt hanging by its shoulders: 2 short sleeves and a long body.
Tip The shoulders sit a little below the top third.
Step 2: Two eyes
Draw 2 egg eyes on the shirt. Add a black dot and a shine in each.
Step 3: Smile, cheeks and collar
Under the eyes draw a U smile with a cheek at each end. Add a U collar on top.
Step 4: The line
Start just in from the left edge. Sag a line through the shoulders, stopping just in from the right edge.
Tip It dips lowest in the middle, where the shirt hangs.
Step 5: Two posts
At each end of the line draw a tall post down to the bottom, with a flat cap.
Step 6: A pair of shorts
On the left of the line draw shorts hanging down: a flat waist and 2 legs with a notch between.
Step 7: A sock
On the right of the line draw a sock hanging down: a narrow tube bending right into a rounded toe.
Step 8: Pegs
Draw a tiny upright peg on each top corner of the shorts and shirt, and 1 on the sock.
Step 9: Sparkles and ground
Add 3 sparkles in the sky and a ground line from one post to the other.
Step 10: Pink cheeks, tan pegs
Go over your lines, then colour the cheeks pink and the pegs tan.
Step 11: Yellow sock, sky shirt
Colour the sock yellow and the shirt sky blue, going around the pegs and cheeks. Leave the eyes white.
Step 12: Red shorts, wood posts
Colour the shorts red around their pegs, and the posts and caps wood brown. Your washing is drying!
Your finished drawing
Follow the steps above and this is where you end up: a clothesline, drawn by you.
Every step in one picture