Watch it draw itself · tap to replay
How to Draw a Chromosome
Draw a chromosome in 11 easy steps, about 8 minutes. Free, with a printable worksheet.
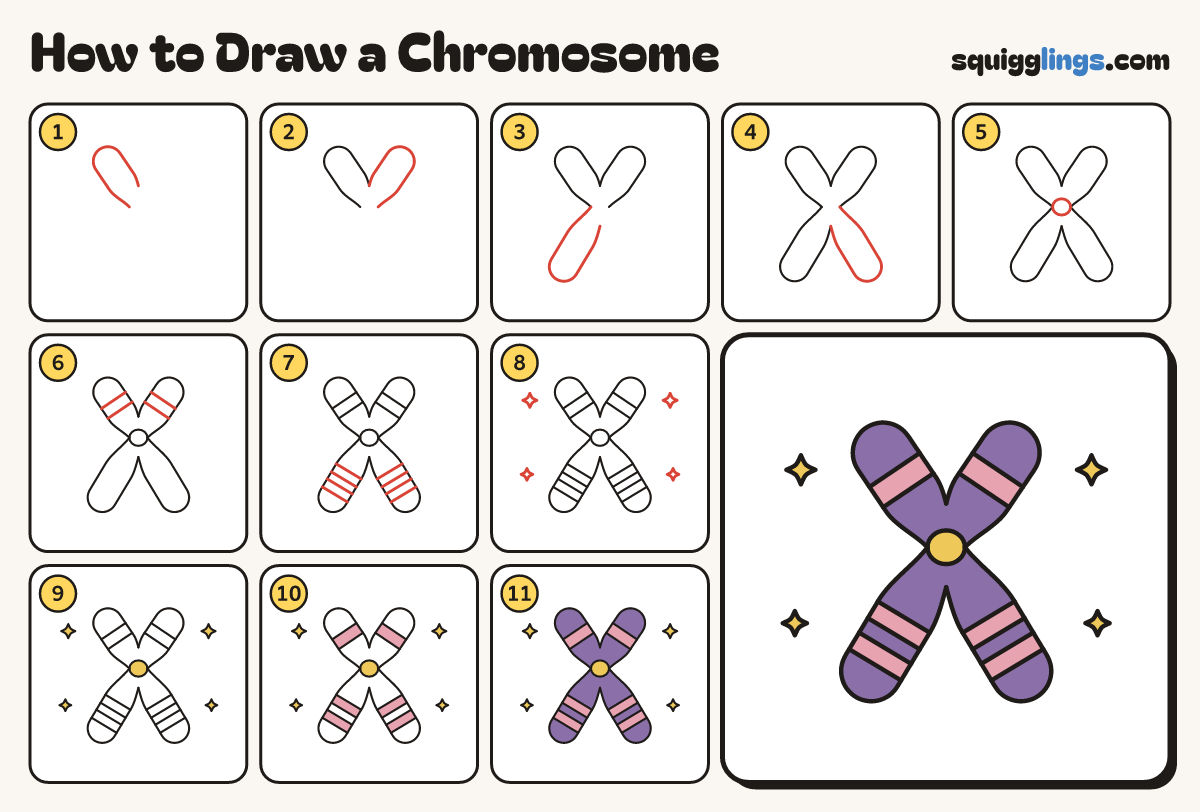
Each picture adds one red line. Draw that line, then scroll to the next picture. Rub out any dashed helper lines at the end. First up: top left arm.
Step 1: Top left arm
Start just left of the middle. Draw a fat rounded finger leaning up and left. Stop just above the middle.
Tip A chromosome looks like a puffy letter X. Draw it one arm at a time.
Step 2: Top right arm
From where you stopped, draw a matching finger leaning up and right. Stop just right of the middle.
Tip The 2 top arms make a V, like bunny ears.
Step 3: Bottom left arm
Go back to the left start. Draw a longer finger leaning down and left. Stop just below the middle.
Step 4: Bottom right arm
From there draw the last long finger leaning down and right, up to join the top right arm.
Tip The bottom arms are longer than the top arms.
Step 5: The middle bead
In the pinched middle draw a round bead. It touches the outline on the left and on the right.
Step 6: Top stripes
Across each top arm draw 2 short lines close together, from edge to edge. That makes one stripe.
Tip Keep the lines straight across the arm, like a ring on a finger.
Step 7: Bottom stripes
Across each bottom arm draw 2 stripes the same way, with a gap between them.
Step 8: Sparkles
Draw 2 small sparkle stars on each side of the chromosome, one high and one low.
Tip A sparkle star has 4 points: up, down, left and right.
Step 9: Yellow bead and sparkles
Go over your lines. Colour the middle bead and the 4 sparkles yellow.
Step 10: Pink stripes
Colour the 6 stripes pink.
Step 11: Purple arms
Colour the rest of the chromosome purple, around the pink stripes and the bead. Your chromosome is done!
Your finished drawing
Follow the steps above and this is where you end up: a chromosome, drawn by you.
Every step in one picture