Watch it draw itself · tap to replay
How to Draw a Christmas Car
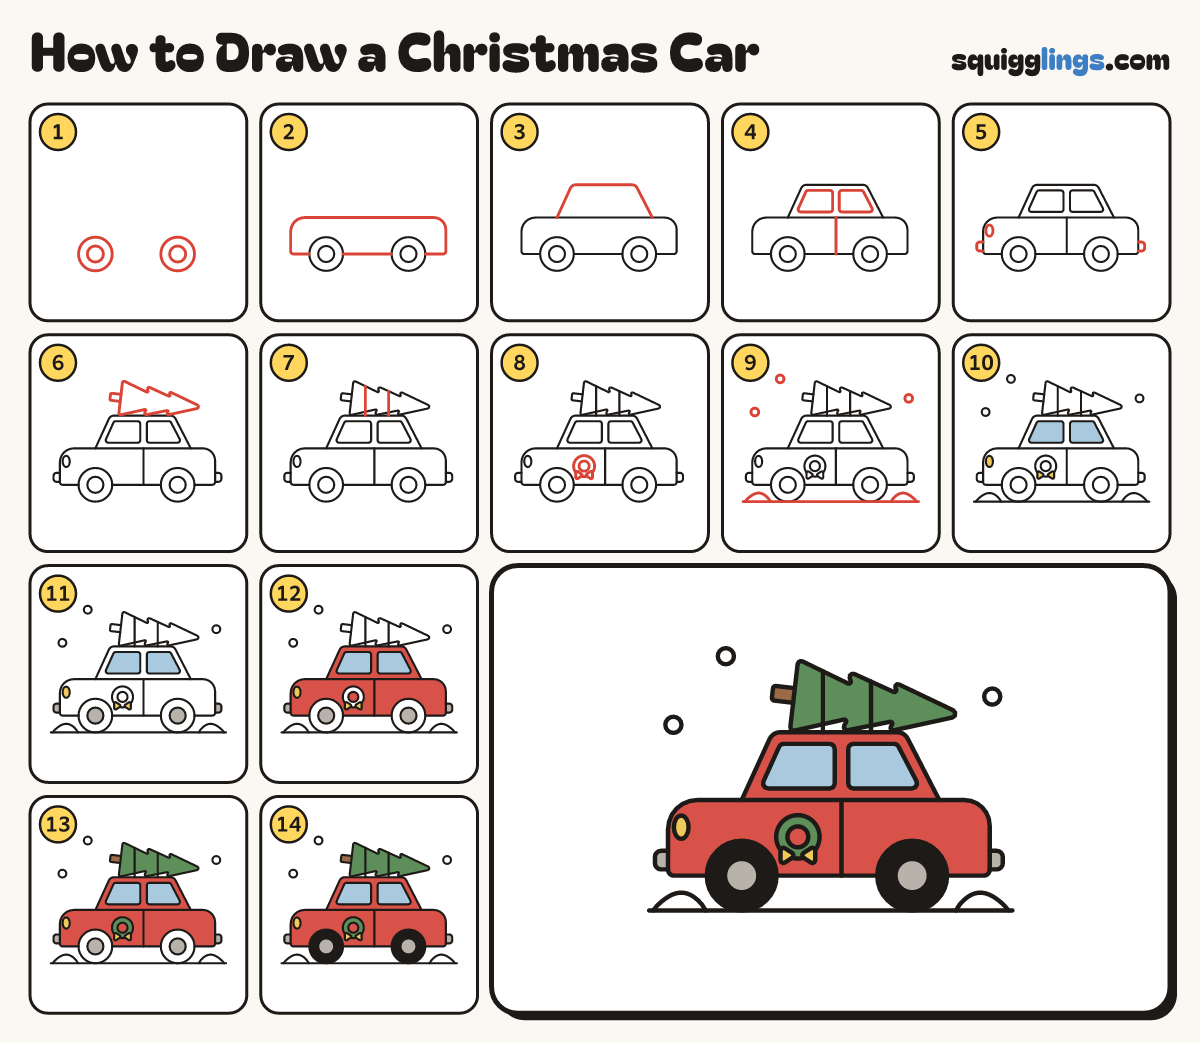
Draw a Christmas car in 14 easy steps, about 11 minutes. Free, with a printable worksheet.
Each picture adds one red line. Draw that line, then scroll to the next picture. Rub out any dashed helper lines at the end. First up: two wheels.
Step 1: Two wheels
Near the bottom draw 2 big round wheels, far apart. Draw a smaller circle inside each for the hubcap.
Tip Leave more than 2 wheels of space between them.
Step 2: Round car body
Draw a long low box with round top corners. Its flat bottom runs behind the middle of both wheels.
Tip Let the box poke out a little past each wheel.
Step 3: Cabin on top
Start on the body. Draw a sloping windscreen, a long flat roof and a sloping back. Stop on the body.
Tip Keep the roof long and flat. The tree will lie on it.
Step 4: Windows and door
Inside the cabin draw 2 windows. Start between them, draw a door line down and stop at the bottom.
Step 5: Light and bumpers
Draw an oval headlight on the front. Add a small bumper poking out at the front and the back.
Step 6: Tree on the roof
Lay a Christmas tree on the roof, tip to the back: 3 zigzag layers, getting smaller, and a short trunk.
Tip The 3 lower points of the tree rest on the roof.
Step 7: Two ropes
Start on the top edge of the tree. Draw 2 ropes straight down, stopping on the roof.
Tip Put one rope across each of the 2 biggest layers.
Step 8: Door wreath
On the door draw a ring with a smaller ring inside. Add a bow of 2 triangles at the bottom.
Step 9: Snowy ground
Draw a long ground line under the wheels. Add a low snow pile at each end and 3 round snowflakes.
Tip Keep the snowflakes small and away from the car.
Step 10: Yellow and blue
Colour the headlight and the bow yellow. Colour the 2 windows blue. Leave the snow white.
Step 11: Grey bits
Colour the 2 hubcaps and the 2 bumpers grey.
Step 12: Red car
Colour the car body and the cabin red, around the windows, the headlight, the wreath and its bow.
Step 13: Green tree
Colour the tree and the wreath ring green. Colour the trunk brown.
Step 14: Black tyres
Colour the 2 tyres black, around the grey hubcaps. Your Christmas car is done!
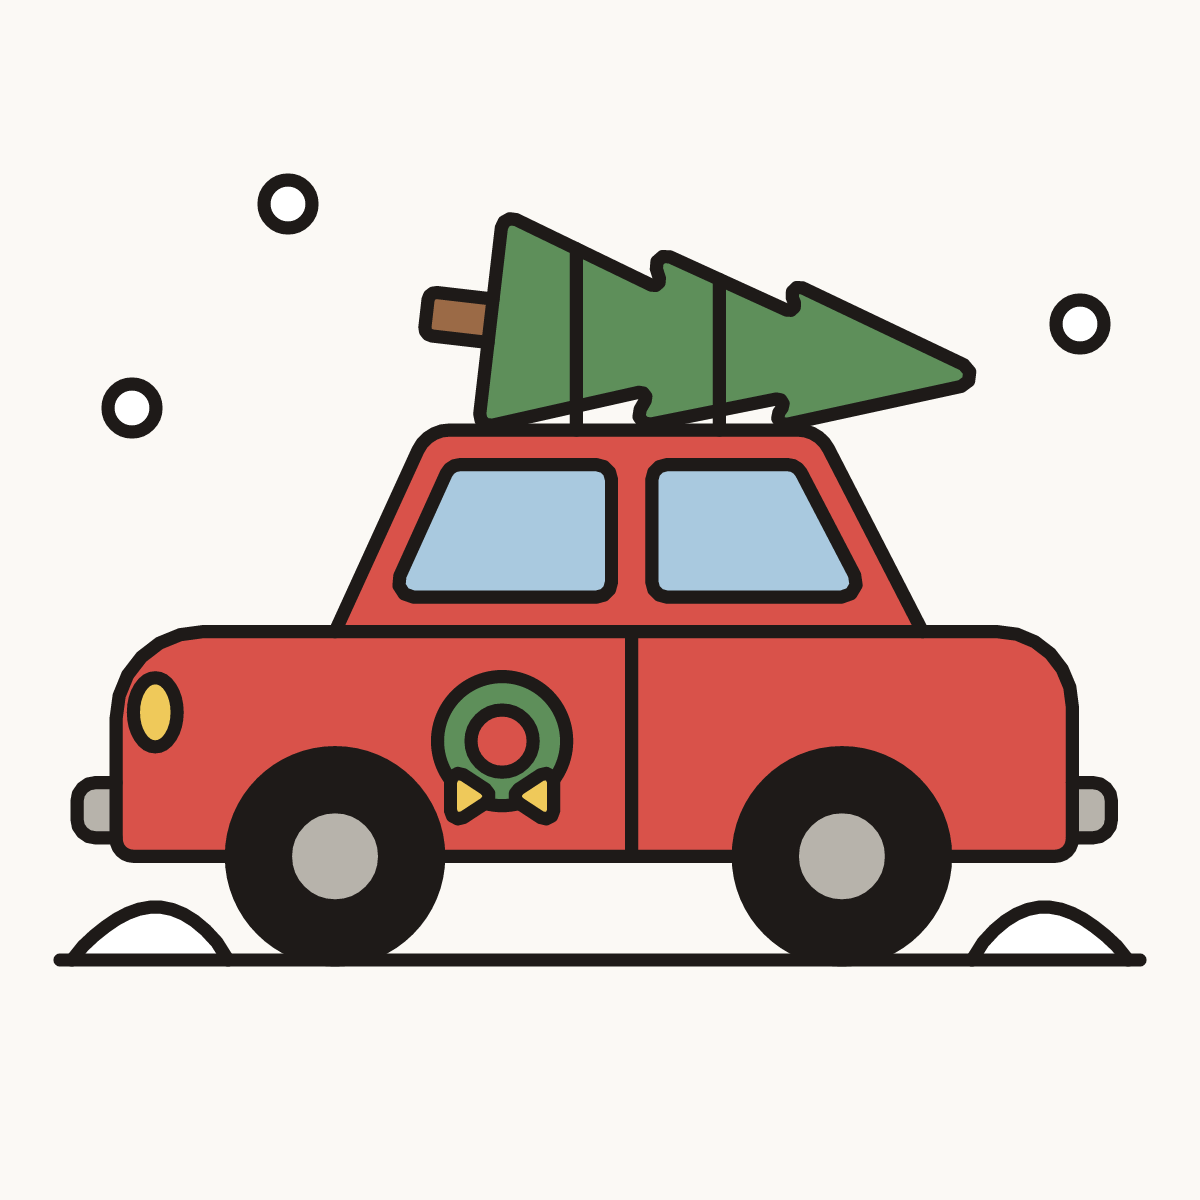
Your finished drawing
Follow the steps above and this is where you end up: a Christmas car, drawn by you.
Every step in one picture