Watch it draw itself · tap to replay
How to Draw a Car Front
Draw a car front in 11 easy steps, about 8 minutes. Free, with a printable worksheet.
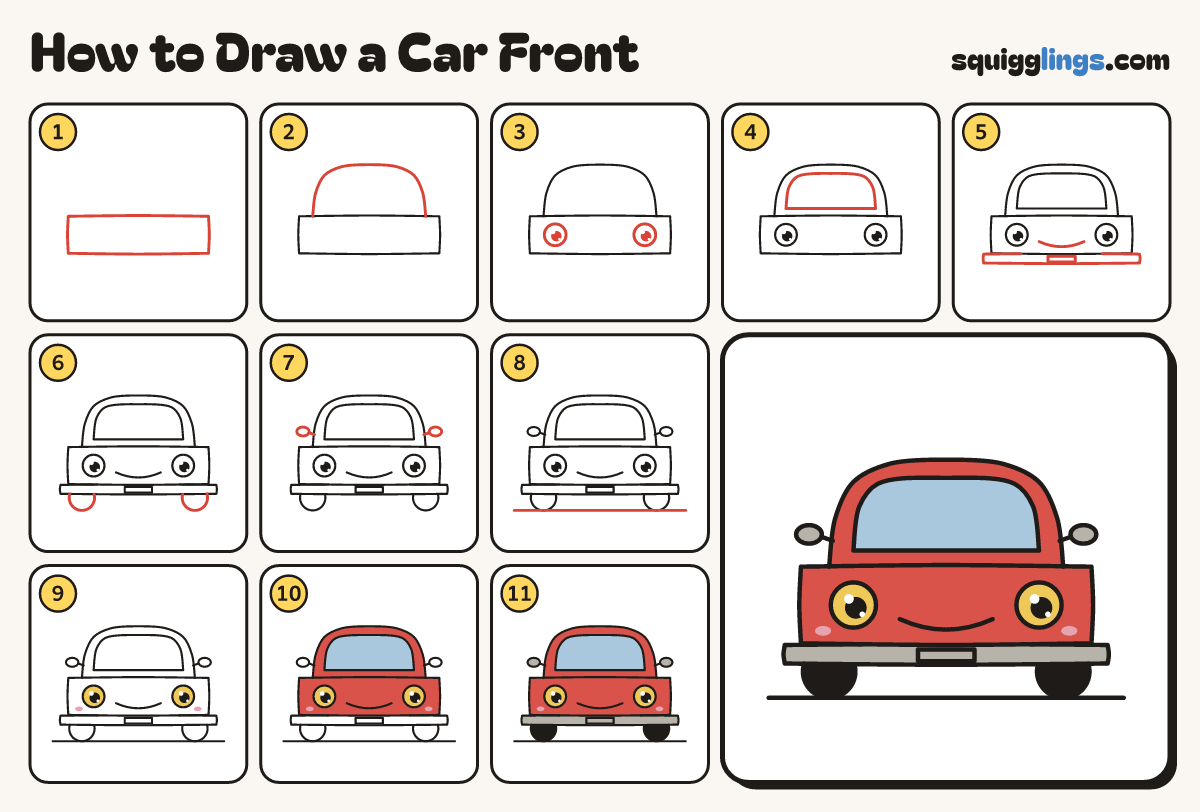
Each picture adds one red line. Draw that line, then scroll to the next picture. Rub out any dashed helper lines at the end. First up: the body.
Step 1: The body
Below the middle, draw a wide box as wide as your hand and a thumb tall, with soft corners.
Tip We look the car straight in the face, wide and low.
Step 2: The roof dome
Start on top of the box near the left corner. Draw a big dome over, stopping near the right corner.
Step 3: Two headlight eyes
On the body, draw 2 big round headlights a hand apart. Add a black dot and shines in each.
Step 4: The windscreen
Inside the dome, draw a big window a finger in from its curve, stopping just above the body.
Step 5: Grille smile and bumper
Between the headlights, draw a bold U smile. Under the body, draw a long flat bumper with a number plate.
Step 6: Two tyres
Under the bumper, near each corner, draw a big round tyre peeking out, so only its bottom half shows.
Step 7: Wing mirrors
On each side of the dome, draw a little sideways egg mirror, joined to the dome by a short line.
Step 8: The road
Under both tyres, draw one long straight road line, a little wider than the car.
Step 9: Yellow lights, pink cheeks
Go over your lines. Colour the headlights yellow round the dots. Add 2 pink cheeks under the lights.
Step 10: Sky window, red body
Colour the windscreen sky blue. Colour the body and dome red, around the windscreen, lights and cheeks.
Step 11: Black tyres, grey bits
Colour the tyres black, and the bumper, mirrors and number plate grey. Your car is done!
Your finished drawing
Follow the steps above and this is where you end up: a car front, drawn by you.
Every step in one picture