Watch it draw itself · tap to replay
How to Draw a Candy Necklace
Draw a candy necklace in 10 easy steps, about 8 minutes. Free, with a printable worksheet.
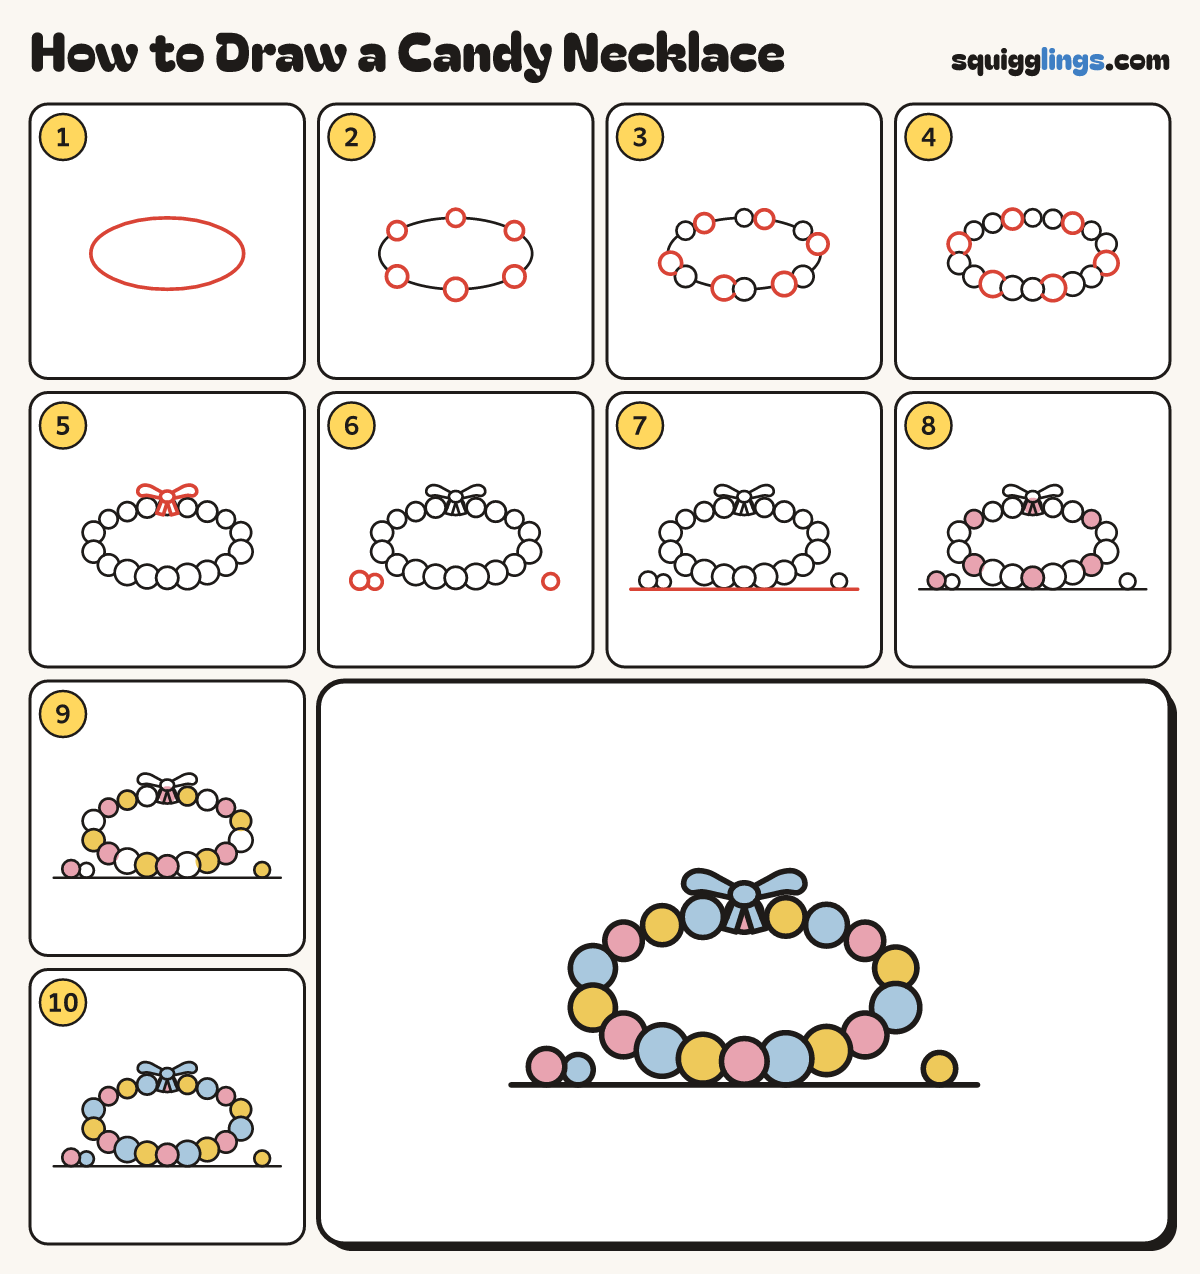
Each picture adds one red line. Draw that line, then scroll to the next picture. Rub out any dashed helper lines at the end. First up: the string.
Step 1: The string
In the middle, draw a wide flat oval, twice as wide as tall, for the string lying down.
Step 2: First beads
On the string, draw 6 beads spread evenly around the oval, smaller at the back and bigger at the front.
Tip A candy necklace is sugar beads on a stretchy string: you nibble them off.
Step 3: More beads
In each gap, draw 1 more bead, a little bigger, leaving room for 1 more beside it.
Step 4: Last beads
In the 6 spaces left, draw 6 more beads, so the whole loop is beads touching beads.
Tip Where beads touch, the one nearer the front hides a little of the one behind.
Step 5: A bow
On the top bead, draw a bow: a round knot, a loop out each side and 2 hanging tails.
Step 6: Loose beads
Beside the necklace, draw 2 loose beads on the left, one behind the other, and 1 on the right.
Tip They rest on the same line as the bottom of the necklace.
Step 7: The table
Draw a table line from well left to well right, just touching the front beads and the loose beads.
Step 8: Pink beads
Colour every third bead pink, starting with the top one, and one loose bead pink too.
Step 9: Yellow beads
Colour the beads after each pink one yellow, and one loose bead yellow.
Step 10: Sky bow and beads
Colour the bow, the rest of the beads and the last loose bead sky blue. Your candy necklace is done!
Your finished drawing
Follow the steps above and this is where you end up: a candy necklace, drawn by you.
Every step in one picture