Watch it draw itself · tap to replay
How to Draw a Candy Jar
Draw a candy jar in 12 easy steps, about 9 minutes. Free, with a printable worksheet.
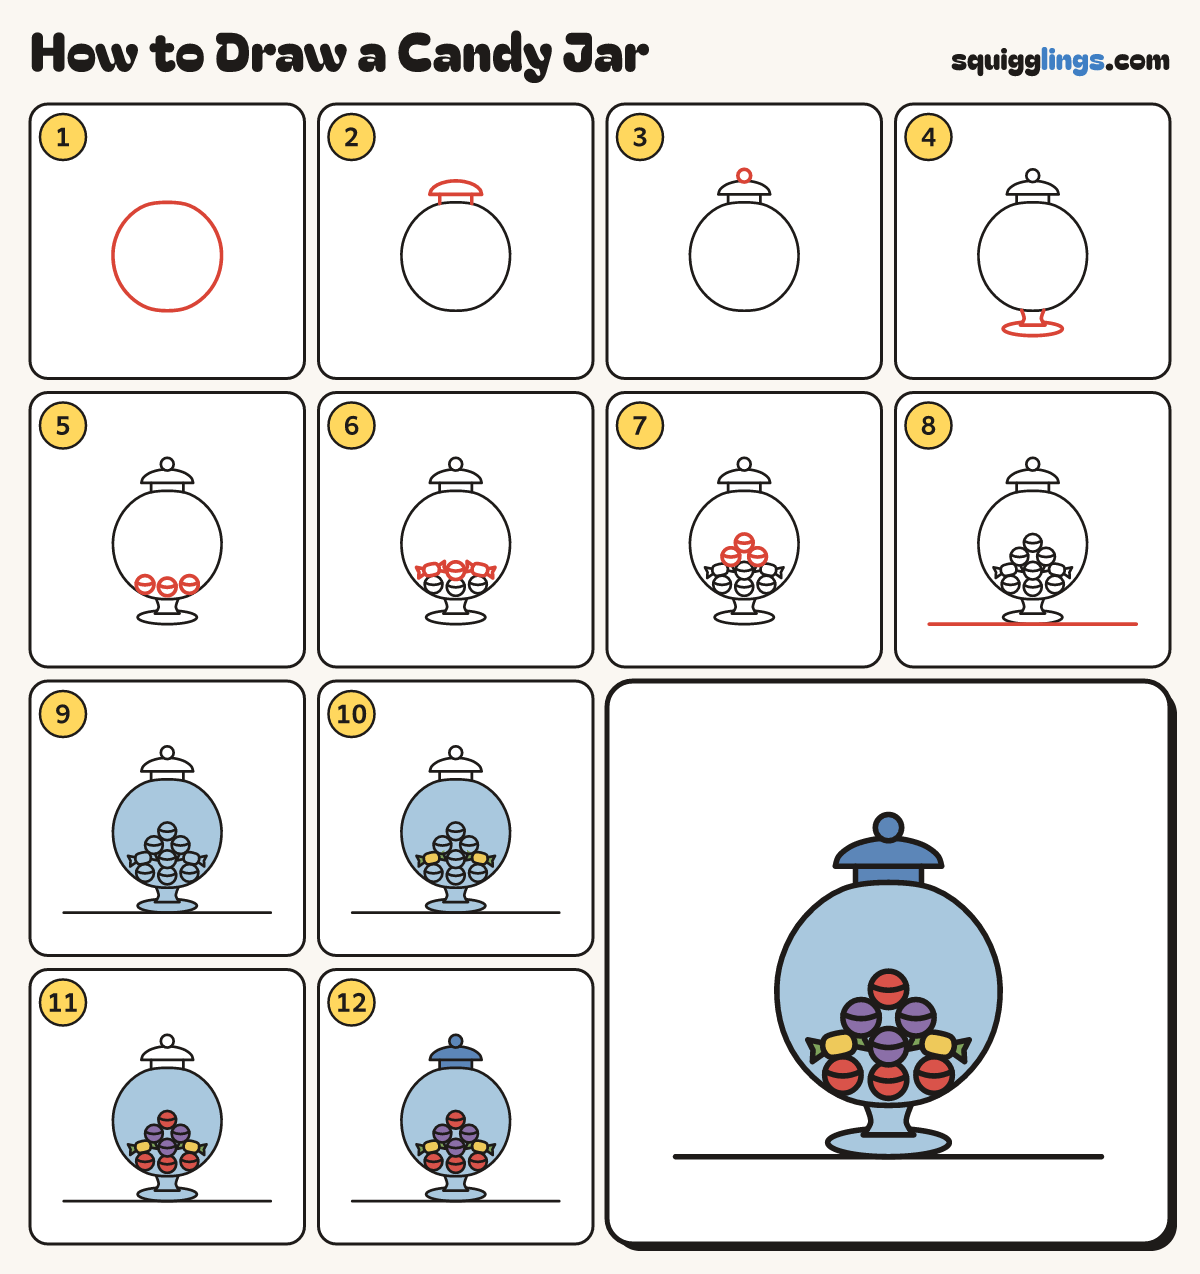
Each picture adds one red line. Draw that line, then scroll to the next picture. Rub out any dashed helper lines at the end. First up: glass globe.
Step 1: Glass globe
In the middle, draw a big round jar, a little flat at the very top.
Step 2: Neck and lid
On the flat top, draw a short neck, then a dome lid on it, wider than the neck.
Step 3: The knob
On top of the lid, draw a small round knob.
Step 4: Stem and foot
Start under the globe, left of middle. Draw a stem down, across, and up to the globe. Add a foot.
Step 5: Bottom candies
Inside the jar, resting on the bottom, draw 3 round candies side by side, each with a curved band.
Step 6: Middle row
On top of them, draw a wrapped candy at each side with twisted ends, and a round one between.
Step 7: Top of the pile
On top, draw 2 more round candies in the gaps, and one on the very top, to make a heap.
Step 8: The table
Draw a table line under the foot, from well left to well right.
Step 9: Sky glass
Go over your lines, then colour the globe, stem and foot sky blue, going round the candies.
Step 10: Yellow and green
Colour the wrapped candies yellow and their twisted ends green.
Step 11: Red and purple
Colour the bottom row and the top candy red, and the rest purple, going around the wrappers.
Step 12: Blue lid
Colour the lid, neck and knob blue, and your candy jar is done!
Your finished drawing
Follow the steps above and this is where you end up: a candy jar, drawn by you.
Every step in one picture