Watch it draw itself · tap to replay
How to Draw a Bumper Car
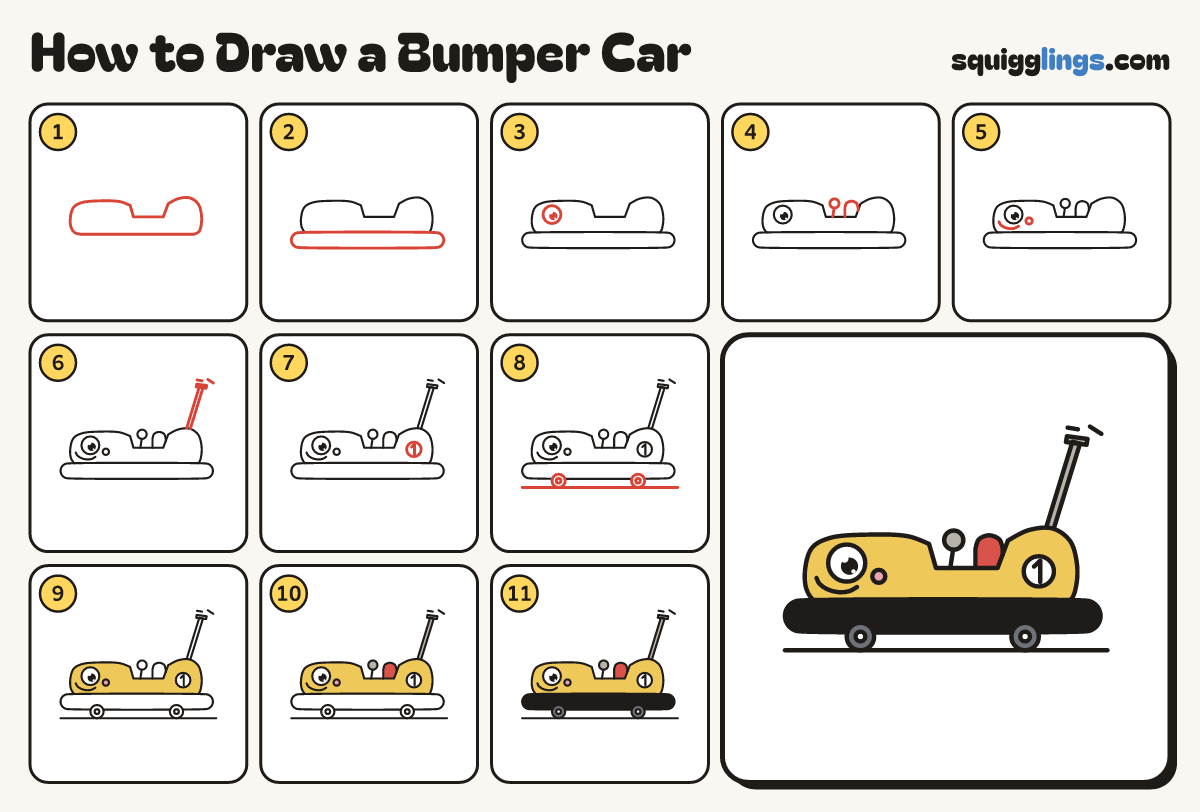
Draw a bumper car in 11 easy steps, about 8 minutes. Free, with a printable worksheet.
Each picture adds one red line. Draw that line, then scroll to the next picture. Rub out any dashed helper lines at the end. First up: tub with a cockpit.
Step 1: Tub with a cockpit
Across the middle draw a bathtub body with a square bite out of the top for the cockpit.
Tip The back hump is the tallest part.
Step 2: Rubber bumper ring
Round the bottom of the tub draw one long fat pill, like a sausage, sticking out past both ends.
Tip The ring is the bouncy rubber bumper.
Step 3: Big headlight eye
On the bonnet, near the nose, draw a big round headlight eye. Add a black dot and 2 white shines.
Step 4: Seat and steering wheel
In the cockpit draw a small seat back. From the floor draw a stick up to a round steering wheel.
Step 5: Smile and cheek
Start under the eye. Draw a bold U smile curling up, stopping before the nose. Add a round cheek behind.
Tip Leave a finger of yellow between the eye and the smile.
Step 6: Pole and sparks
From the top of the back hump draw a thin pole slanting up and back. Add a pad and sparks.
Tip The pole touches the electric ceiling: that makes it go!
Step 7: Number on the side
On the back hump, under the pole, draw a round circle with a big fat number 1 inside.
Step 8: Little wheels and floor
Under the ring draw 2 small wheels poking out, one near each end. Rule a floor line touching both.
Step 9: Yellow car
Go over your lines. Colour the tub yellow and the cheek pink. Leave the headlight and number white.
Tip Keep the eye white.
Step 10: Red seat, grey pole
Colour the seat red. Colour the pole, its pad and the steering wheel grey.
Step 11: Black ring and wheels
Colour the rubber ring black and the little wheels dark grey. Ready to bump!
Your finished drawing
Follow the steps above and this is where you end up: a bumper car, drawn by you.
Every step in one picture