Watch it draw itself · tap to replay
How to Draw Ballet Shoes
Draw ballet shoes in 11 easy steps, about 8 minutes. Free, with a printable worksheet.
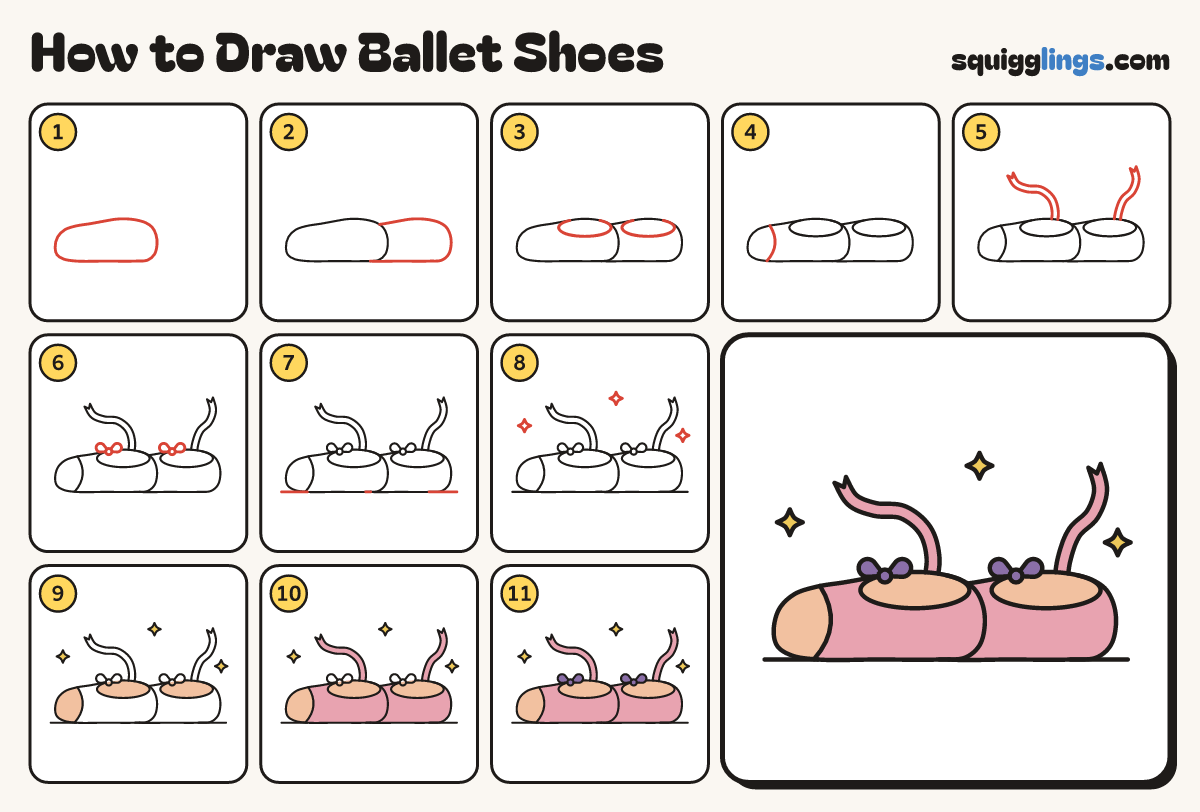
Each picture adds one red line. Draw that line, then scroll to the next picture. Rub out any dashed helper lines at the end. First up: the front slipper.
Step 1: The front slipper
On the left draw a long slipper pointing left, with a round toe, a flat bottom and a round heel.
Step 2: The back slipper
Behind the first, draw a second slipper the same shape, starting halfway along, so its back half peeks out.
Step 3: The openings
In the back half of each slipper draw a long flat U, starting and stopping on the top edge.
Step 4: Toe box
Near the front slipper's toe, draw a curve from the top edge to the bottom, bowing toward the heel.
Step 5: Ribbons
From each opening's top edge draw a wavy ribbon, 2 lines side by side, with a V at the end.
Step 6: 2 bows
At the front of each opening draw a small bow: a round knot with a fat loop each side.
Step 7: Ground line
Draw a ground line under both slippers, from far left to far right.
Step 8: 3 sparkles
Add 3 little sparkle stars in the air, away from the slippers and the ribbons.
Step 9: Peach and yellow
Go over your lines. Colour the toe box and the insides peach, and the sparkles yellow.
Step 10: Pink slippers
Colour the slippers and the ribbons pink, going around the peach parts and the bows.
Step 11: Purple bows
Colour the bows purple. Your ballet shoes are ready to dance!
Your finished drawing
Follow the steps above and this is where you end up: ballet shoes, drawn by you.
Every step in one picture