Watch it draw itself · tap to replay
How to Draw Animal Tracks
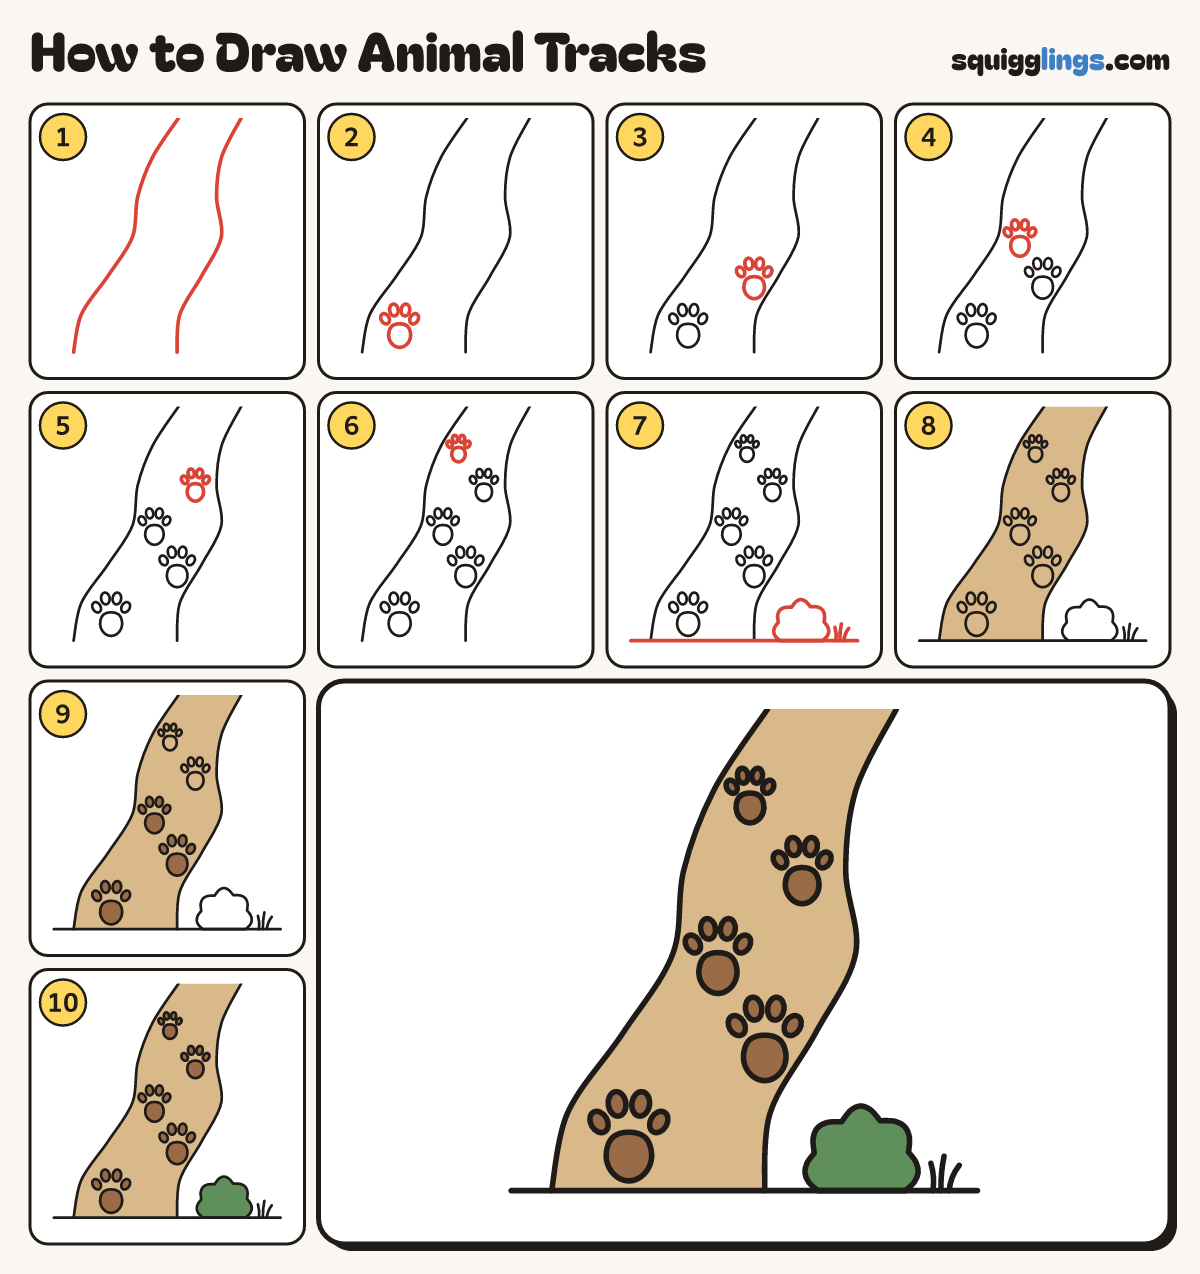
Draw animal tracks in 10 easy steps, about 8 minutes. Free, with a printable worksheet.
Each picture adds one red line. Draw that line, then scroll to the next picture. Rub out any dashed helper lines at the end. First up: a winding path.
Step 1: A winding path
Start at the bottom left. Draw a wavy line up to the top. Add a second line to its right.
Tip The path gets narrower at the top because it is far away.
Step 2: The first print
At the bottom left of the path draw a paw print: a round pad and 4 egg toes above it.
Step 3: The second print
A little higher, on the right side of the path, draw another paw print, a little smaller.
Tip Left, right, left, right: that is how an animal walks.
Step 4: The third print
A little higher, on the left side of the path, draw a paw print, a little smaller again.
Step 5: The fourth print
A little higher, on the right side of the path, draw a paw print, smaller still.
Step 6: The fifth print
Near the top, on the left side of the path, draw the smallest paw print.
Step 7: Ground, bush and grass
Draw the ground along the bottom. On it, right of the path, draw a bumpy bush and 3 grass blades.
Step 8: Tan path
Colour the path between the 2 wavy lines tan, going around the paw prints.
Step 9: Brown prints
Colour the 3 lower paw prints brown, pads and toes.
Step 10: More brown, green bush
Colour the 2 top prints brown too, and the bush green.
Your finished drawing
Follow the steps above and this is where you end up: animal tracks, drawn by you.
Every step in one picture