Watch it draw itself · tap to replay
How to Draw a Sawshark
Draw a sawshark in 14 easy steps, about 11 minutes. Free, with a printable worksheet.
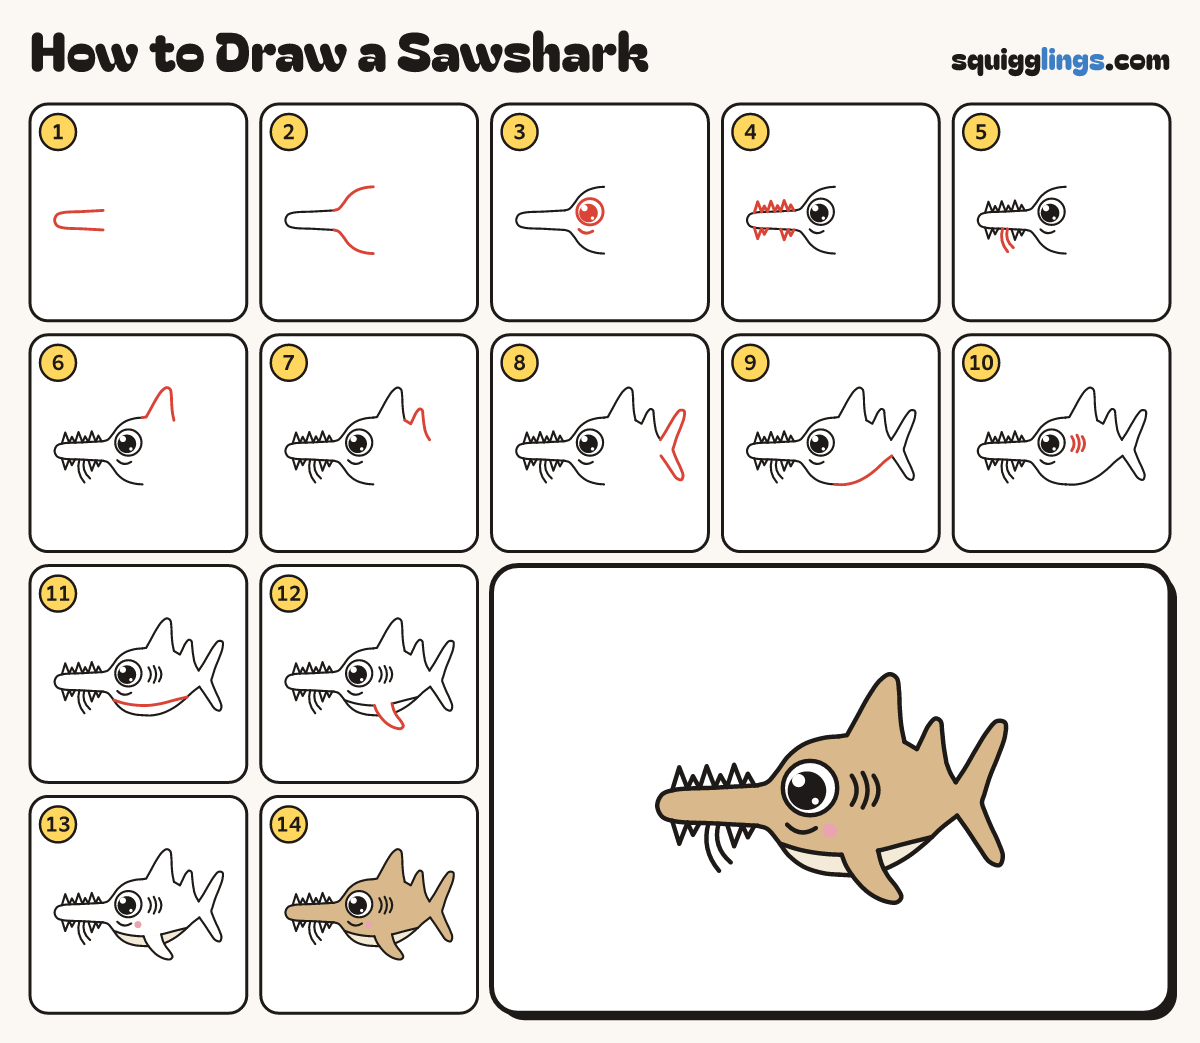
Each picture adds one red line. Draw that line, then scroll to the next picture. Rub out any dashed helper lines at the end. First up: the saw.
Step 1: The saw
Start in the middle. Draw a long flat blade left to a round tip and back. Stop under your start.
Tip A wide flat blade, like a ruler with a round end.
Step 2: Head
Start at each open end of the saw. Curve one line up and back, and one line down and back.
Tip The head opens out from the saw like a funnel.
Step 3: Eye and smile
Inside the head, draw 1 huge round eye. Fill it black, leaving 2 white shines. Add a short smile underneath.
Step 4: Saw teeth
Along the top of the saw, draw a zigzag: tall tooth, short tooth. Do the same underneath, leaving a gap.
Tip Leave the gap in the middle of the bottom edge.
Step 5: Two whiskers
Start in the gap under the saw. Draw 2 long whiskers hanging down, curving back a little.
Tip The 2 whiskers are how you tell a sawshark from a sawfish.
Step 6: Back and fin
Start at the top of the head. Draw the back up into a tall fin and down again.
Step 7: Second fin
Carry the back on. Draw a smaller fin, then slope down and stop where the tail starts.
Step 8: Big tail
Start at the end of the back. Draw a tall top tip, a notch, and a bottom tip back.
Tip No line where the tail joins the body.
Step 9: Round tummy
Start at the bottom of the head. Draw 1 long round tummy, curving up to meet the tail.
Step 10: Three gills
Just behind the eye, draw 3 short curves side by side like ) ) ). Make the middle one tallest.
Step 11: Tummy stripe
Start low on the head. Draw 1 long gentle curve along the body, stopping on the tummy near the tail.
Tip This line is where the sandy top meets the pale tummy.
Step 12: Side fin
From the stripe behind the eye, sweep a blade fin back past the tummy, then up to the stripe.
Tip Rub out the bits of tummy line and stripe inside the fin.
Step 13: Cream tummy
Colour the tummy under the stripe cream. Add a pink cheek. Leave the side fin white for now.
Step 14: Sandy sawshark
Colour the saw, body, fins and tail light brown, around the cheek. Leave the eye and the teeth white.
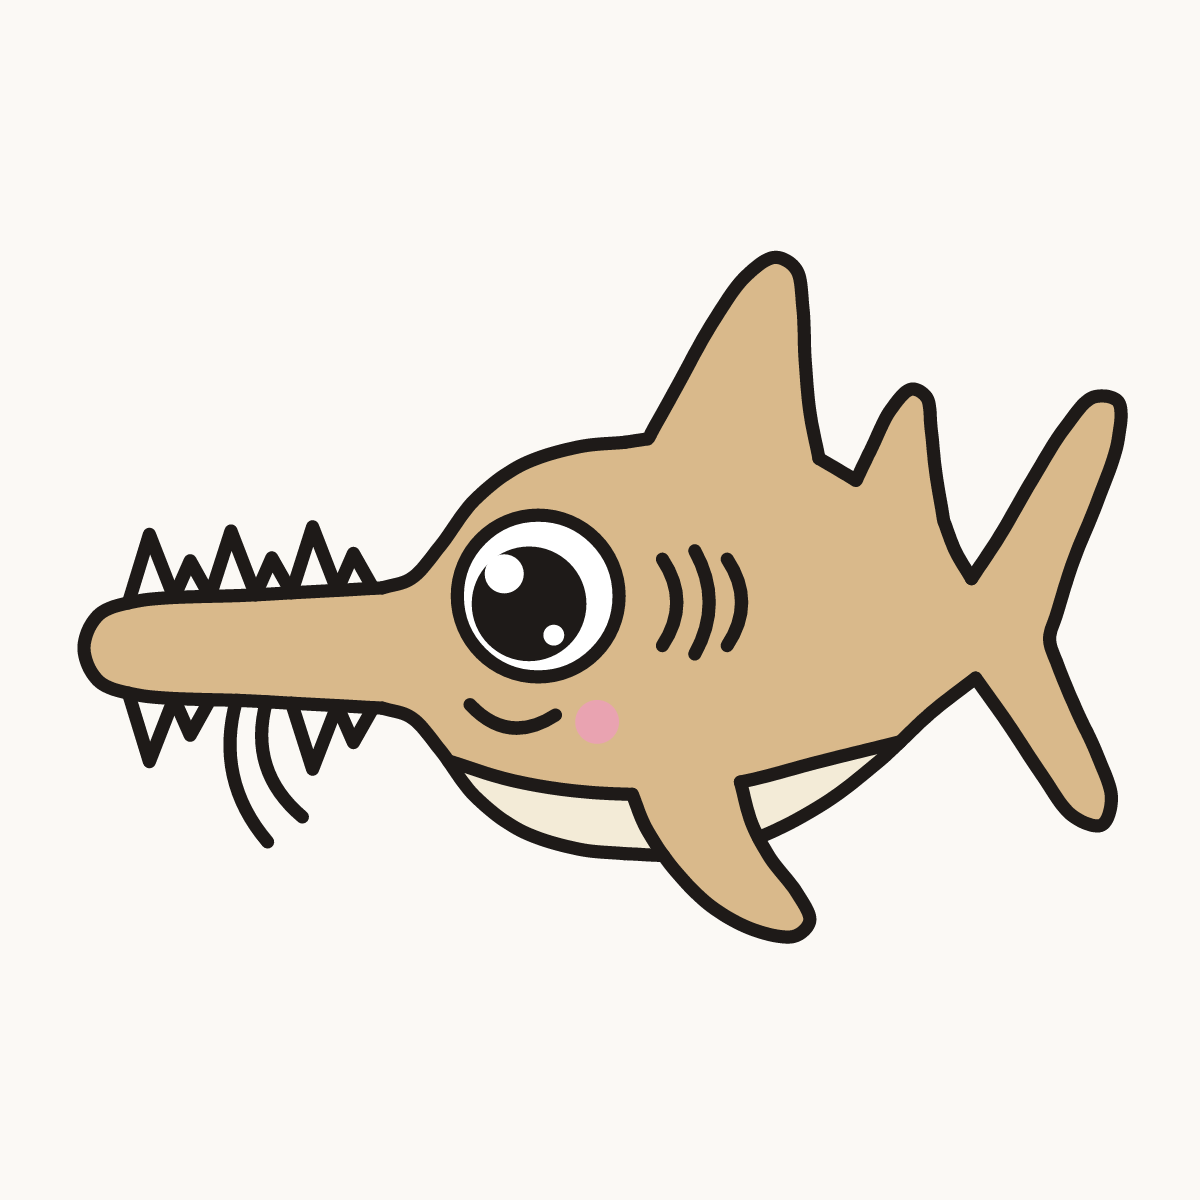
Your finished drawing
Follow the steps above and this is where you end up: a sawshark, drawn by you.
Every step in one picture