Watch it draw itself · tap to replay
How to Draw a Net of a Prism
Draw a net of a prism in 10 easy steps, about 8 minutes. Free, with a printable worksheet.
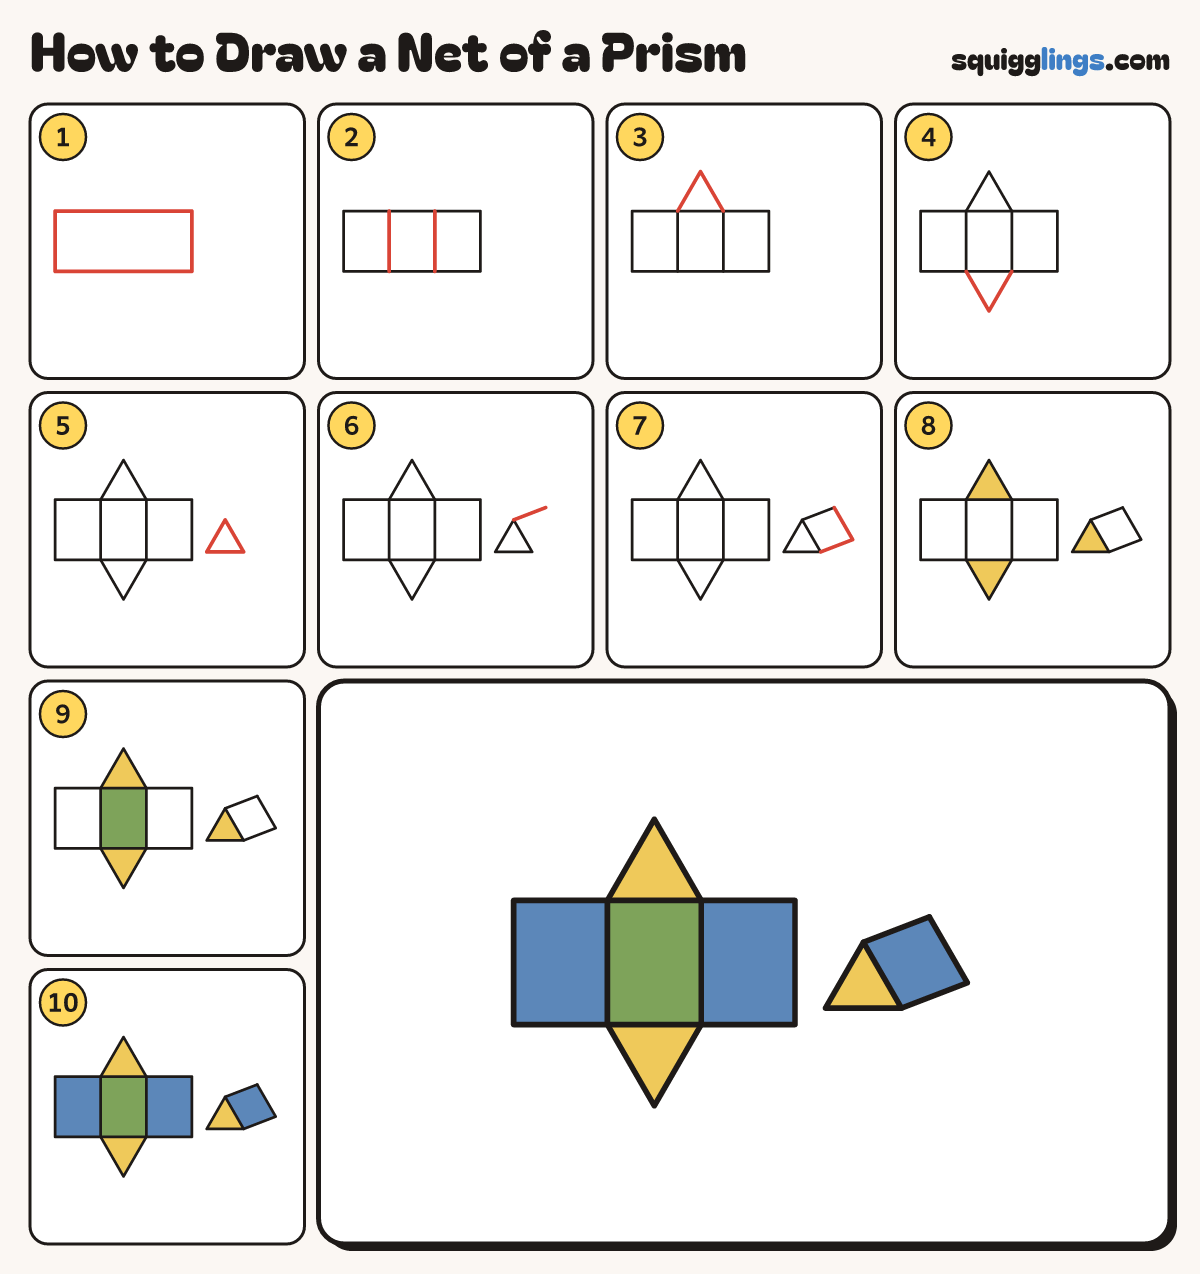
Each picture adds one red line. Draw that line, then scroll to the next picture. Rub out any dashed helper lines at the end. First up: long strip.
Step 1: Long strip
Across the middle of your paper, on the left, draw a long box, lying down.
Tip Make it a bit more than twice as long as it is tall.
Step 2: Three equal rectangles
Start on the top edge. Draw 2 straight lines down and stop at the bottom edge, making 3 equal parts.
Tip Each part is a tall rectangle. Check all 3 are the same width.
Step 3: Top triangle
From the 2 top corners of the middle rectangle, draw 2 slanted lines up to meet in a point.
Tip All 3 sides of the triangle are the same length.
Step 4: Bottom triangle
Start at a bottom corner of the middle rectangle. Draw the same triangle upside down. Stop at the other corner.
Tip This net really folds: the 2 triangles become the ends of the prism.
Step 5: Little prism front
In the space on the right draw a small triangle with 3 equal sides, sitting flat.
Step 6: The ridge
Start at the top point of the small triangle. Draw a short line slanting up to the right.
Step 7: Far end
From the end of the ridge draw a line down, leaning like the triangle's side. Join back to the corner.
Tip The 2 short slanted lines lean the same way and are the same length.
Step 8: Yellow triangles
Colour the 2 triangles of the net yellow. Colour the front of the little prism yellow too.
Step 9: Green floor
Colour the middle rectangle green. It is the floor of the prism, hidden underneath.
Step 10: Blue sides
Colour the 2 outside rectangles blue, and the slanted side of the little prism. Go over your lines.
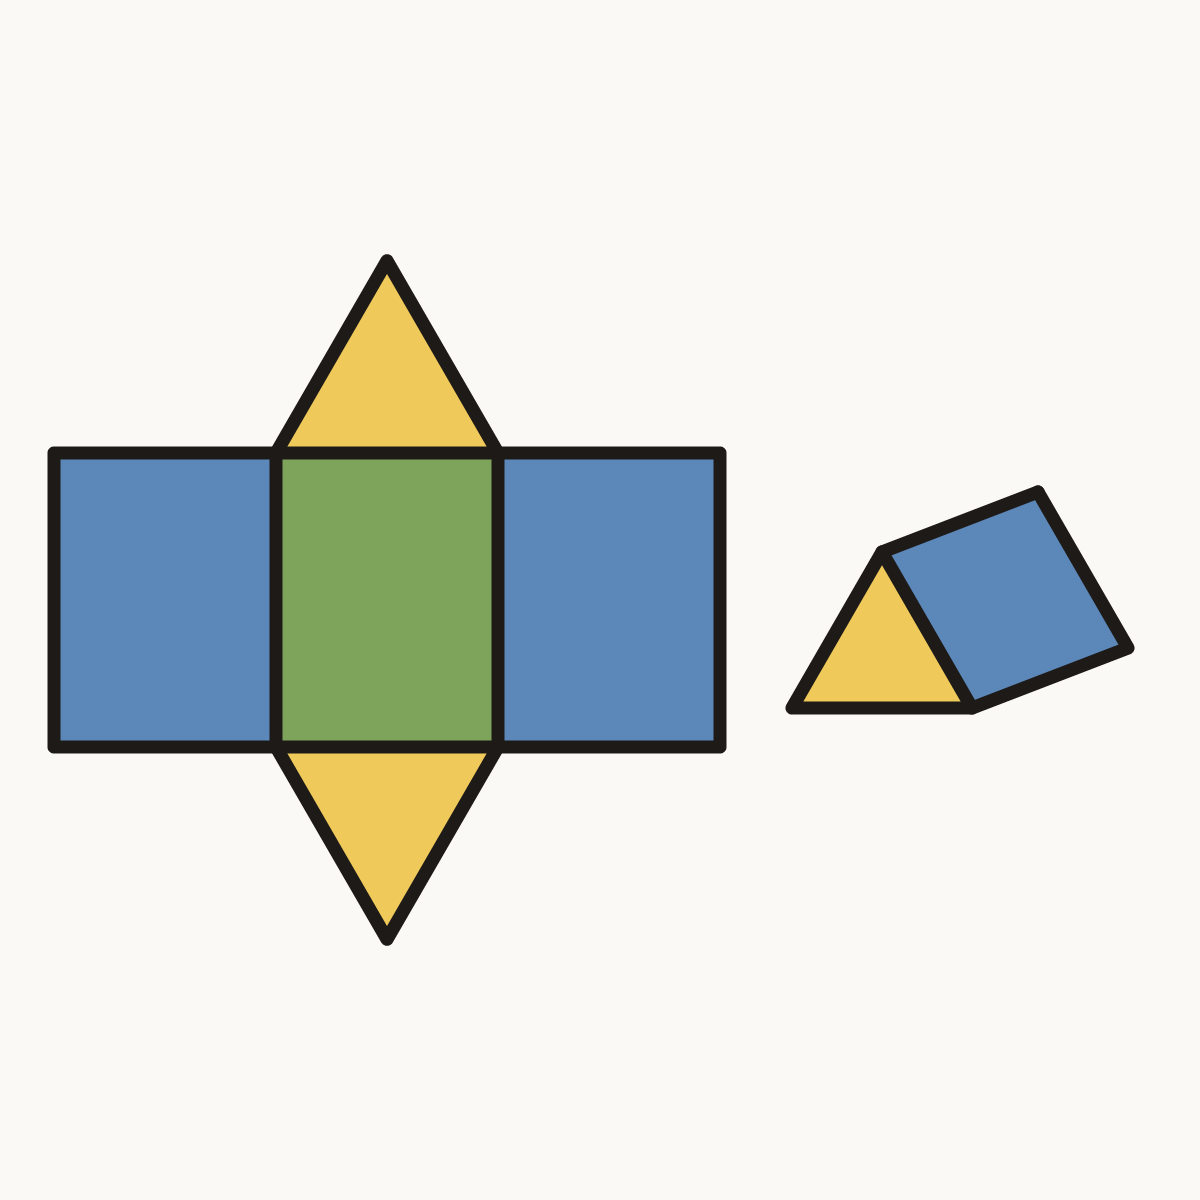
Your finished drawing
Follow the steps above and this is where you end up: a net of a prism, drawn by you.
Every step in one picture