Watch it draw itself · tap to replay
How to Draw a Pill Millipede
Draw a pill millipede in 10 easy steps, about 8 minutes. Free, with a printable worksheet.
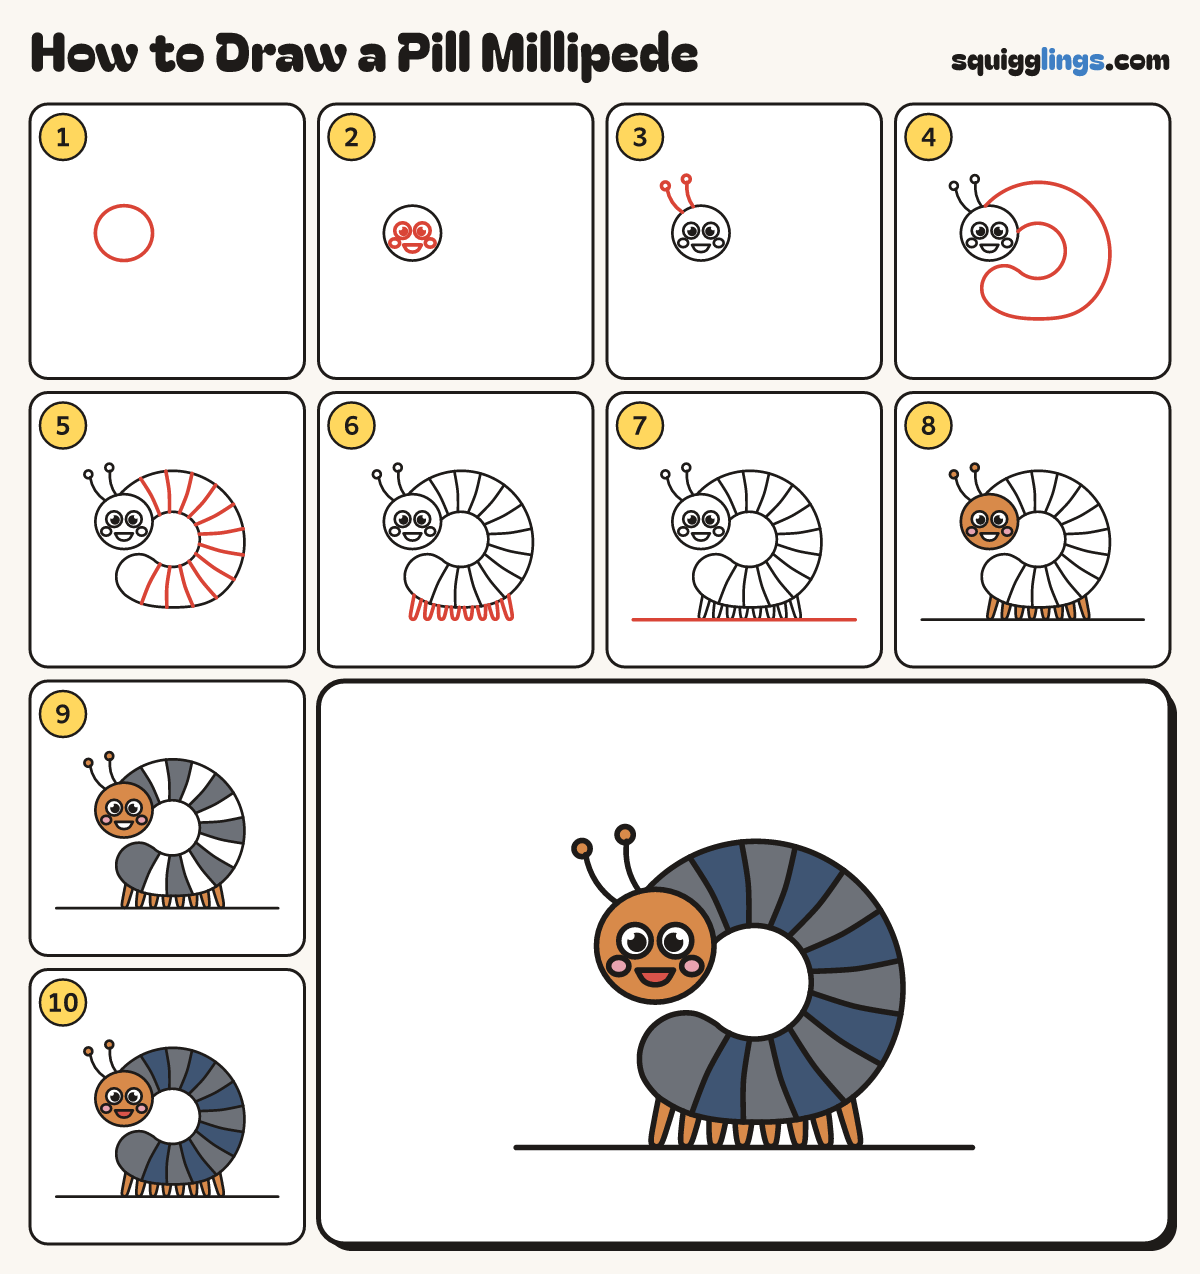
Each picture adds one red line. Draw that line, then scroll to the next picture. Rub out any dashed helper lines at the end. First up: the round head.
Step 1: The round head
On the left, above the middle, draw a big round ball for the head, as big as an orange.
Tip The head is the front of the curled body, looking at you.
Step 2: Eyes and smile
In the middle of the head draw 2 big round eyes with dots. Add an open smile and 2 cheeks.
Step 3: Two feelers
On top of the head draw 2 feelers leaning left. Each starts on the head and ends in a ball.
Tip Both feelers lean the same way.
Step 4: The curled body
Start on the head's upper right. Draw a thick band curling up, over, round and back to the head.
Tip The body is half rolled up, so there is a hole in the middle.
Step 5: Armour plates
Across the curled band draw lines from the inside edge to the outside edge, evenly spaced all the way round.
Step 6: Tiny legs
Under the curl draw 8 short, chunky legs with round feet, all ending at the same height.
Step 7: The ground
Draw a ground line right across the paper, touching the tip of every leg.
Step 8: Ginger head and legs
Colour the cheeks pink. Colour the head, feeler balls and legs ginger around the eyes, cheeks and mouth.
Tip Leave the eyes white.
Step 9: Grey plates
Go over your lines. Colour every other plate dark grey, from the head to the round tail.
Step 10: Navy plates, red mouth
Colour the plates in between navy blue and the mouth red. Your pill millipede is done!
Your finished drawing
Follow the steps above and this is where you end up: a pill millipede, drawn by you.
Every step in one picture