Watch it draw itself · tap to replay
How to Draw a Pavlova
Draw a pavlova in 11 easy steps, about 8 minutes. Free, with a printable worksheet.
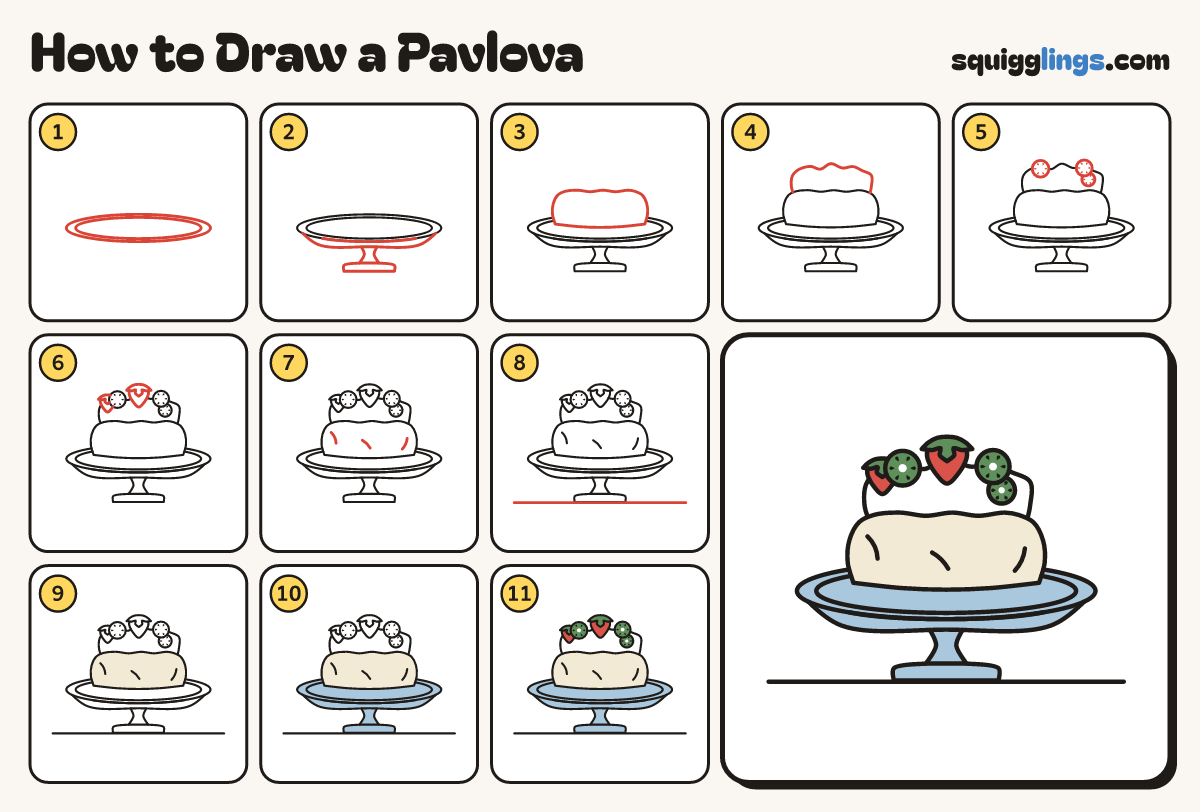
Each picture adds one red line. Draw that line, then scroll to the next picture. Rub out any dashed helper lines at the end. First up: stand top.
Step 1: Stand top
A little below the middle, draw a wide flat oval. Draw a second oval just inside it.
Step 2: Stem and foot
Start at the left end. Draw a bowed edge to the right end. Add a stem and a flat foot.
Step 3: Meringue
Start on the stand at the left. Draw a big soft drum with a wavy top, ending where you began.
Tip A pavlova is a crisp meringue piled with cream and fruit.
Step 4: Whipped cream
On top of the meringue, draw a big puffy pile of cream with a bumpy top.
Step 5: Kiwi slices
Draw 3 round kiwi slices on the cream, each with a ring of tiny seed dots near the middle.
Step 6: Strawberries
Draw 2 heart-shaped strawberries with leafy caps: a big one in the middle and a small one at the left.
Step 7: Cracks
Draw 3 short curved lines on the meringue for cracks.
Step 8: Table line
Draw a long line under the foot, just touching its bottom.
Step 9: Cream meringue
Go over your lines. Colour the meringue cream and the whipped cream white.
Step 10: Sky blue stand
Colour the whole cake stand sky blue: the plate, the stem and the foot.
Step 11: Green kiwi, red berries
Colour the kiwi slices and strawberry caps green, leaving the kiwi middles white. Colour the berries red around the caps.
Your finished drawing
Follow the steps above and this is where you end up: a pavlova, drawn by you.
Every step in one picture