Watch it draw itself · tap to replay
How to Draw a Gondola
Draw a gondola in 12 easy steps, about 9 minutes. Free, with a printable worksheet.
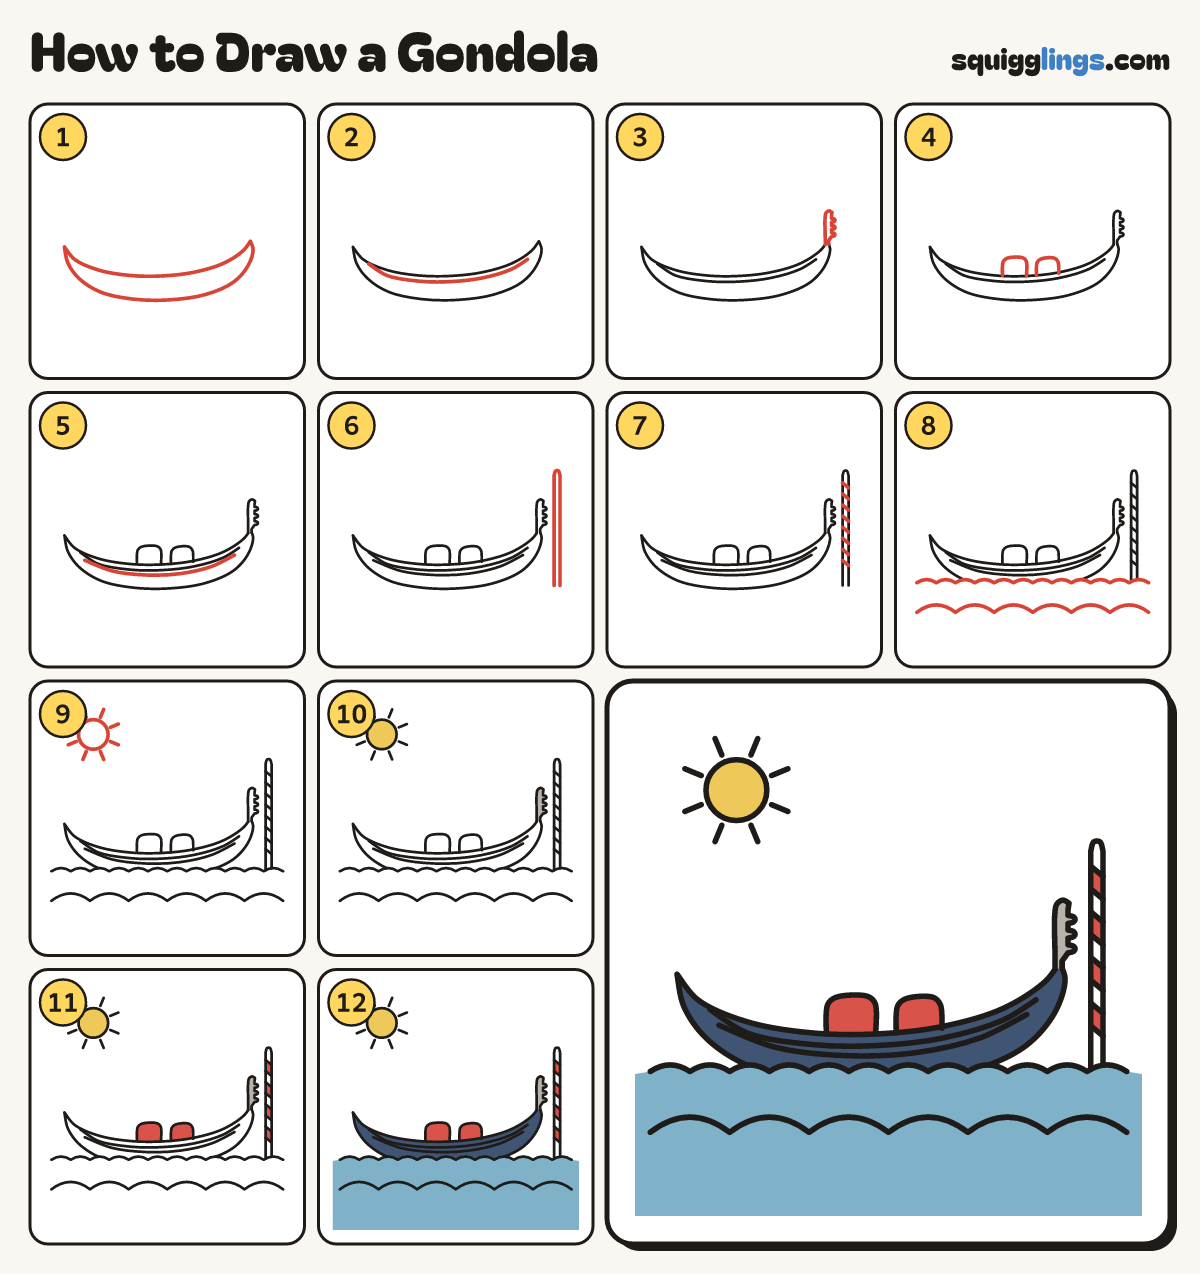
Each picture adds one red line. Draw that line, then scroll to the next picture. Rub out any dashed helper lines at the end. First up: the hull.
Step 1: The hull
Below the middle draw a long thin boat. Both ends curl up high and the deck sags between them.
Tip The front end is the tallest.
Step 2: The rim
Draw a second line just under the deck line, from near the back tip to near the front tip.
Step 3: The iron comb
On the front tip draw a tall flat blade with 3 round teeth poking forward: the iron comb.
Step 4: 2 seats
Start on the middle of the deck. Draw 2 rounded seat backs side by side and stop on the deck.
Step 5: A side stripe
Draw one long gentle curve along the boat's side, a little below the rim, from back to front.
Step 6: Mooring pole
Start in the water on the right. Draw a tall thin pole up, over, and back down into the water.
Step 7: Pole stripes
Draw slanted lines across the pole from top to bottom, like a barber's pole.
Step 8: Waves
Draw a row of wave bumps across the paper, over the boat's bottom. Add 6 bigger bumps lower down.
Step 9: The sun
In the top left corner draw a round sun with 8 short rays all around.
Step 10: Yellow sun, grey comb
Colour the sun yellow and the iron comb grey.
Step 11: Red seats and stripes
Colour the 2 seats red, and every other pole stripe red.
Step 12: Blue sea, navy hull
Colour the sea blue, right down to the bottom. Then colour the hull navy.
Your finished drawing
Follow the steps above and this is where you end up: a gondola, drawn by you.
Every step in one picture