Watch it draw itself · tap to replay
How to Draw a Four-Wheeler
Draw a four-wheeler in 11 easy steps, about 8 minutes. Free, with a printable worksheet.
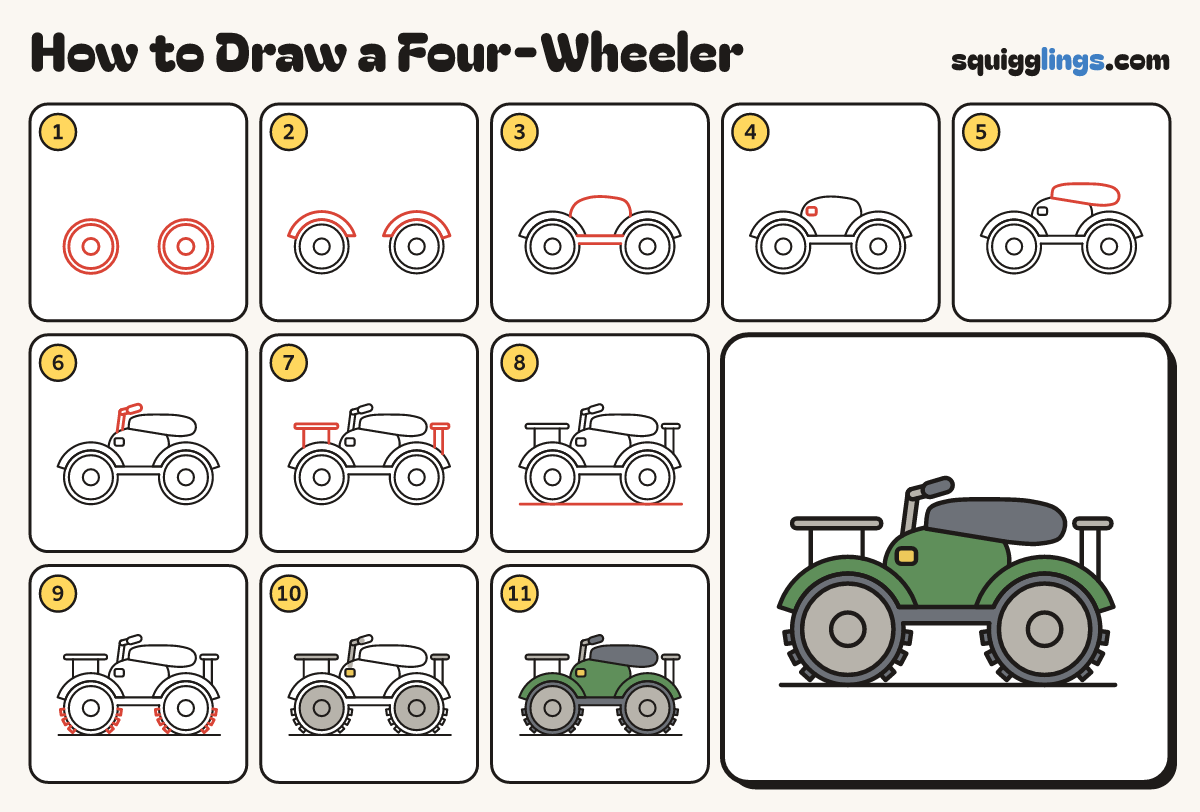
Each picture adds one red line. Draw that line, then scroll to the next picture. Rub out any dashed helper lines at the end. First up: two big wheels.
Step 1: Two big wheels
Low down, draw 2 big circles the same size, a wide gap apart. Add a rim and hub in each.
Tip Big chunky wheels make the quad look tough.
Step 2: Two fenders
Draw a fat curved fender over each wheel, hugging the top of the tyre.
Step 3: Body and hump
Between the fenders, draw the body with a round hump at the front. Add a flat footboard under it.
Step 4: Headlight
On the front of the body, below the tank hump, draw a small rounded box headlight.
Step 5: The seat
On the flat top behind the hump, draw a long plump cushion seat poking out over the back fender.
Step 6: Handlebar
From the hump top, draw a short stem leaning back. Add a short bar ending in a fat grip.
Step 7: Front and back racks
Above each fender, draw a flat thin bar. Add 2 short legs from the bar down to the fender.
Tip Every leg stands on a fender, so nothing floats.
Step 8: The ground
Draw one straight ground line touching the bottom of both tyres, a hand past each wheel.
Step 9: Knobby tread
On each side of both tyres, draw 3 little square bumps sticking out. Leave the bottom smooth.
Step 10: Grey metal, yellow light
Go over your lines. Colour the stem, bar, racks and wheel centres grey. Colour the headlight yellow.
Step 11: Green body, dark tyres
Colour the body and fenders green around the headlight. Colour the tyres, grip, footboard and seat dark grey.
Your finished drawing
Follow the steps above and this is where you end up: a four-wheeler, drawn by you.
Every step in one picture